

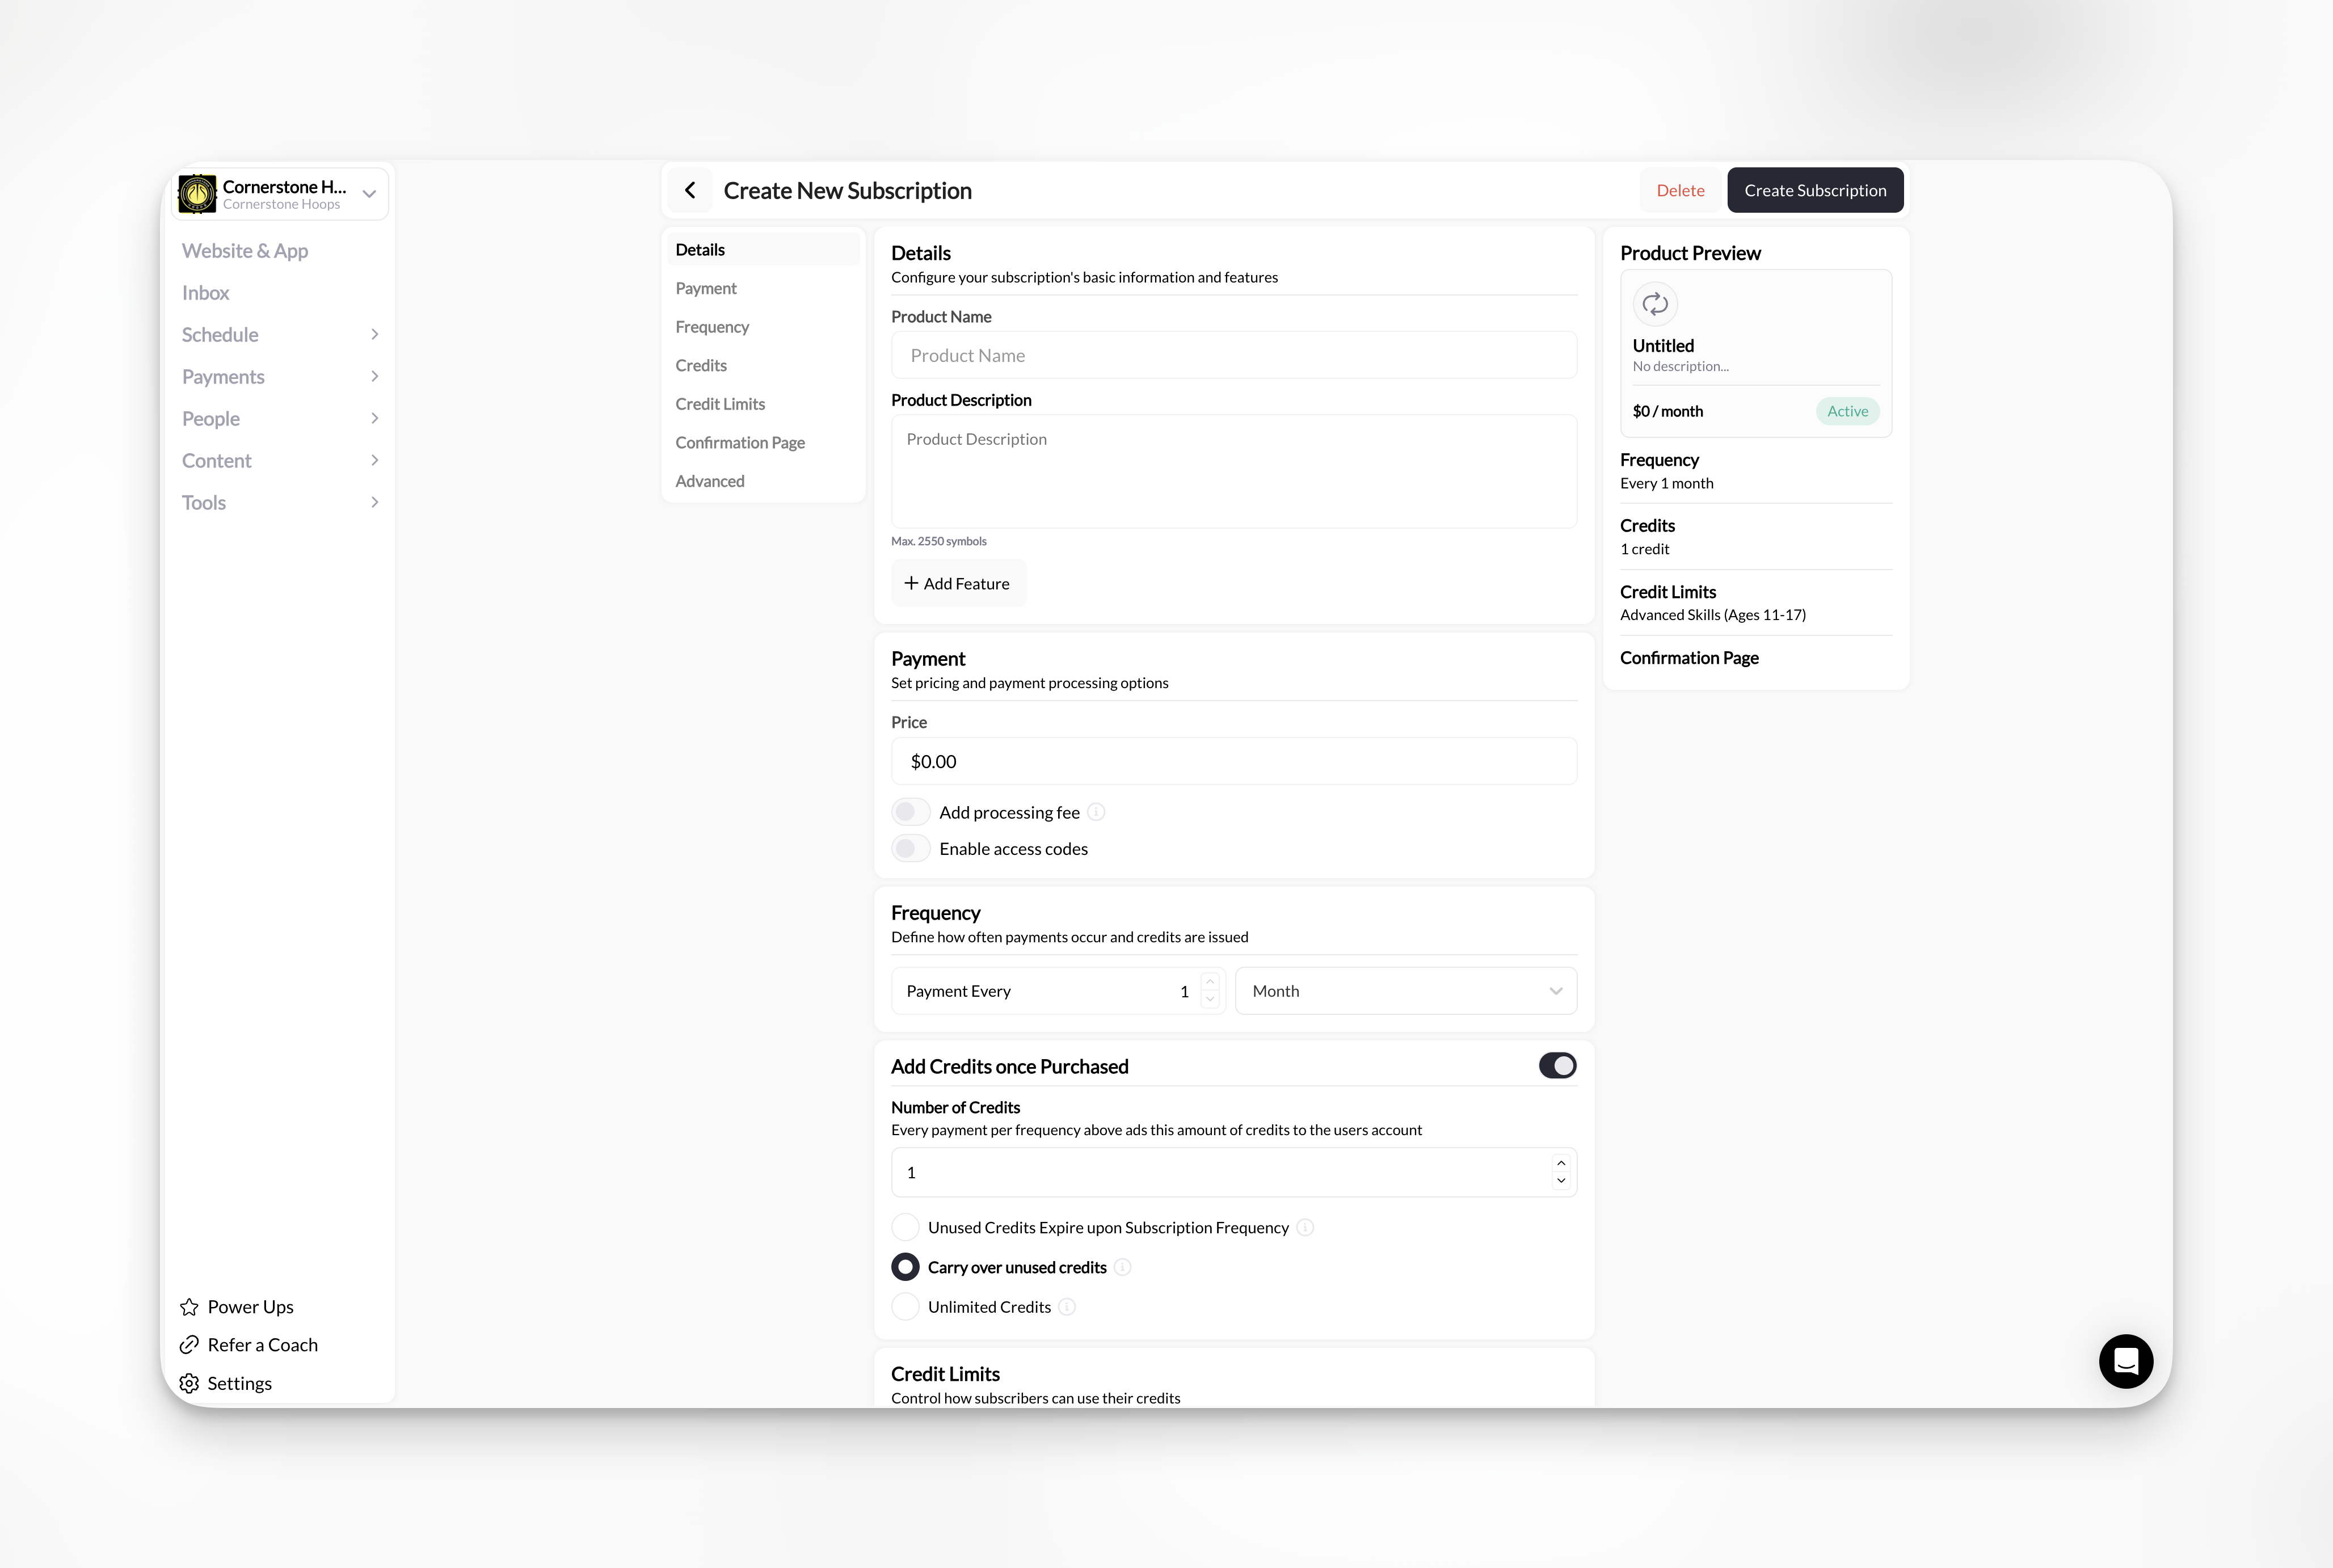
Details
- Product Name (required): what families see at checkout and in their purchase history. Name it after what it unlocks, such as “Group Training - 8 Credits a Month”, not “Package A”.
- Product Description: what’s included, who it’s for, and any expiration or restriction.
- Add Feature: short bullet points shown with the product.
Payment
Price is required for One-Time and Subscription products. Enter $0.00 for a free product. Access Code products don’t need a price.Add processing fee
Add processing fee
Turn on Add processing fee to charge the buyer a fee on top of the price. Set a Fixed Fee and a Percentage Fee. The Preview below the fields shows the price, fee, and total. Leave it off to absorb the fees yourself.You can also set the label buyers see for the fee. Fee amounts, the CoachIQ platform fee, and ACH fees are covered in Processing fees.
Enable access codes
Enable access codes
Turn on Enable access codes to let families redeem a code instead of paying. Add each code and how many times it can be used. Remove a code to stop new redemptions; purchases already made with it are unaffected.On an Access Code product, codes are the only way to get the product. On a One-Time or Subscription product, families can pay or enter a code. See Product types: Access Code.
Payment methods at checkout
Payment methods at checkout
Products don’t choose their own payment methods. Buyers see the methods that are active for your organization: cards, plus Apple Pay and Google Pay, US bank account (ACH), and buy-now-pay-later options such as Afterpay where enabled. ACH works on one-time products and recurring memberships. See Payment methods at checkout.
Show payment methods (collect a card without charging)
Show payment methods (collect a card without charging)
$0.00 products only. Turn on Show payment methods to have the buyer enter a card at checkout without being charged. The card is saved to their profile. Use it to get cards on file before a season starts.Saving a card doesn’t schedule a charge. To charge automatically on a future date, use a subscription with Schedule charges for later.
Add an initial down payment (subscriptions)
Add an initial down payment (subscriptions)
Adds a one-time amount to the first payment only, such as an enrollment or registration fee. Later payments charge the regular price.Example: a $50 down payment on a $200-a-month membership charges $250 at signup, then $200 a month.
Subscription length (subscriptions)
Subscription length (subscriptions)
- Ongoing (default): bills until the family or you cancel.
- End after a number of payments: for example, 4 payments for a season billed monthly.
- End on a date: for example, the last day of the season.
Schedule charges for later (subscriptions)
Schedule charges for later (subscriptions)
The family checks out now and saves a payment method, and the first charge runs automatically on the First charge date. Use it to open registration early and bill everyone when the season starts.Families see Billing starts [date] rather than a trial.
Enable free trial (subscriptions)
Enable free trial (subscriptions)
Set the Trial period (days). The family isn’t charged until the trial ends and can cancel before then. The client’s Subscriptions tab shows Trialing during the trial.A product can use a free trial or Schedule charges for later, not both.
Older one-time products: free trials and Schedule charges for later are subscription-only. If an older one-time product still has one of them on, the builder shows Only available for subscriptions and won’t save until you turn it off. Paid checkout for that product is blocked until then. To bill on a future date, create a subscription instead.
The amounts families see
The initial payment is what the family pays at signup, including any down payment and coupon. The recurring amount is what later payments charge. A coupon that applies to the first payment only doesn’t reduce later payments. Example: a $15-a-month membership with a $5 down payment and a 50% coupon for two months has a $10 initial payment before fees, then $7.50 a month while the coupon lasts, then $15 a month. To give members an automatic discount on other products, create a member discount under Payments → Coupons. See Member discounts.Frequency
Subscriptions only. Set Payment Every to a number and a period: Day, Week, Month, or Year. For example, every 1 month, every 3 months, or every 1 year. If the product adds credits, they are added on the same schedule.Credits
Credits turn a product into a package or membership that pays for sessions. The product decides how many credits a family gets and when they expire. Each scheduler decides how many credits a booking costs. Read this with Credits and schedulers.Add Credits once Purchased
Add Credits once Purchased
Off (default): the product only takes payment.On: each purchase adds credits to the account the purchase belongs to. For a subscription, credits are added every billing period. See who the purchase is for.
Number of Credits
Number of Credits
How many credits each purchase, or each billing period, adds. Match it to your schedulers’ credit costs: 10 credits cover 10 one-credit sessions or 5 two-credit sessions.
Credit expiration: one-time products
Credit expiration: one-time products
- Days after purchase, for example 90 days
- A specific date, such as the end of a season
- Never expire
Credit expiration: subscriptions
Credit expiration: subscriptions
- Unused Credits Expire upon Subscription Frequency: leftover credits are removed when the next period starts.
- Carry over unused credits: leftover credits roll into the next period.
- Unlimited Credits: families see ∞ instead of a credit count. See Credits overview for how unlimited credits work.
Require sessions to happen before credits expire
Turn on Sessions must occur by expiration when a credit should only pay for sessions held before it expires. It works with expiration by date, days after purchase, or subscription period.- On: the session date must fall on or before the credit’s expiration date. A reschedule must stay inside that window. A recurring booking needs an end date, and every occurrence must fit.
- Off: the credit only needs to be valid when the booking is made. The session can take place later.
Credit Limits
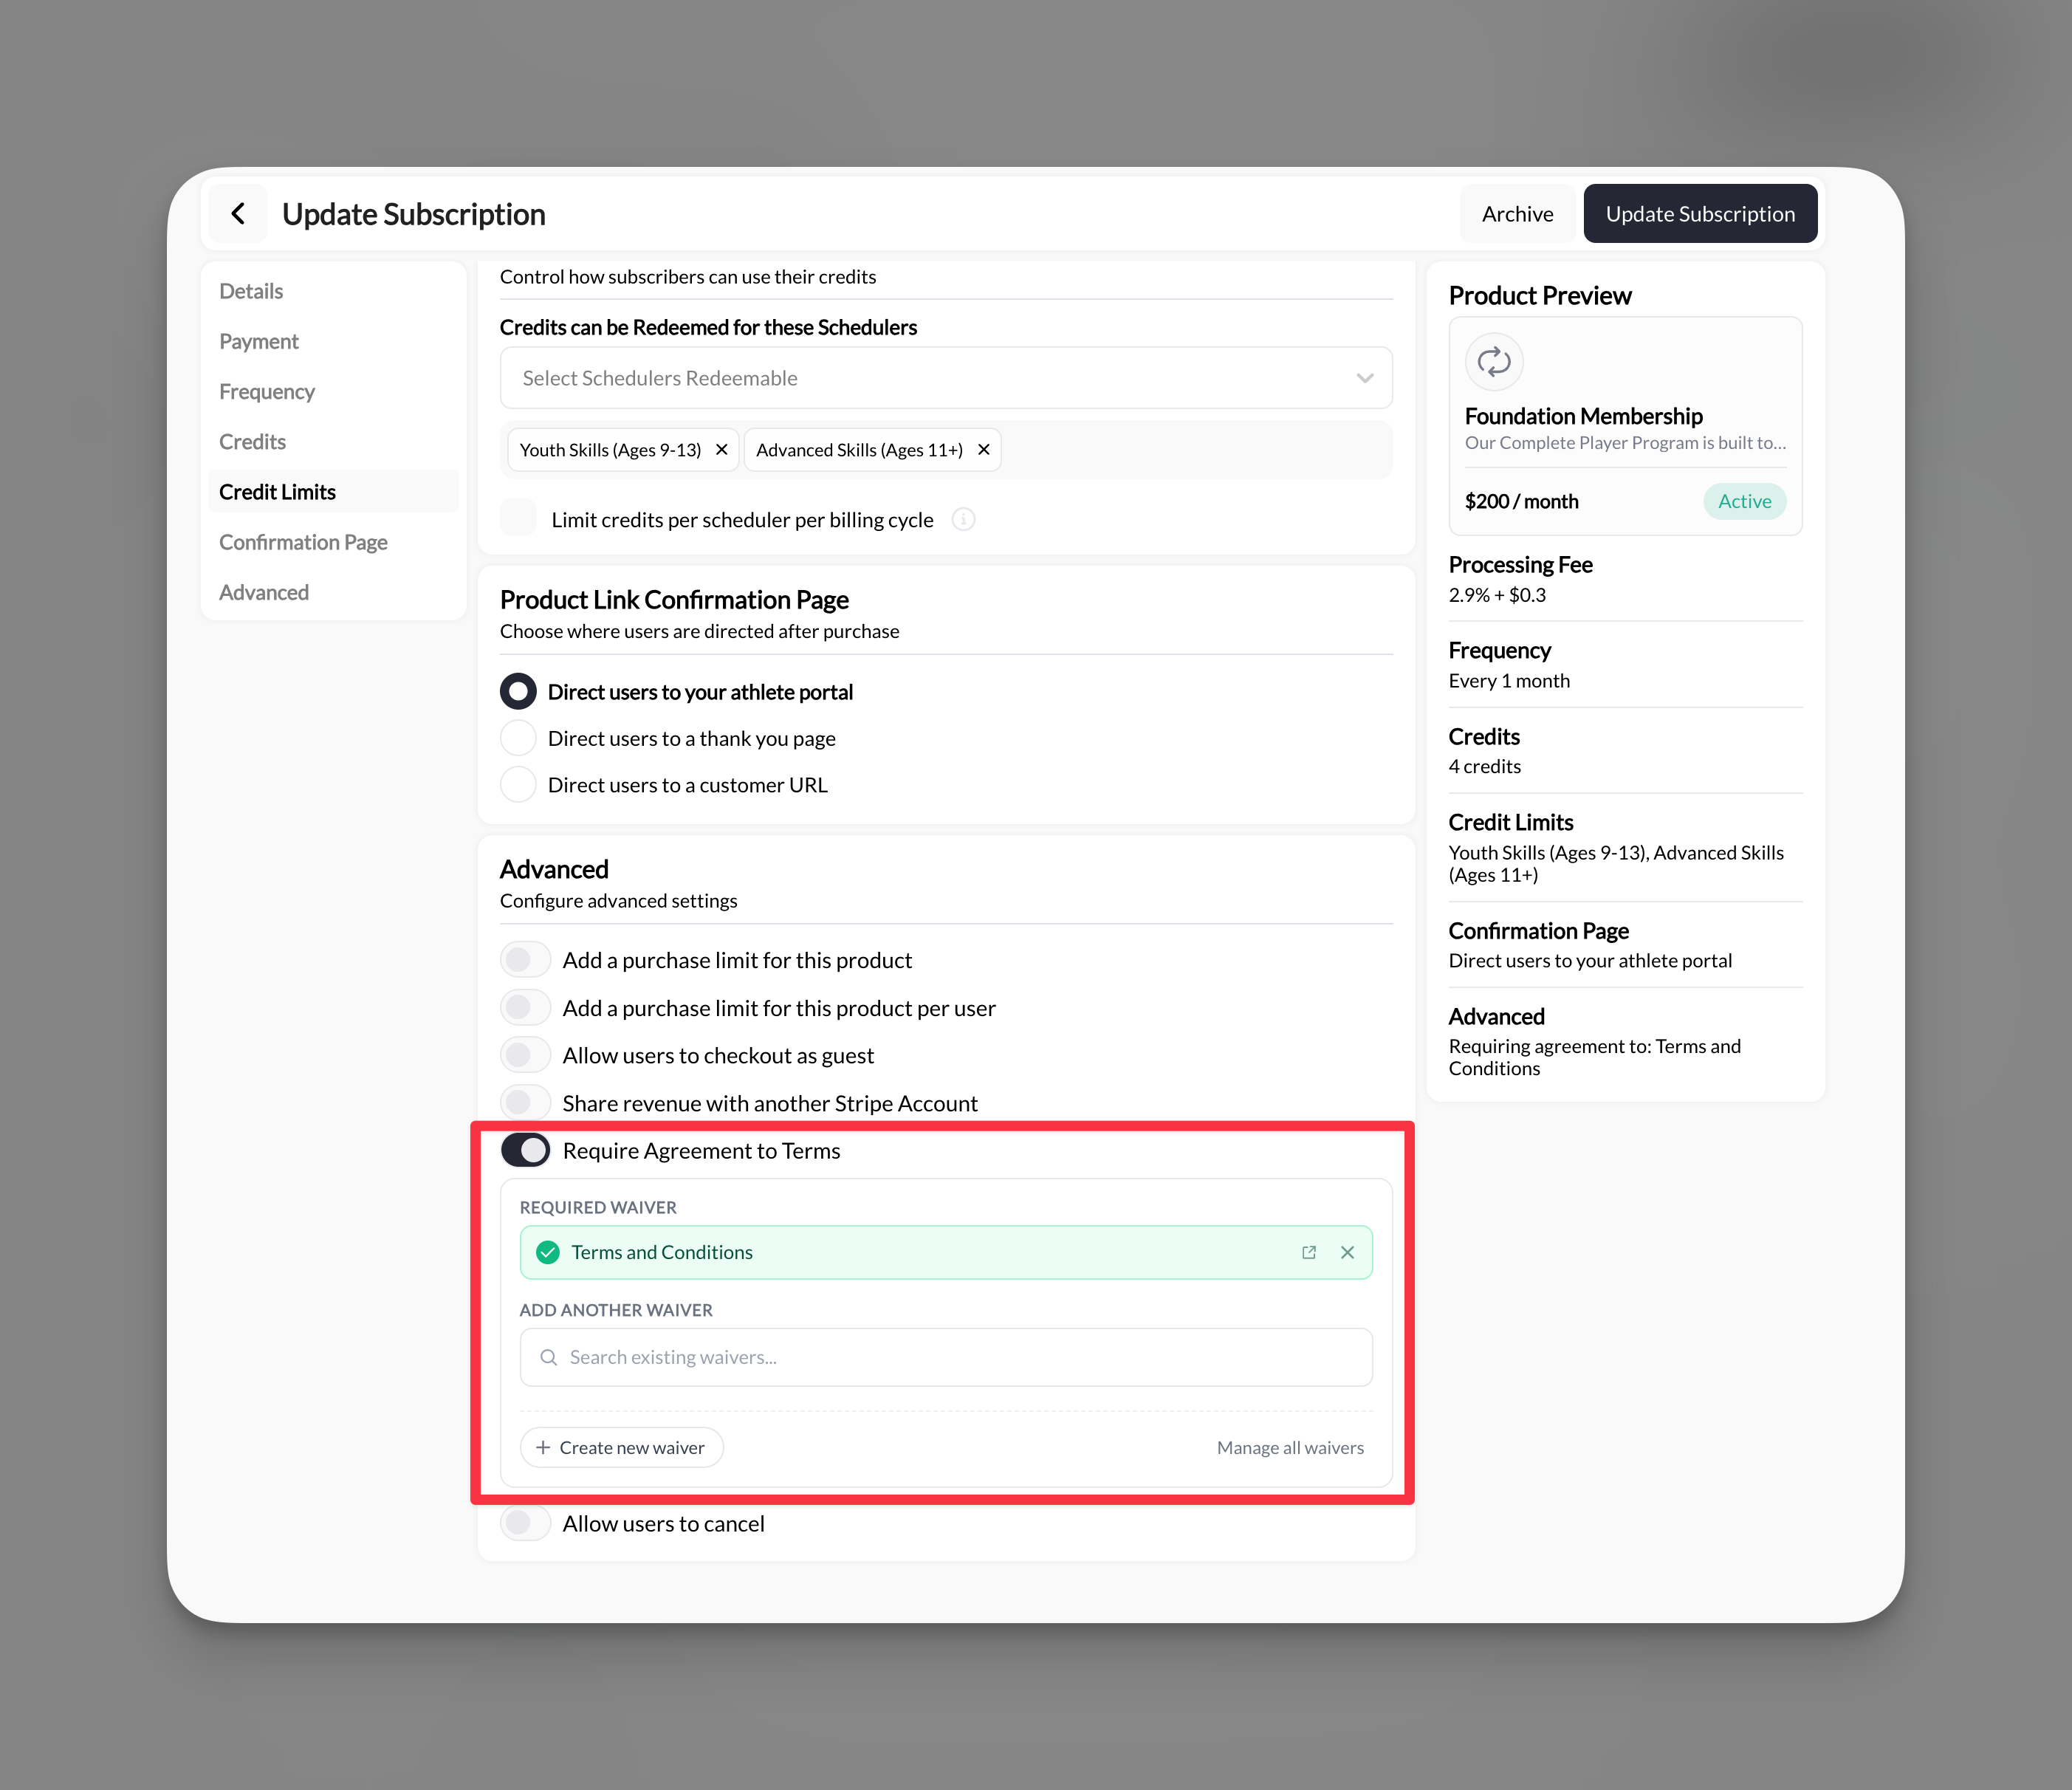
Shown when credits are on.- Credits can be Redeemed for these Schedulers: choose the schedulers that accept this product’s credits. Leave it empty to allow every credit scheduler. When you pick schedulers, the credits only work there, and other schedulers tell the family they have no usable credits.
- Limit credits per scheduler per billing cycle: for subscriptions, cap how many of the product’s credits can be used on each selected scheduler in a billing period. For example, 4 on group training and 4 on private lessons from an 8-credit membership.
Credit changes after families have bought
A coupon lowers the price but doesn’t change the number of credits.
Confirmation page
Choose where the buyer goes after paying:- Direct users to your athlete portal (default)
- Direct users to a thank you page
- Direct users to a customer URL: enter the full address, such as a page on your website. Test the link before you share the product.
Product link
Every saved product has a direct checkout link. Copy it from the builder to send in a message, add to your website, or turn into a QR code. Anyone with the link can buy the product unless it’s archived.Advanced
Purchase limits
Purchase limits
- Add a purchase limit for this product: the total number of purchases across your business. When it’s reached, the product is sold out. Use it for camp spots or roster sizes.
- Add a purchase limit for this product per user: how many times one person can buy it. Set 1 for an intro offer.
Allow users to checkout as guest
Allow users to checkout as guest
Lets someone buy without signing in first. Not available when the purchase is for a Managed Athlete. See Guest checkout.
Require Agreement to Terms
Require Agreement to Terms
Requires the buyer to accept one or more waivers at checkout. Select an existing waiver, choose + Create new waiver, or open Manage all waivers. Waivers live under Tools → Waivers, which also tracks who has accepted. See Waivers.Older products may still use a single agreement link instead of a waiver.
Allow users to cancel
Allow users to cancel
Subscriptions. Lets families cancel the subscription themselves from their account. Leave it off if cancellations should go through you. See Managing subscriptions.
Attach a registration form to a product
In Advanced, choose Add a form, select a form, and save the product. The form needs at least one question. Checkout then goes registration → review → purchase, and required answers must be completed first. A parent or athlete who already completed registration for that product skips the form on a repeat purchase. You can also start from the form and connect the product from its Connections menu. See Forms with payments and bookings.Who the purchase is for
At the bottom of the builder, choose who receives the purchase and its credits.- Buyer (default): the purchase and credits belong to the account that pays. A parent buying for children holds one shared family balance. See Booking for multiple athletes.
- Managed Athlete: checkout asks Who are you registering? The parent picks a child, and the purchase, credits, and any tags go to that child. Use it for team registrations, seasonal programs, and per-athlete credits.