

One product can be used in several places.
Schedulers
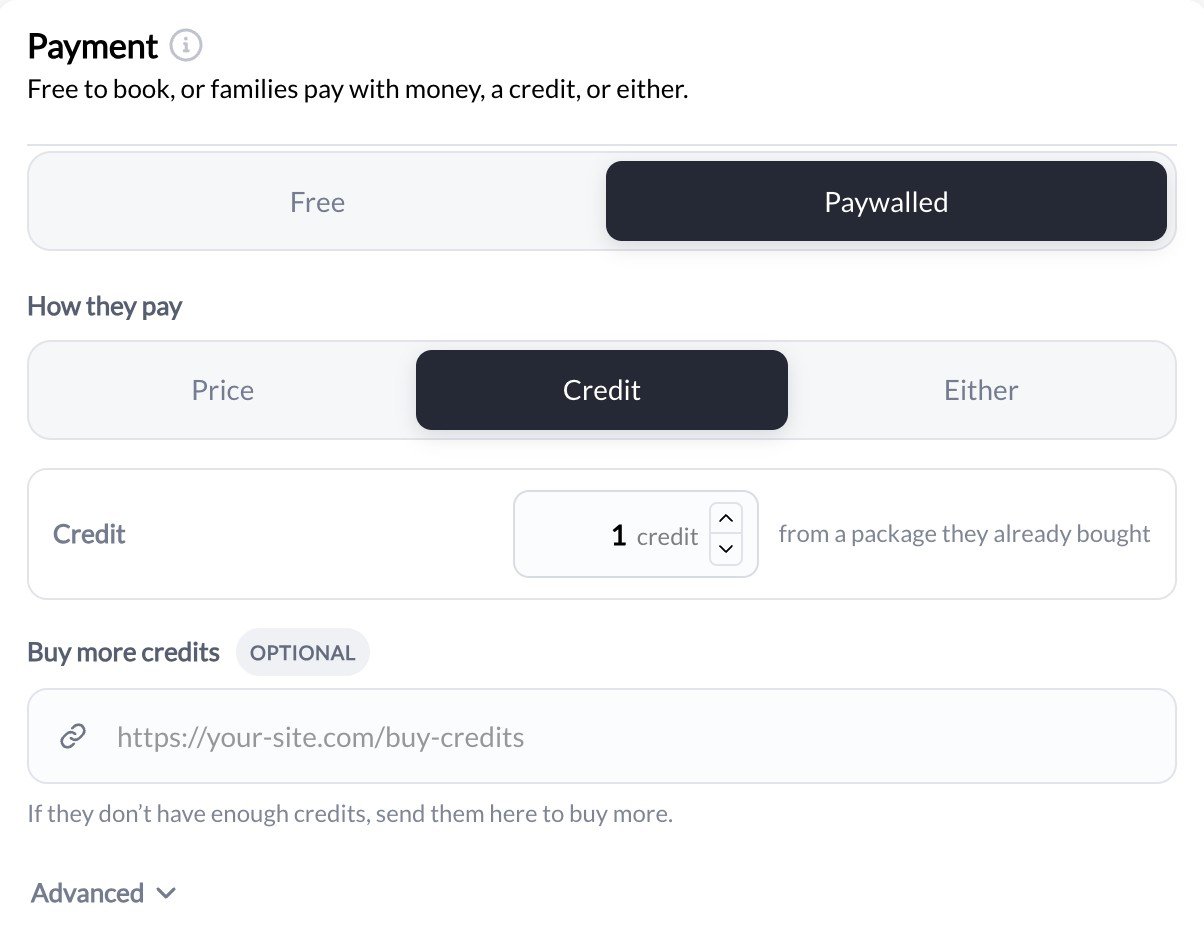
Open the scheduler under Scheduling → Schedulers and go to Payment. Choose Free or Paywalled. For Paywalled, choose How they pay: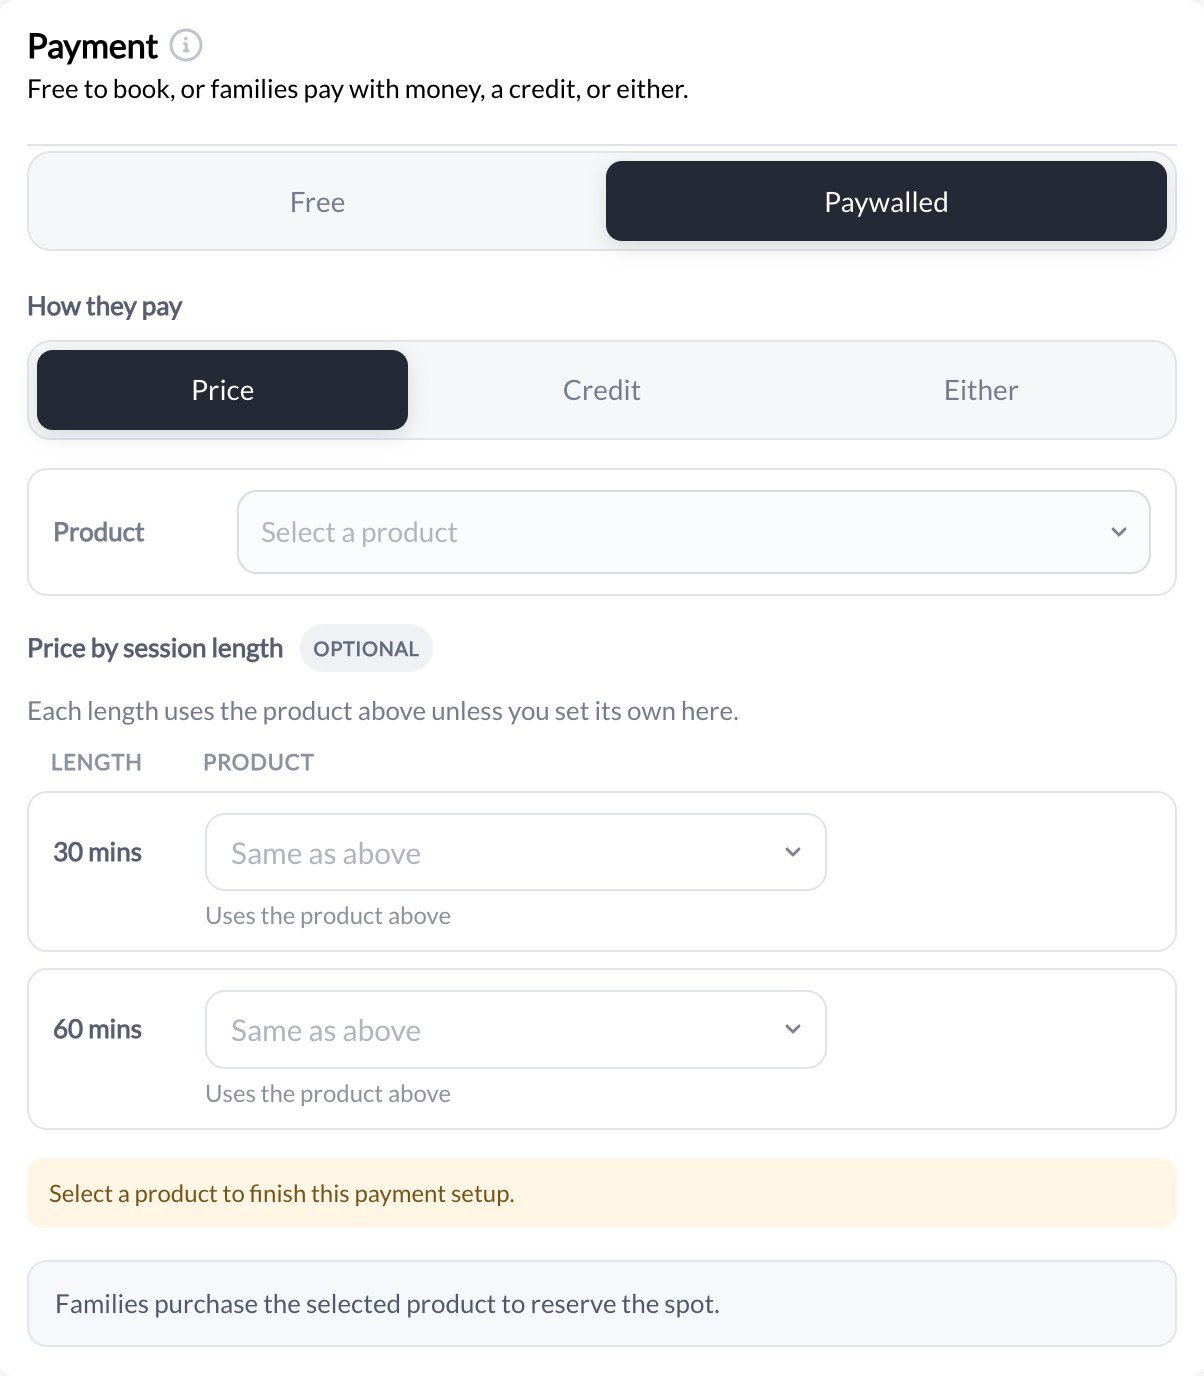
- The scheduler’s Payment is Credit or Either, with the credit cost per booking.
- The product adds credits, and its Credit Limits allow this scheduler, or are left open to all schedulers.
Programs
1
Open the program's share settings
Go to Content → Programs, open the program, and select Share in the top bar, or Change beside it.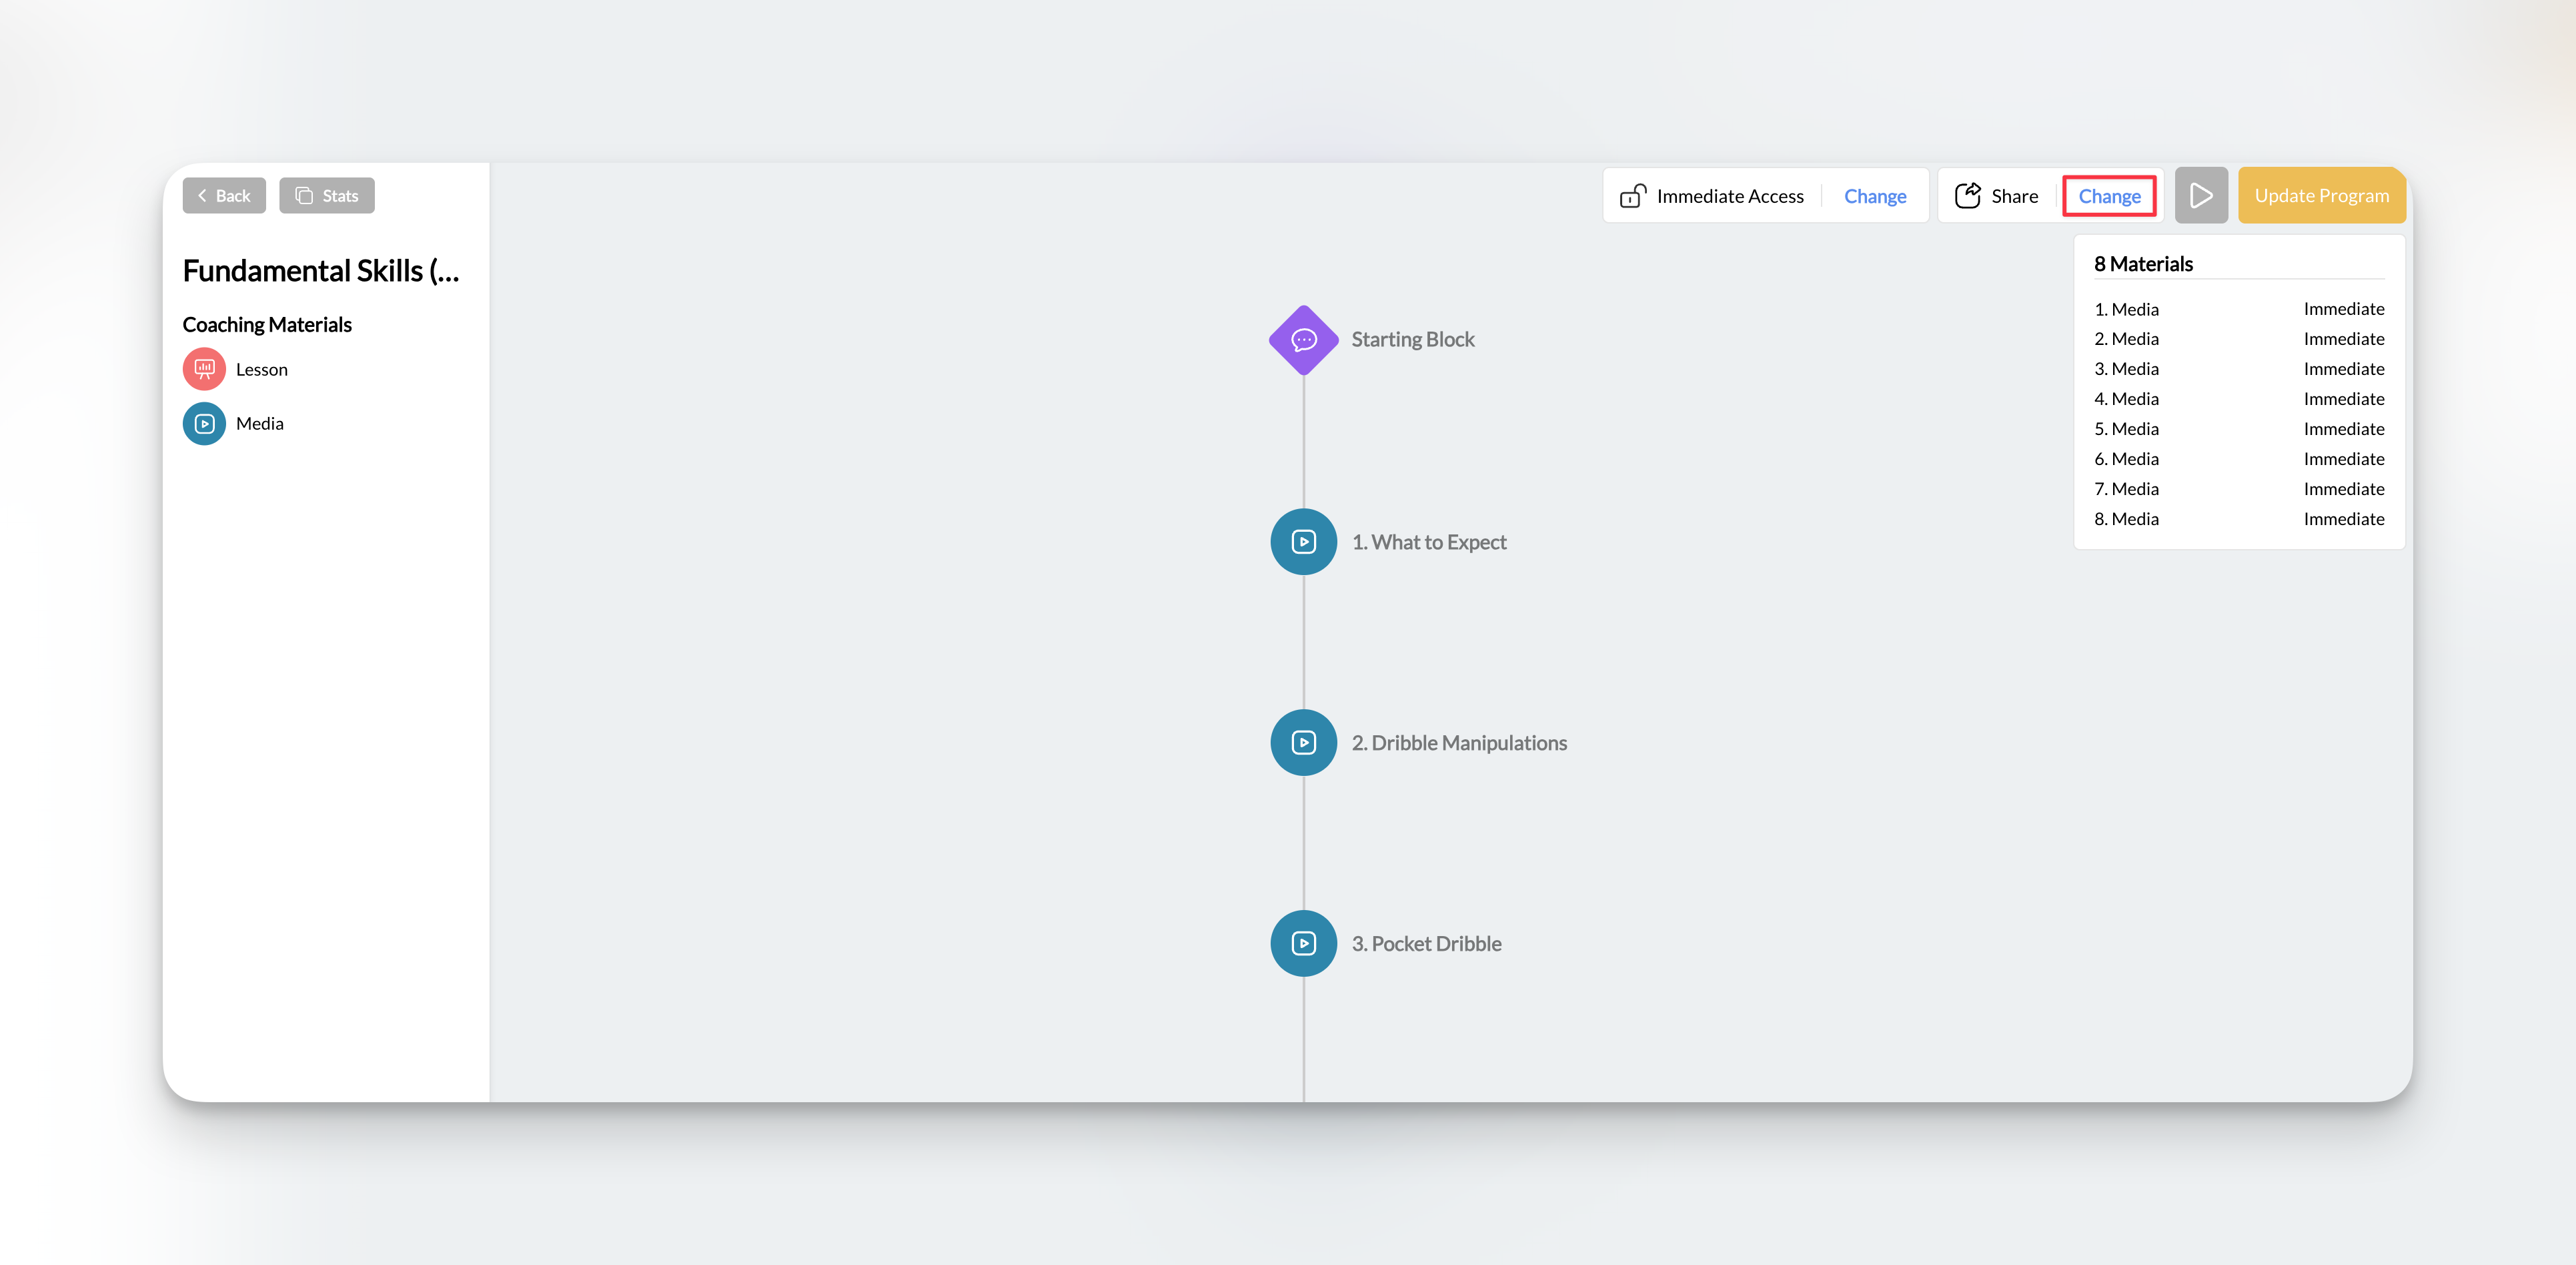
2
Set it to Paywalled
Choose Paywalled, then select the products that unlock the program.
3
Save
Select Save to apply the share settings.
Forms
Open the form under Tools → Forms, select Connections in the top bar, and turn on Add Product(s). The product becomes its own page after the questions, so families answer the form and then check out. Select Update Form to save.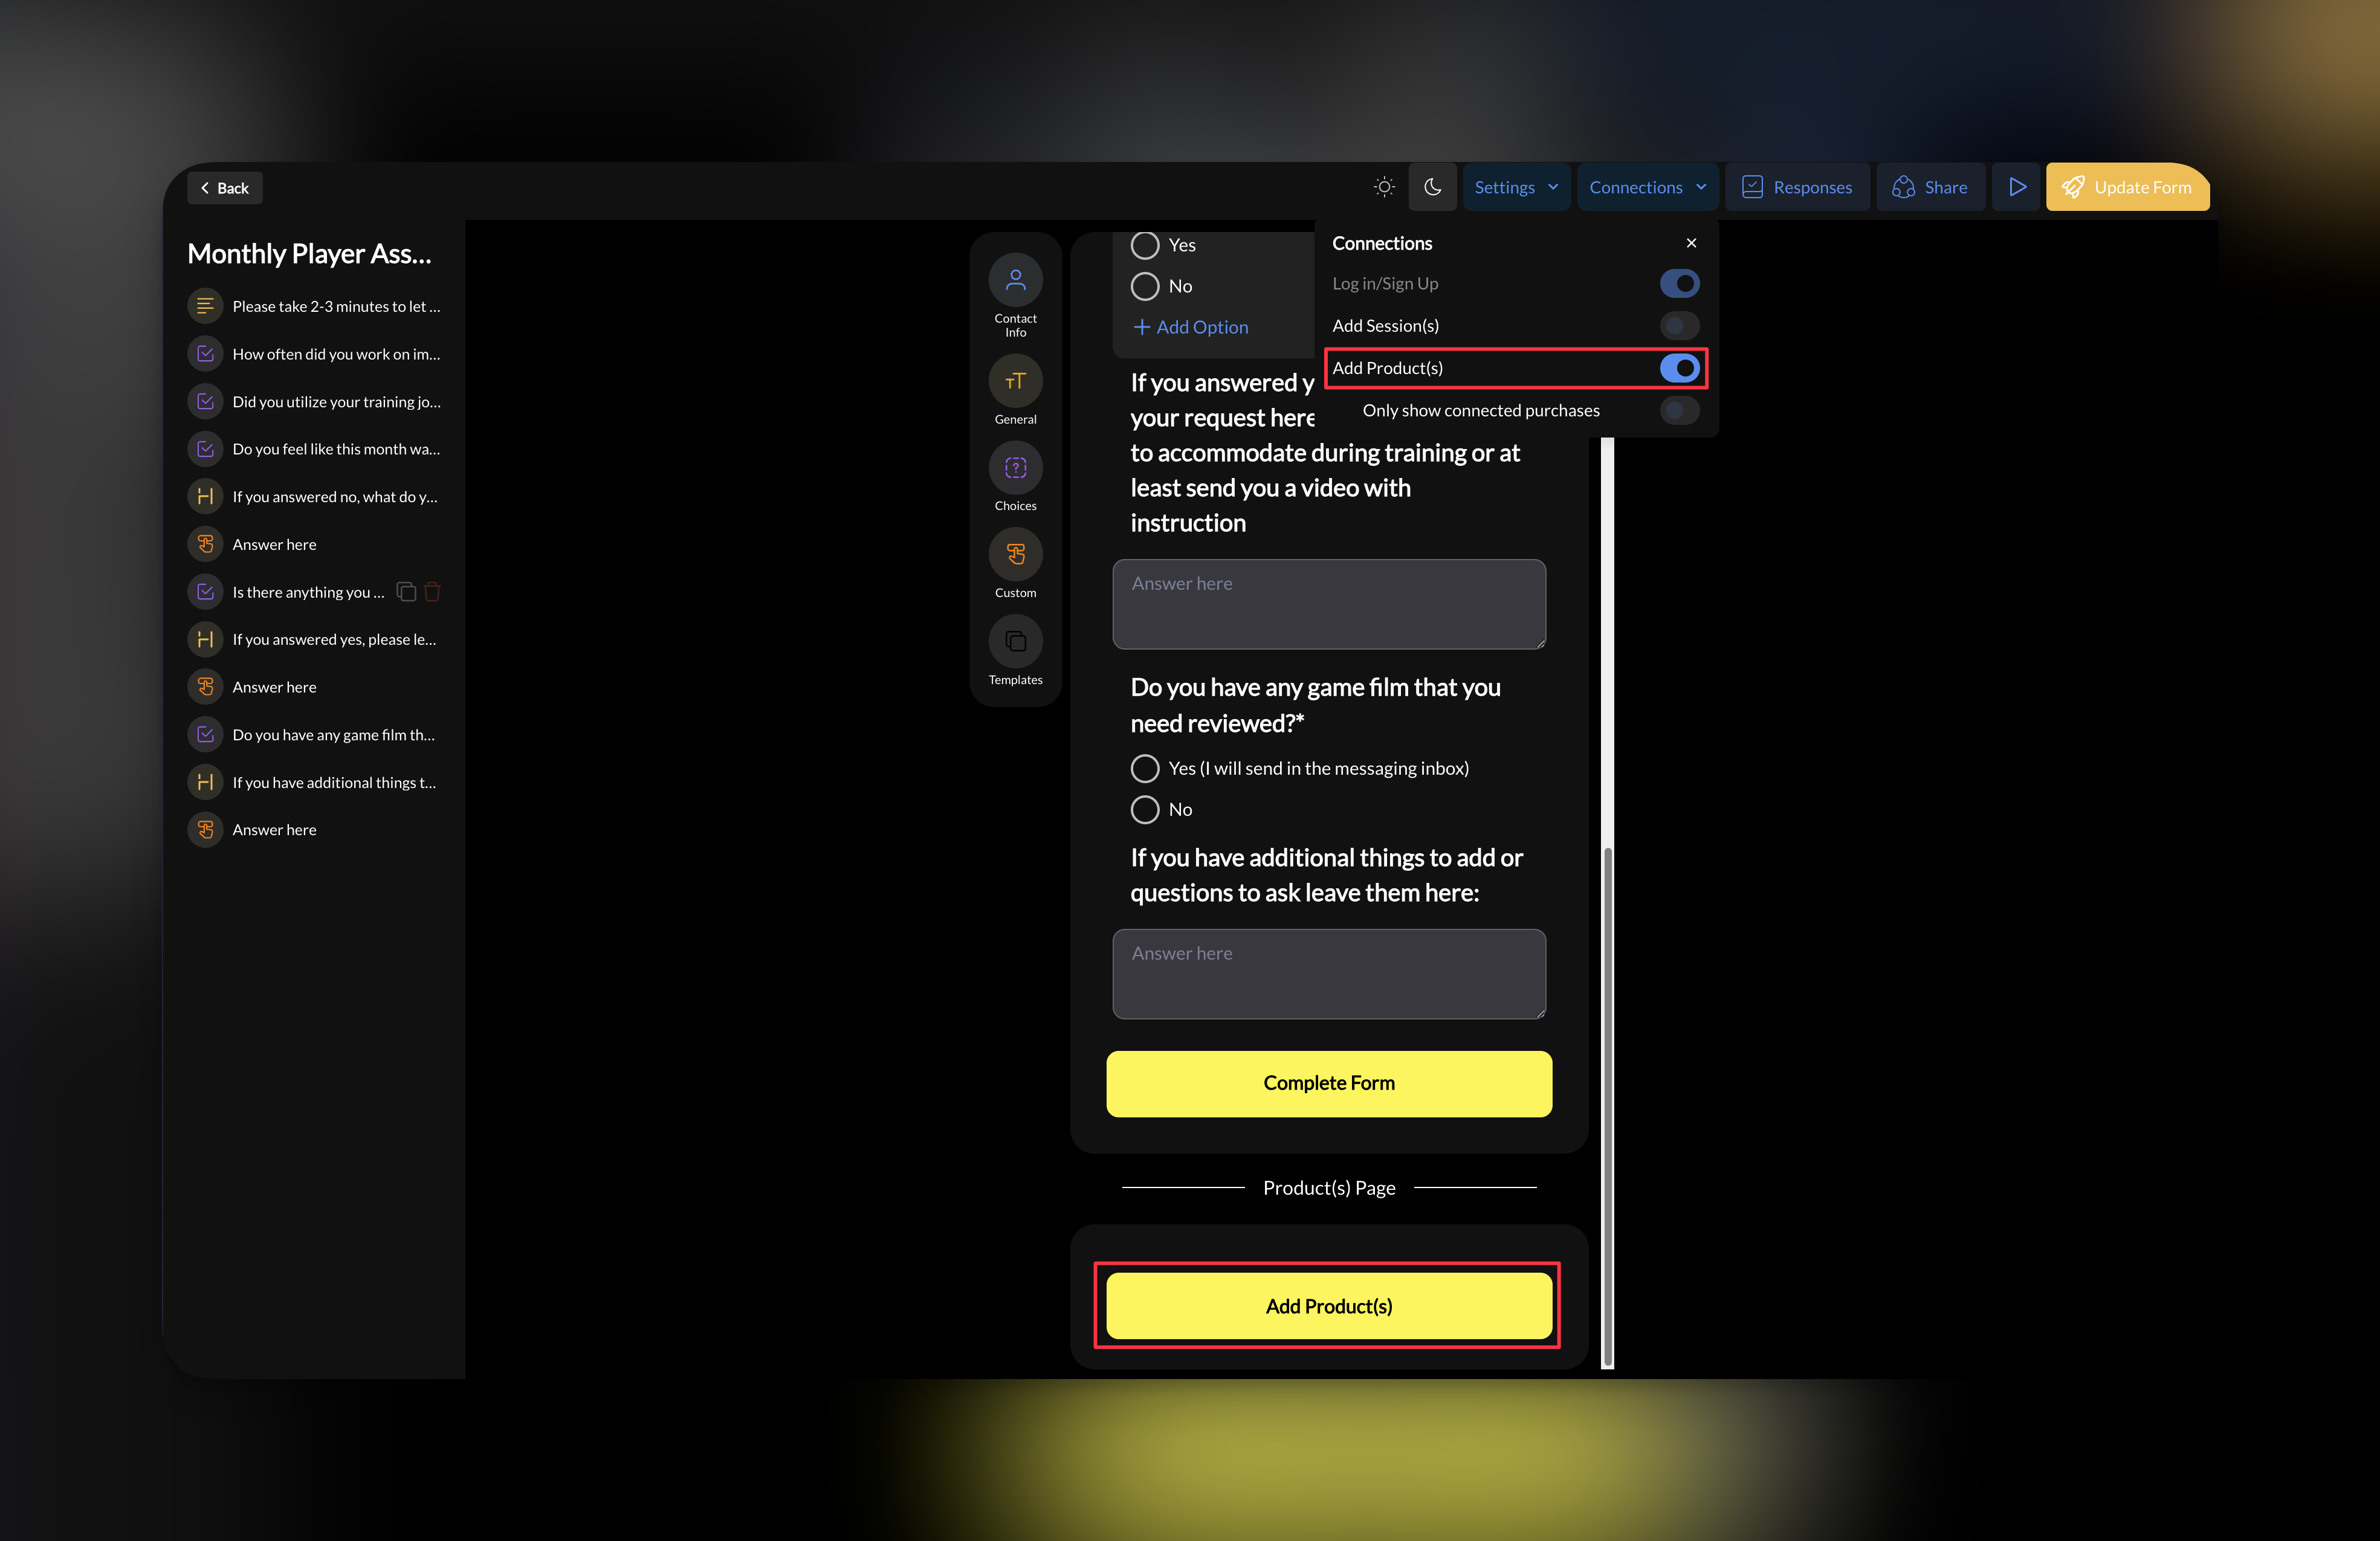
Troubleshooting
The product isn't in the list
The product isn't in the list
- Check the product isn’t archived. On Payments → Products, set the status filter to Archived.
- Check you saved the product.
- Reopen the scheduler, program, or form so the list reloads.
A family can't pay
A family can't pay
- Check Stripe is connected and the product’s price is correct.
- Check the product hasn’t reached its purchase limit.
- Open the link or page the family used and go as far as checkout yourself.
A family has credits but can't book
A family has credits but can't book
- The scheduler must be Paywalled with Credit or Either.
- The product’s Credit Limits must allow this scheduler.
- The credits may have expired, or a per-scheduler limit may be reached for this billing period.
- The credits may belong to a parent or a child depending on who the purchase is for.