

Where to find this: Scheduling → Schedulers → open a scheduler → Availability section
Before you begin: You’ll need your incoming seasonal availability already created for each scheduler. If you haven’t done that yet, create it first (see Step 1 below), then continue with the rest. If it’s already set up, skip to Step 2.
1
Create your new seasonal availability (if you haven't already)
Go to Scheduling → Setup → Availability and create the incoming season’s availability template.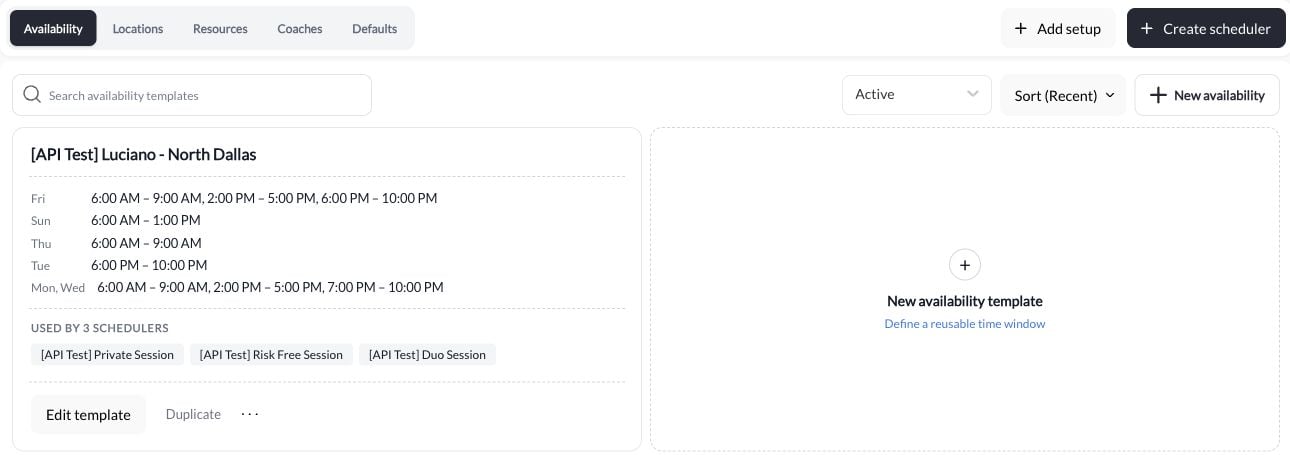
2
Open the scheduler you want to update
From the Schedulers page, click into the first scheduler you want to transition. Navigate to its Availability section in the left sidebar.
3
Add the new seasonal availability as Additional Availability
Scroll to the Additional Availability section and click + Add Additional Availability. Select your new seasonal availability from the dropdown.
4
Set a start date on the new availability and an end date on the current one
With the new availability block added, check Set a start date and enter the date your new season begins — for example, June 1 for a spring-to-summer switch.Then scroll up to your Current Availability block, check Set an end date, and enter the last day of your current season — for example, May 31.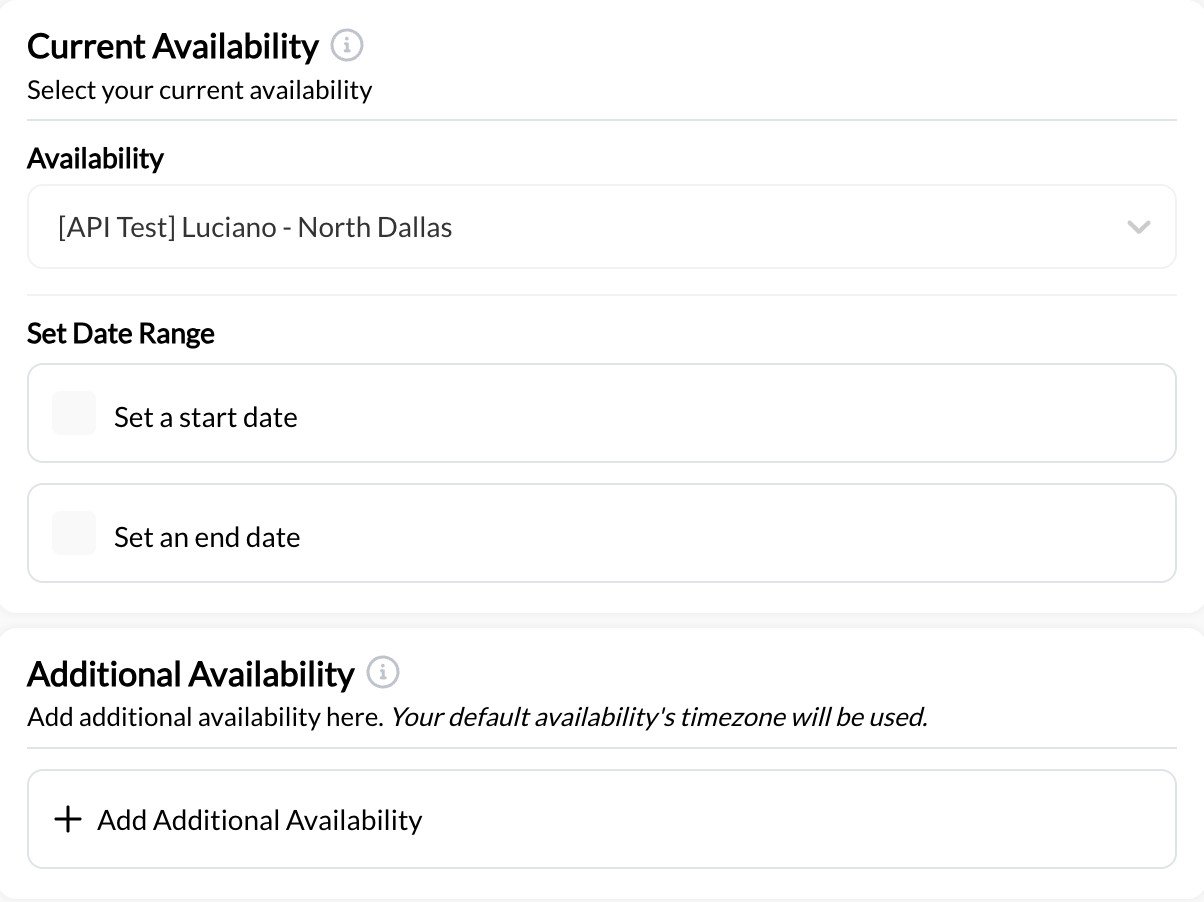
Use consecutive boundary dates, then preview the last week of the old season and first week of the new one. The template’s actual weekdays, exceptions, and booking window still determine which times appear.
5
Preview and save
Check the Preview calendar on the right side of the page to confirm the transition looks correct — your current hours should show up through the end date and your new seasonal hours from the start date onward.When everything looks right, click Update.
6
Repeat for each scheduler
Go through each of your remaining schedulers and repeat Steps 2–5. Each scheduler manages its own availability blocks independently, so you’ll need to update them one at a time.
What if I don't set an end date on my current availability?
What if I don't set an end date on my current availability?
Both availability blocks will be active at the same time and athletes will see slots from both seasons. Always set an End Date on your current availability to prevent overlap.
Can I adjust the dates after saving?
Can I adjust the dates after saving?
Yes. Go back into the scheduler, find either availability block, and update the Start Date or End Date. Changes apply immediately to future-available slots — existing bookings are not affected.
My new availability isn't showing in the Additional Availability dropdown
My new availability isn't showing in the Additional Availability dropdown
The availability must be created before it can be attached to a scheduler. Create it under Scheduling → Setup → Availability, then return to the scheduler and select it.
Do I need to do this for every scheduler?
Do I need to do this for every scheduler?
Yes — each scheduler manages its own availability blocks. If you have three schedulers, you’ll need to set the start/end dates in each one individually.
Creating Your Availability Schedule
Set up a new availability block from scratch before attaching it to a scheduler.
Creating Your First Scheduler
Full walkthrough of scheduler settings, including the Availability section.
Setting Blackout Dates
Block specific dates without changing your overall availability.
How Availability Works
Understand how availability blocks connect to schedulers and generate bookable slots.