> ## Documentation Index
> Fetch the complete documentation index at: https://help.coachiq.io/llms.txt
> Use this file to discover all available pages before exploring further.
# Add and Manage Sections
> Learn how to add, reorder, hide, and remove sections in CoachIQ's Website Builder. Complete guide for managing your coaching website layout.
**Where to find this**: Dashboard → Website Builder → Select any page
## What you'll accomplish
Learn how to add new sections to your coaching website, reorder them for the best user flow, temporarily hide sections, and remove sections you no longer need.
## Adding new sections to your website
From your dashboard, select **Website Builder** and choose the page you want to edit.
Scroll to where you want to add a new section and click the **+ Add Section** button.
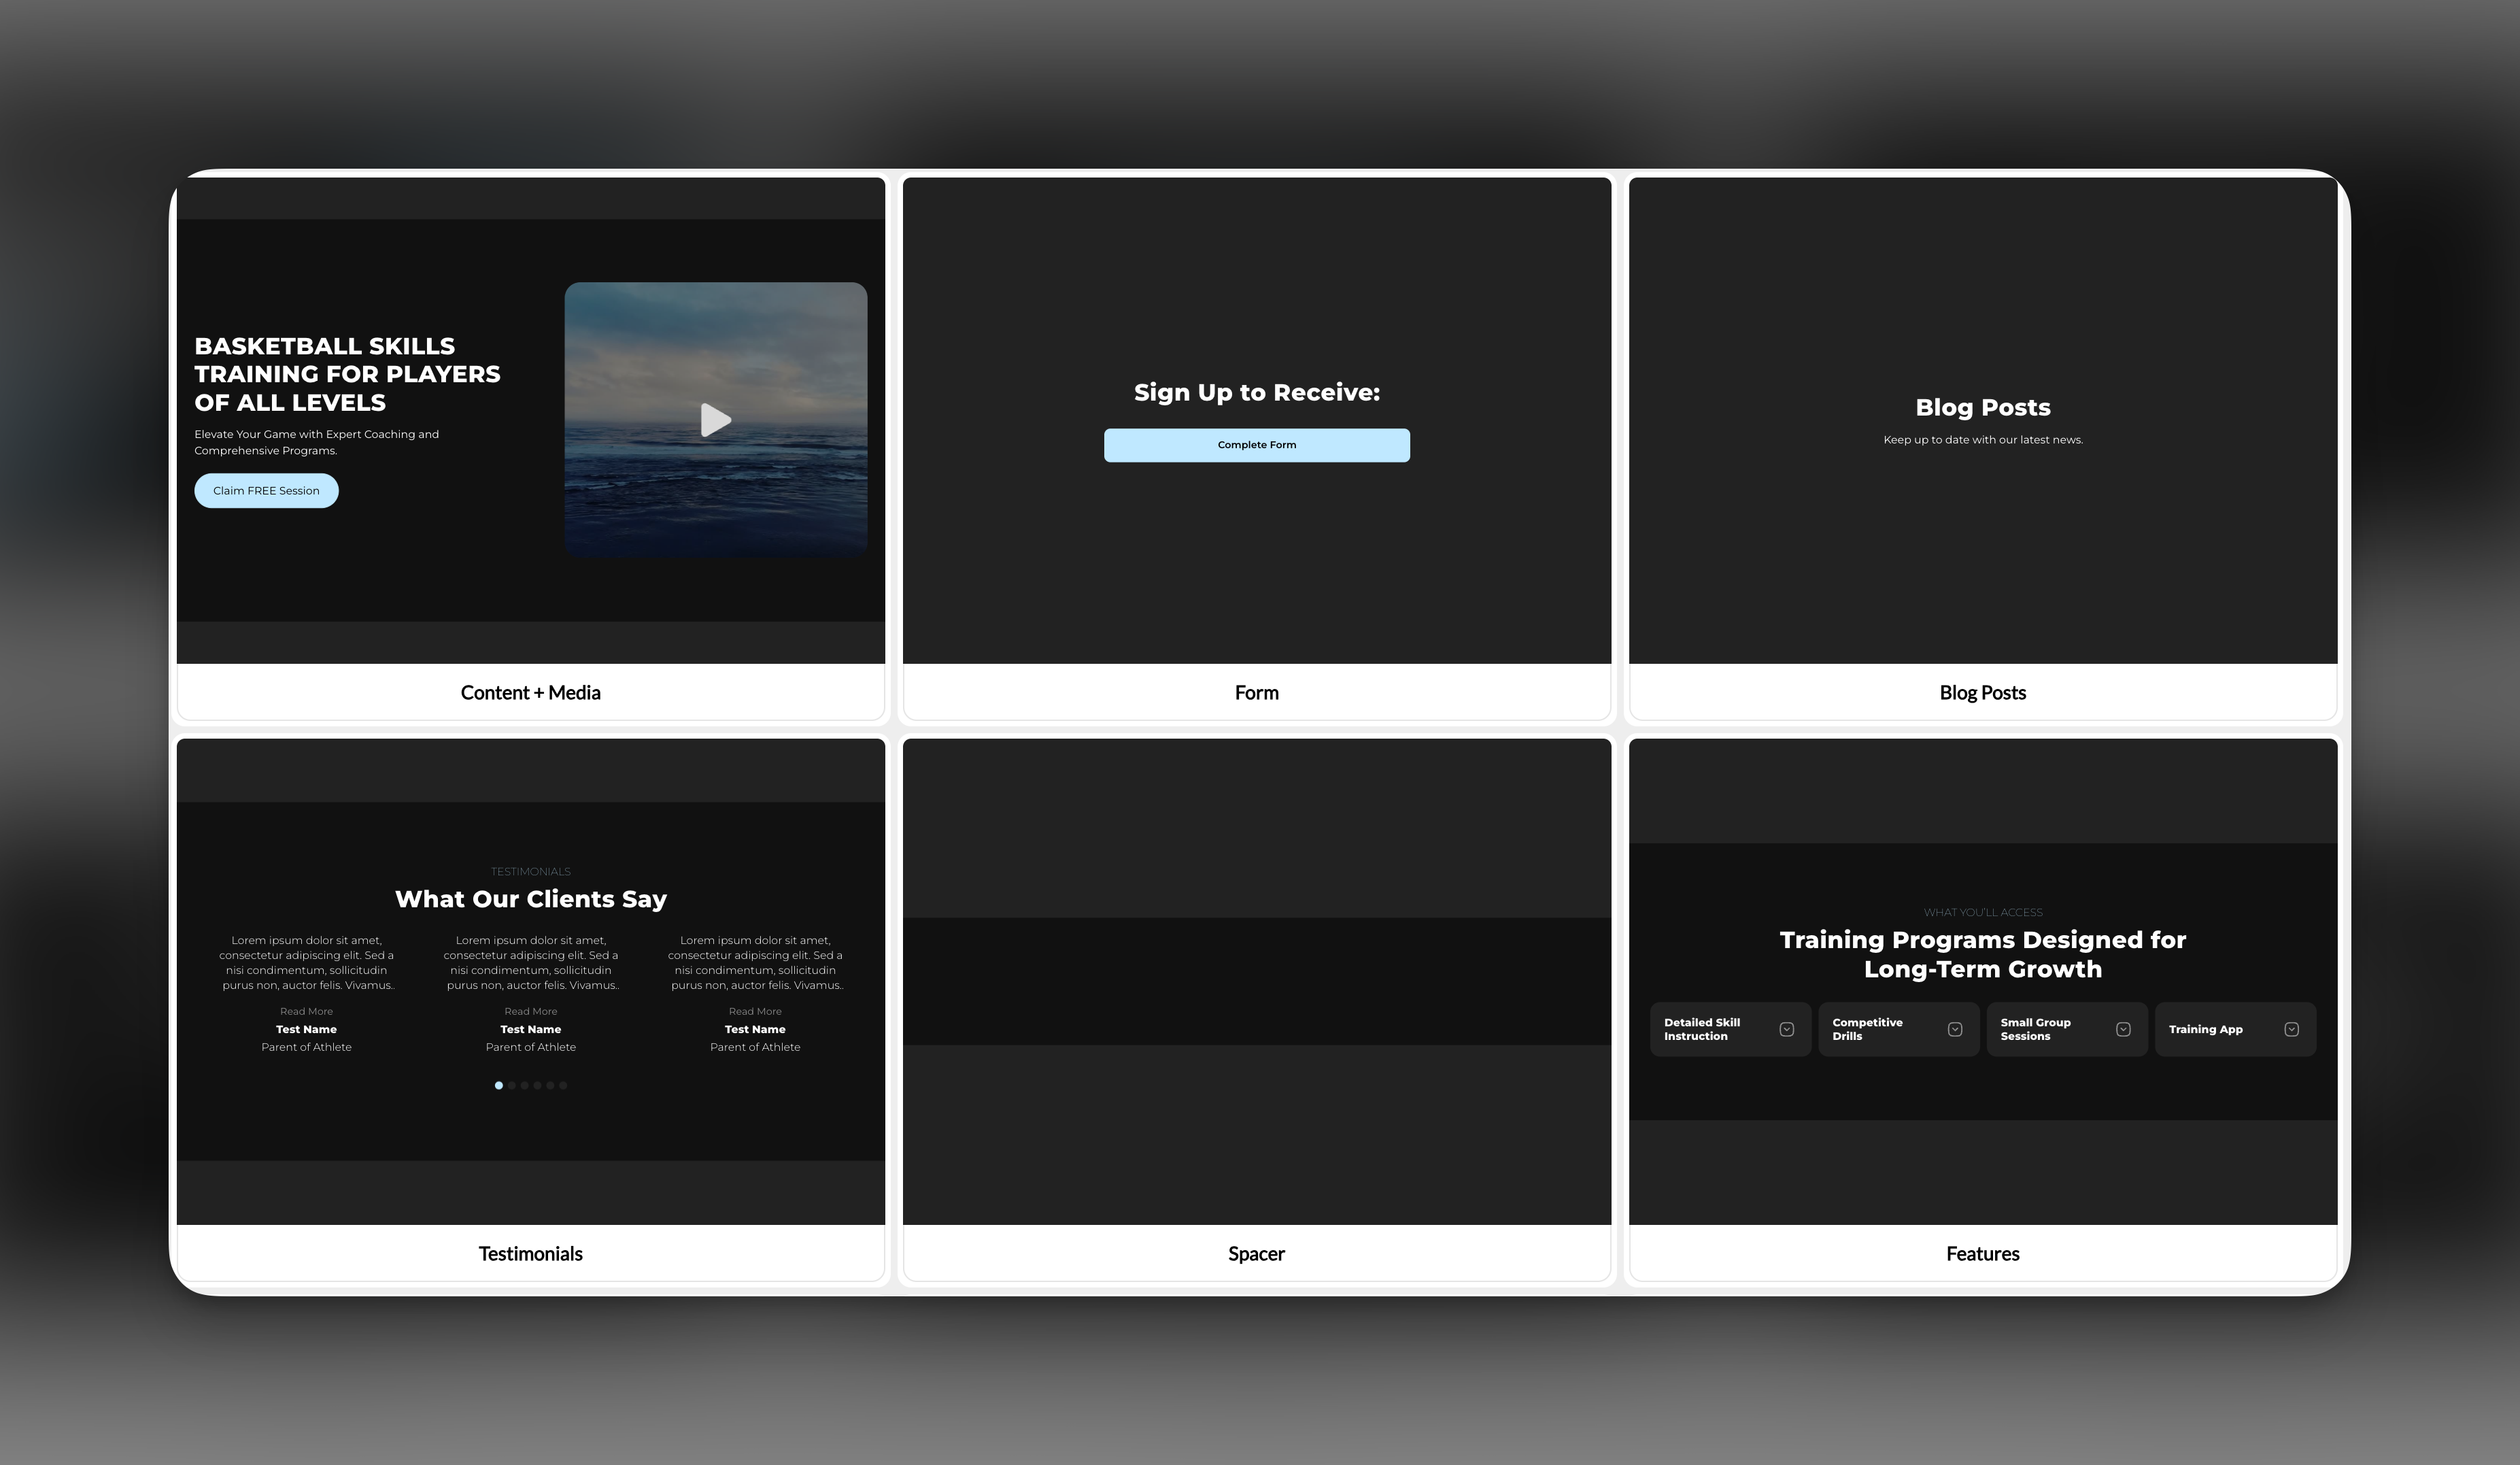
 A modal will appear showing all available section types. Choose the section that best fits your content needs:
* **Content + Media** for text and images
* **Form** for lead capture
* **Testimonials** for client reviews
* **Pricing** for service packages
* **Scheduling** for session booking
* **Features** for highlighting your programs
A modal will appear showing all available section types. Choose the section that best fits your content needs:
* **Content + Media** for text and images
* **Form** for lead capture
* **Testimonials** for client reviews
* **Pricing** for service packages
* **Scheduling** for session booking
* **Features** for highlighting your programs
 **Success!** Your new section will appear on the page and you can immediately start customizing it.
## Reordering sections on your page
You can change the order of sections to create the perfect flow for your visitors.
Find the section you want to reorder in your page layout.
Look for the reorder controls next to the section name in the left sidebar by hovering over the section with your mouse.
**Best practice**: Place your most important sections (like scheduling or contact forms) higher on the page where visitors will see them first.
Click and drag the six dot icon to move the section up or down to your preferred position.
**Success!** Your new section will appear on the page and you can immediately start customizing it.
## Reordering sections on your page
You can change the order of sections to create the perfect flow for your visitors.
Find the section you want to reorder in your page layout.
Look for the reorder controls next to the section name in the left sidebar by hovering over the section with your mouse.
**Best practice**: Place your most important sections (like scheduling or contact forms) higher on the page where visitors will see them first.
Click and drag the six dot icon to move the section up or down to your preferred position.
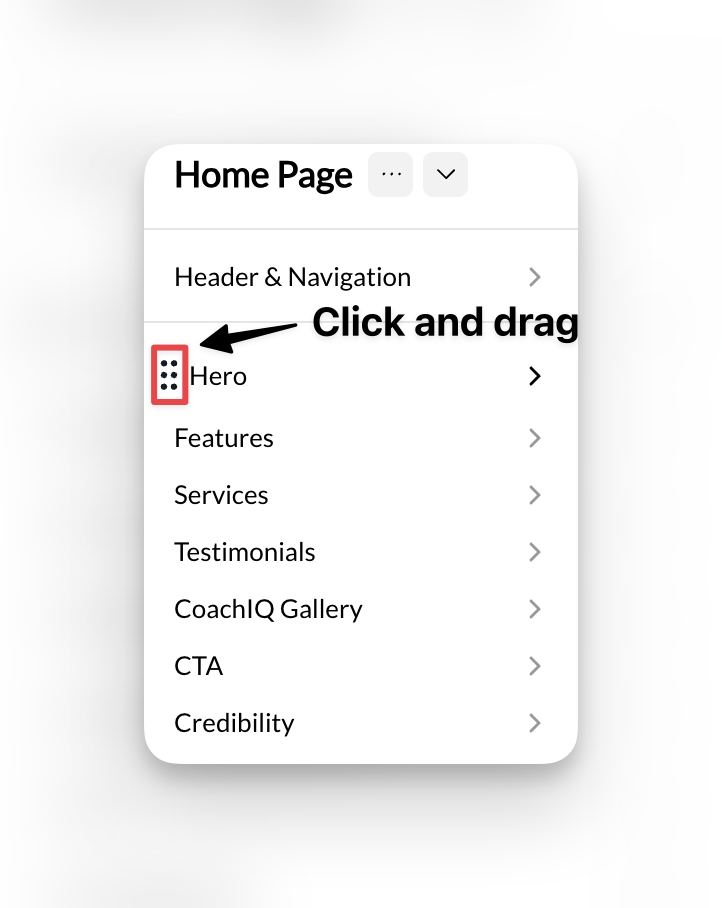 The section will immediately move to its new position and you can preview the change.
## Hiding sections temporarily
Sometimes you want to keep a section configured but temporarily hide it from visitors.
Click on the section you want to hide in your Website Builder.
Look for the **Hide** toggle in the section settings panel and switch it on.
The section will immediately move to its new position and you can preview the change.
## Hiding sections temporarily
Sometimes you want to keep a section configured but temporarily hide it from visitors.
Click on the section you want to hide in your Website Builder.
Look for the **Hide** toggle in the section settings panel and switch it on.
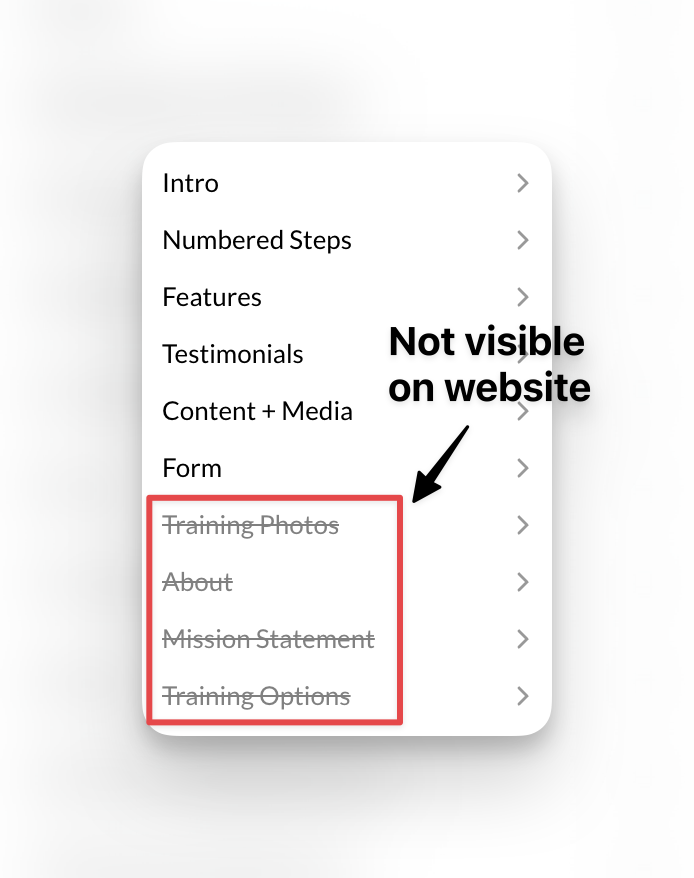 Hidden sections remain in your Website Builder but won't appear to visitors on your live site. This is perfect for sections you're still working on or seasonal content.
To make the section visible again, simply toggle the Hide option back off.
## Removing sections permanently
**Important**: Removing a section permanently deletes all its content and settings. This action cannot be undone.
Click on the section you want to delete in your Website Builder.
Look for a trash/delete icon or "Remove Section" option in the section controls.
Confirm that you want to permanently remove the section and all its content.
The section will be immediately removed from your page.
## Common questions
There's no strict limit on the number of sections you can add, but keep user experience in mind. Pages that are too long may lose visitor attention.
While you can't directly copy sections, you can recreate similar sections by selecting the same section type and configuring it with the same content.
Hidden sections are saved in your Website Builder but don't appear to visitors. They don't affect your site's loading speed or SEO.
No, removing a section permanently deletes it. If you might need the section later, use the Hide option instead.
## Pro tips
**Plan your layout**: Before adding sections, sketch out your ideal page flow. Start with essential sections like hero, about, services, and contact.
**Use Hide for testing**: When trying new section layouts, hide existing sections instead of removing them so you can easily revert changes.
**Mobile preview**: After reordering sections, always check how your page looks on mobile devices to ensure good user experience.
## Related articles
* [Section Styling and Layout](/website/sections/backgrounds-styling) - Customize the visual appearance of your sections
* [Editing Section Content](/website/sections/sections) - Learn how to edit text, images, and content within sections
* [Section Types](/website/section-types) - Explore the specific features available for each section type
Hidden sections remain in your Website Builder but won't appear to visitors on your live site. This is perfect for sections you're still working on or seasonal content.
To make the section visible again, simply toggle the Hide option back off.
## Removing sections permanently
**Important**: Removing a section permanently deletes all its content and settings. This action cannot be undone.
Click on the section you want to delete in your Website Builder.
Look for a trash/delete icon or "Remove Section" option in the section controls.
Confirm that you want to permanently remove the section and all its content.
The section will be immediately removed from your page.
## Common questions
There's no strict limit on the number of sections you can add, but keep user experience in mind. Pages that are too long may lose visitor attention.
While you can't directly copy sections, you can recreate similar sections by selecting the same section type and configuring it with the same content.
Hidden sections are saved in your Website Builder but don't appear to visitors. They don't affect your site's loading speed or SEO.
No, removing a section permanently deletes it. If you might need the section later, use the Hide option instead.
## Pro tips
**Plan your layout**: Before adding sections, sketch out your ideal page flow. Start with essential sections like hero, about, services, and contact.
**Use Hide for testing**: When trying new section layouts, hide existing sections instead of removing them so you can easily revert changes.
**Mobile preview**: After reordering sections, always check how your page looks on mobile devices to ensure good user experience.
## Related articles
* [Section Styling and Layout](/website/sections/backgrounds-styling) - Customize the visual appearance of your sections
* [Editing Section Content](/website/sections/sections) - Learn how to edit text, images, and content within sections
* [Section Types](/website/section-types) - Explore the specific features available for each section type