> ## Documentation Index
> Fetch the complete documentation index at: https://help.coachiq.io/llms.txt
> Use this file to discover all available pages before exploring further.
# Filter, Export, and Use Your Sheet
> Find the rows you need, understand totals and selection, open source records, and review message recipients.
Once your sheet has rows, use its controls to focus on the work you need to do. Start in **Tools → Sheets** and open your saved sheet.
## Search, filter, and sort
Use **Search this sheet** to narrow the visible rows. Open a column's menu for sorting and filters. Text filters include **Contains**, **Equals**, **Is empty**, and **Is not empty**; use the options available for the selected column type.
For a client follow-up sheet, you might filter your custom Status column to **Not started**, then sort by a target date. Clearing the filter brings the other rows back; filtering does not remove them from the sheet.
If you see no matching rows, clear the search and check active filters before assuming records are missing. Use column visibility controls when you want a simpler view without deleting columns.
## Read the Totals row
The footer sums numeric columns and counts other columns. Totals reflect the current filtered view, so narrowing the rows can change the figures. Check the active filters before using a total in a report.
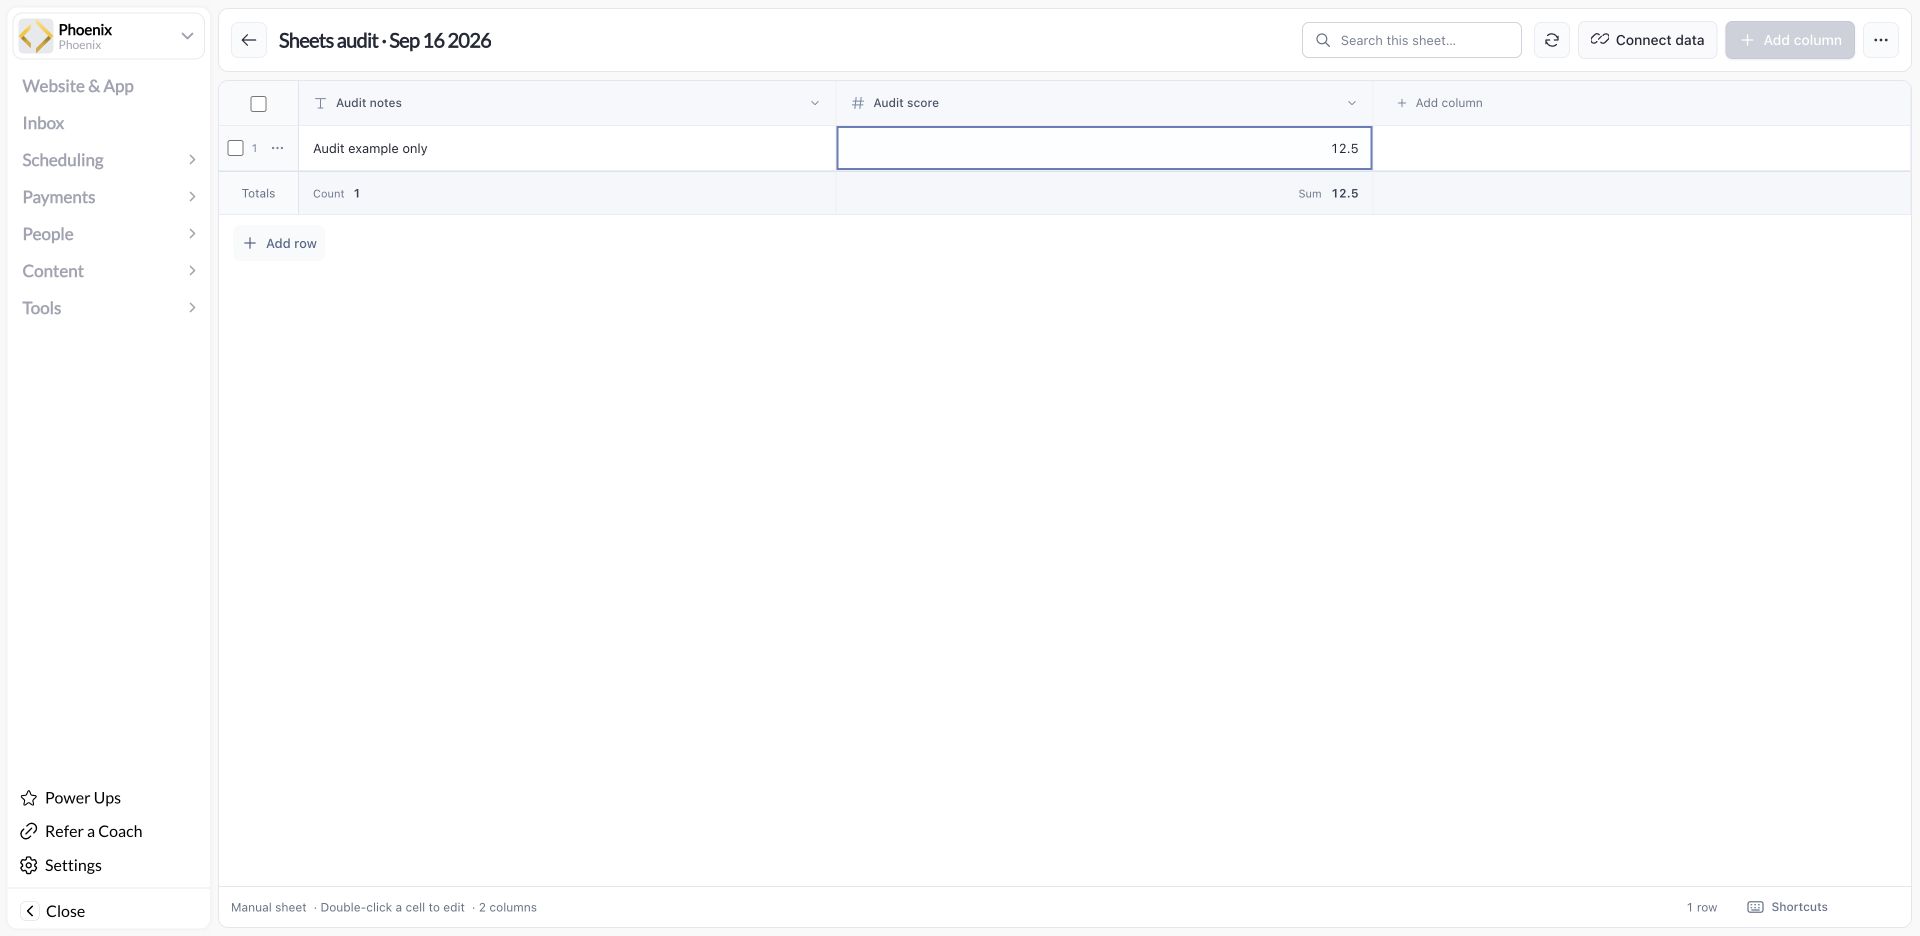 A count is not automatically a count of unique athletes or families. A sum is not automatically profit, revenue, or a currency conversion. Use the source and column meaning to interpret the result; review payment records in [Payments](/payments/transactions) when reconciling money.
## Select the right rows
Select individual rows using their checkboxes. Review the selected count before using a bulk action. If you choose **Select all matches**, check that you intend to include all matching rows rather than only the rows currently visible.
The selection bar can offer **Message**, **Export selected**, **Remove**, and **Clear**. Available actions depend on the sheet and source. Clear the selection when you finish so your next action starts with the intended audience.
## Open the original record
For a connected row, use its menu and choose **Open in CoachIQ**. Make changes in the original area, then refresh your sheet to check the current values. A manual row has no source record to open.
## Message selected rows
1. Select the rows relevant to your message.
2. Choose **Message**.
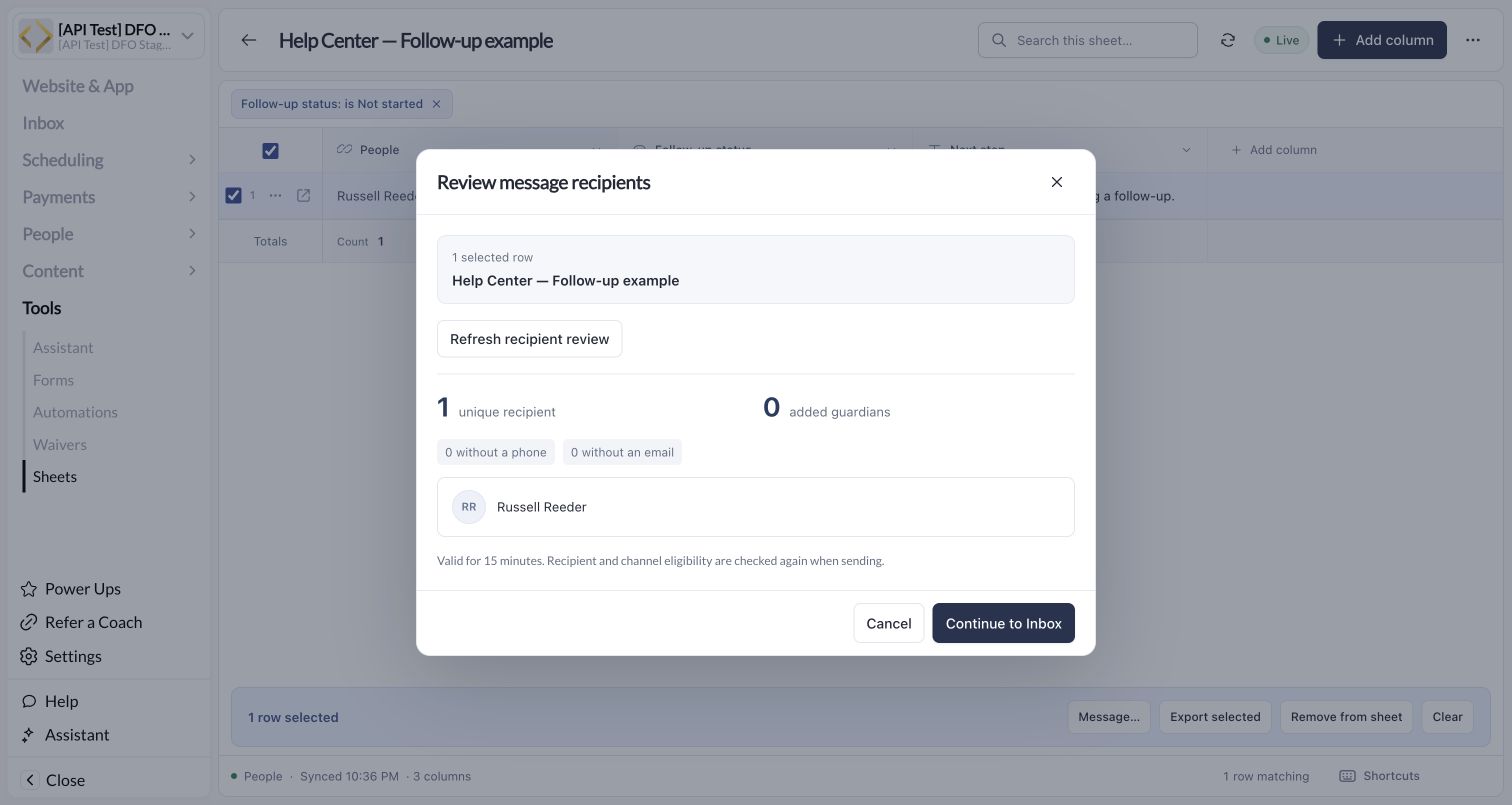
3. Review the recipient list, unique-recipient counts, guardian handling, and any ineligible or missing contacts.
4. Continue to Inbox to compose and send the message.
Selecting sheet rows does not send anything. A selected row is not necessarily one reachable recipient: an athlete may have guardian contacts, and some records may have no eligible contact. Review the actual audience before sending.
Use the existing [Inbox guidance](/inbox/inbox-overview) for delivery channels and [messaging credits](/inbox/sms-credits) for metered usage.
## Export your work
Use **Export current view** in the sheet's actions menu, or **Export selected** for a selection. Check filters and selected counts first. The export downloads directly; it is a snapshot, not a continuing connection to CoachIQ.
## Remove rows or delete a sheet
Read the confirmation for **Remove** before continuing. Removing a linked row from the sheet is different from deleting its underlying CoachIQ record. Deleting the sheet removes the sheet and its custom information, while source records remain in CoachIQ.
If the goal is only to stop live updates, use [Unlink live data](/tools/sheets/connect-live-data#unlink-live-data) instead.
## A useful first workflow
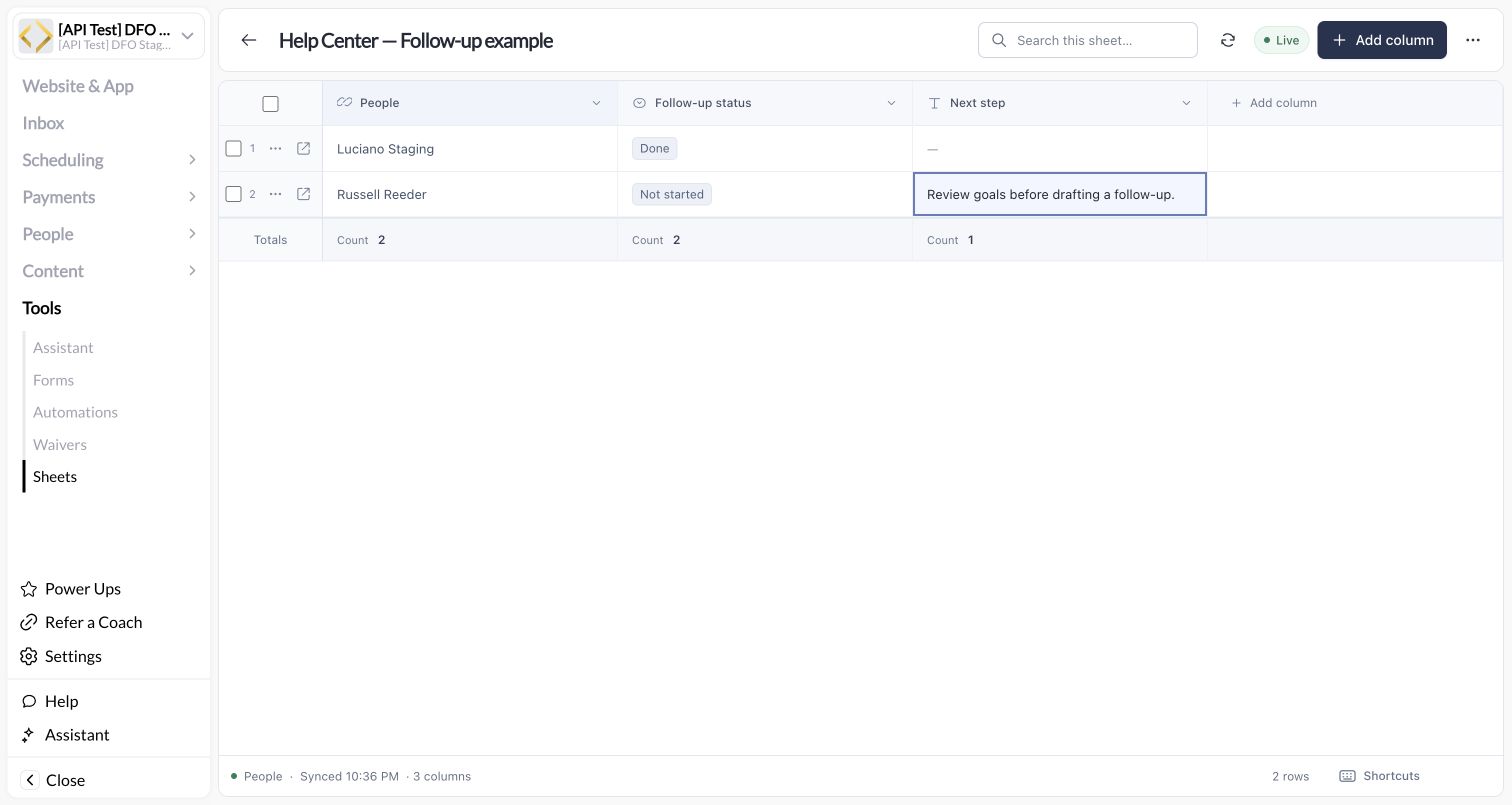
Use a follow-up sheet to keep live client information beside your team's working notes. The screenshots below use two staff records in a CoachIQ test workspace; the statuses are examples, not actual client follow-up activity.
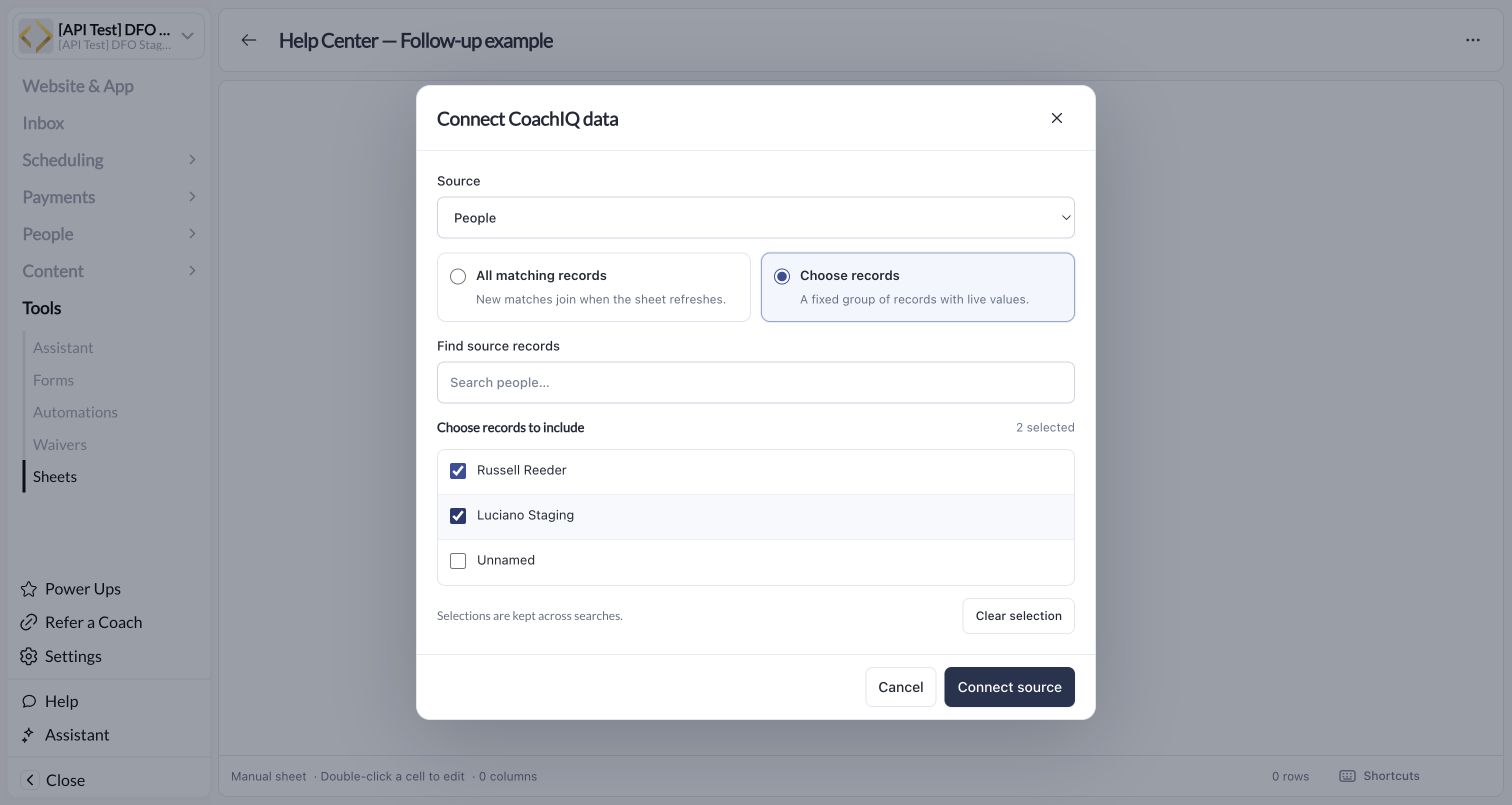
Create a sheet, choose **Connect CoachIQ data → People**, then choose **Choose records** for a fixed list whose values stay live. Use **All matching records** instead when you want new matching records to join on refresh.
A count is not automatically a count of unique athletes or families. A sum is not automatically profit, revenue, or a currency conversion. Use the source and column meaning to interpret the result; review payment records in [Payments](/payments/transactions) when reconciling money.
## Select the right rows
Select individual rows using their checkboxes. Review the selected count before using a bulk action. If you choose **Select all matches**, check that you intend to include all matching rows rather than only the rows currently visible.
The selection bar can offer **Message**, **Export selected**, **Remove**, and **Clear**. Available actions depend on the sheet and source. Clear the selection when you finish so your next action starts with the intended audience.
## Open the original record
For a connected row, use its menu and choose **Open in CoachIQ**. Make changes in the original area, then refresh your sheet to check the current values. A manual row has no source record to open.
## Message selected rows
1. Select the rows relevant to your message.
2. Choose **Message**.
3. Review the recipient list, unique-recipient counts, guardian handling, and any ineligible or missing contacts.
4. Continue to Inbox to compose and send the message.
Selecting sheet rows does not send anything. A selected row is not necessarily one reachable recipient: an athlete may have guardian contacts, and some records may have no eligible contact. Review the actual audience before sending.
Use the existing [Inbox guidance](/inbox/inbox-overview) for delivery channels and [messaging credits](/inbox/sms-credits) for metered usage.
## Export your work
Use **Export current view** in the sheet's actions menu, or **Export selected** for a selection. Check filters and selected counts first. The export downloads directly; it is a snapshot, not a continuing connection to CoachIQ.
## Remove rows or delete a sheet
Read the confirmation for **Remove** before continuing. Removing a linked row from the sheet is different from deleting its underlying CoachIQ record. Deleting the sheet removes the sheet and its custom information, while source records remain in CoachIQ.
If the goal is only to stop live updates, use [Unlink live data](/tools/sheets/connect-live-data#unlink-live-data) instead.
## A useful first workflow
Use a follow-up sheet to keep live client information beside your team's working notes. The screenshots below use two staff records in a CoachIQ test workspace; the statuses are examples, not actual client follow-up activity.
Create a sheet, choose **Connect CoachIQ data → People**, then choose **Choose records** for a fixed list whose values stay live. Use **All matching records** instead when you want new matching records to join on refresh.
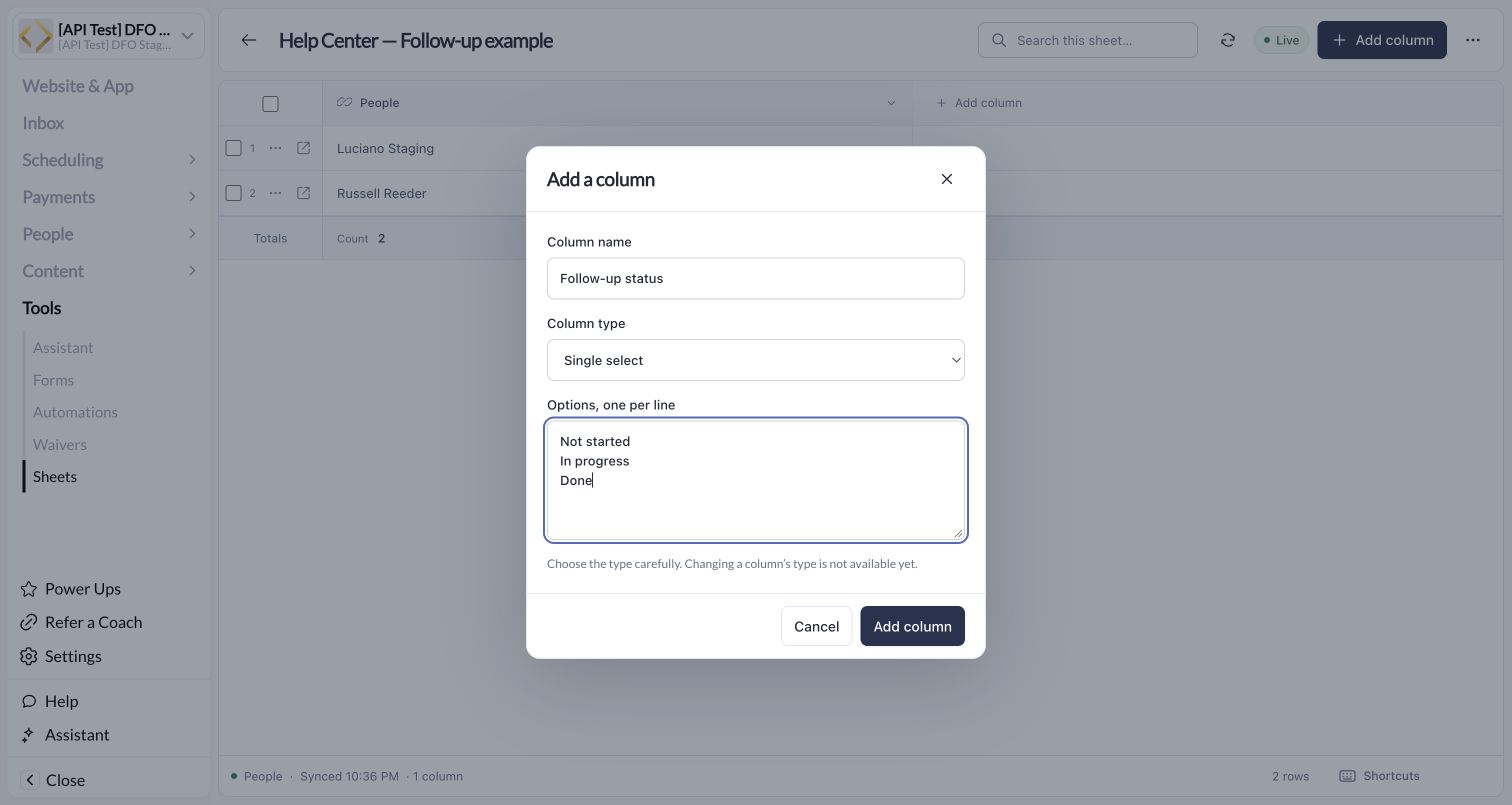
 Add a **Single select** column named **Follow-up status**, with **Not started**, **In progress**, and **Done** as separate options. Add a **Text** column named **Next step**. Double-click a custom cell, enter its value, and choose **Save**.
 Use **Hide column** for contact fields you do not need in this view. Hiding a column does not remove the source contact details.
 Open **Follow-up status → Filter column**, choose **Equals**, and enter **Not started**. Apply the filter, then select the intended rows. Check both the filter chip and selected count.
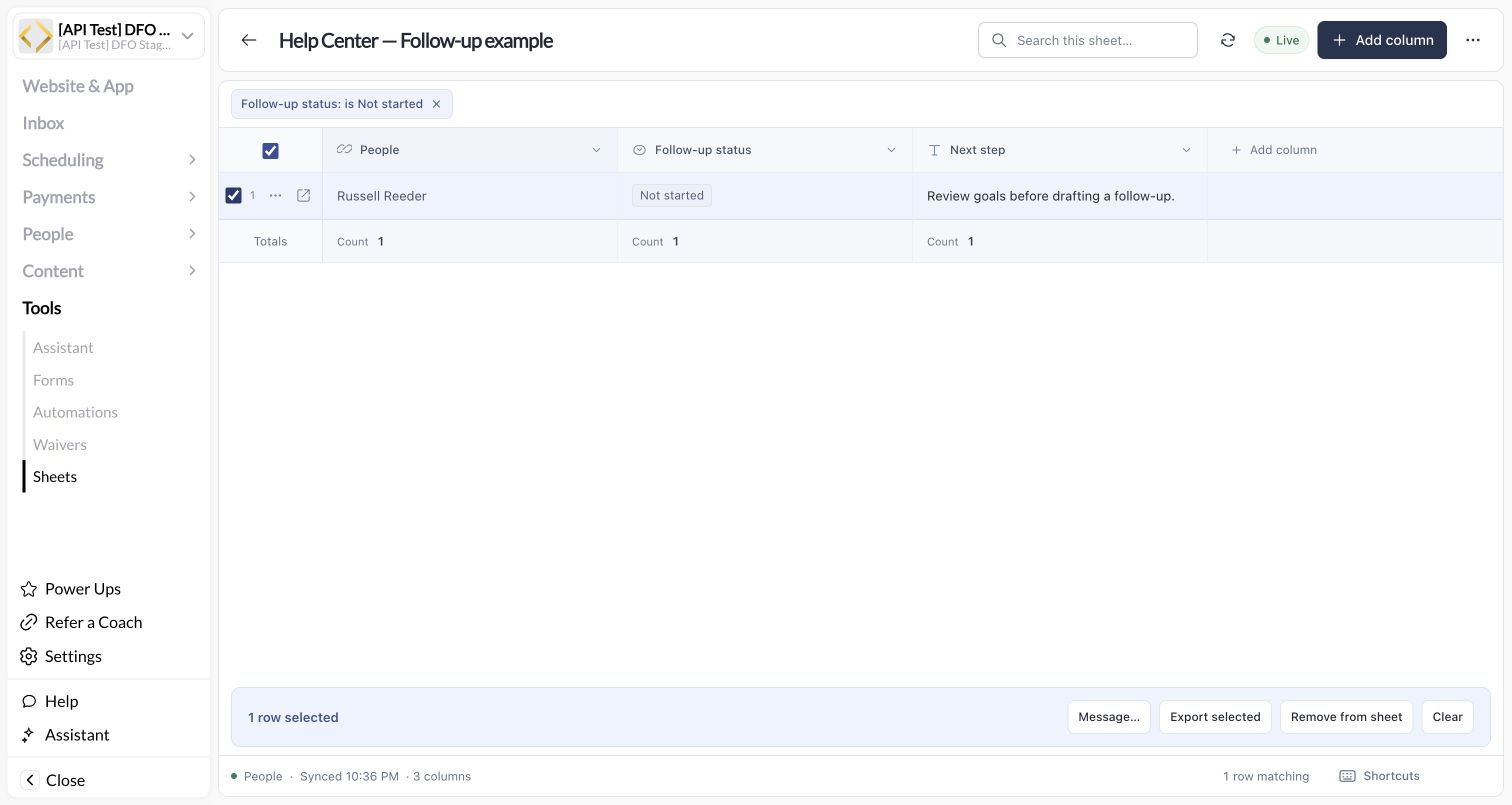 Choose **Message → Review recipients**. Check the unique recipients, added guardians, and missing contact counts. Only continue to Inbox when that audience matches your intent. The review has a validity window, and eligibility is checked again when sending.
 Choose **Export selected** for the selected rows, or use **Export current view** from the sheet actions menu for the filtered view. After completing a follow-up, update its custom status and next step. Clear the selection before starting a different task.
This documentation is built and hosted on [Mintlify](https://mintlify.com), a developer documentation platform.
Choose **Export selected** for the selected rows, or use **Export current view** from the sheet actions menu for the filtered view. After completing a follow-up, update its custom status and next step. Clear the selection before starting a different task.
This documentation is built and hosted on [Mintlify](https://mintlify.com), a developer documentation platform.