> ## Documentation Index
> Fetch the complete documentation index at: https://help.coachiq.io/llms.txt
> Use this file to discover all available pages before exploring further.
# Sharing Schedulers on the Athlete App
> Quick guide to making your schedulers visible and bookable in the athlete app with smart organization strategies.
**Quick navigation**: Dashboard → Athlete Portal → Edit → Schedule
## What you'll accomplish
Get your schedulers live in the athlete app so athletes can browse and book sessions. This is the final step after creating your schedulers—making them accessible to athletes.
**Success**: Schedulers appear in athlete app, organized clearly, ready for booking.
## The 3-step process
Dashboard → \*\*Athlete Portal \*\*→ Edit → Schedule tab
Toggle the **Active** switch ON to enable scheduling in the athlete portal.
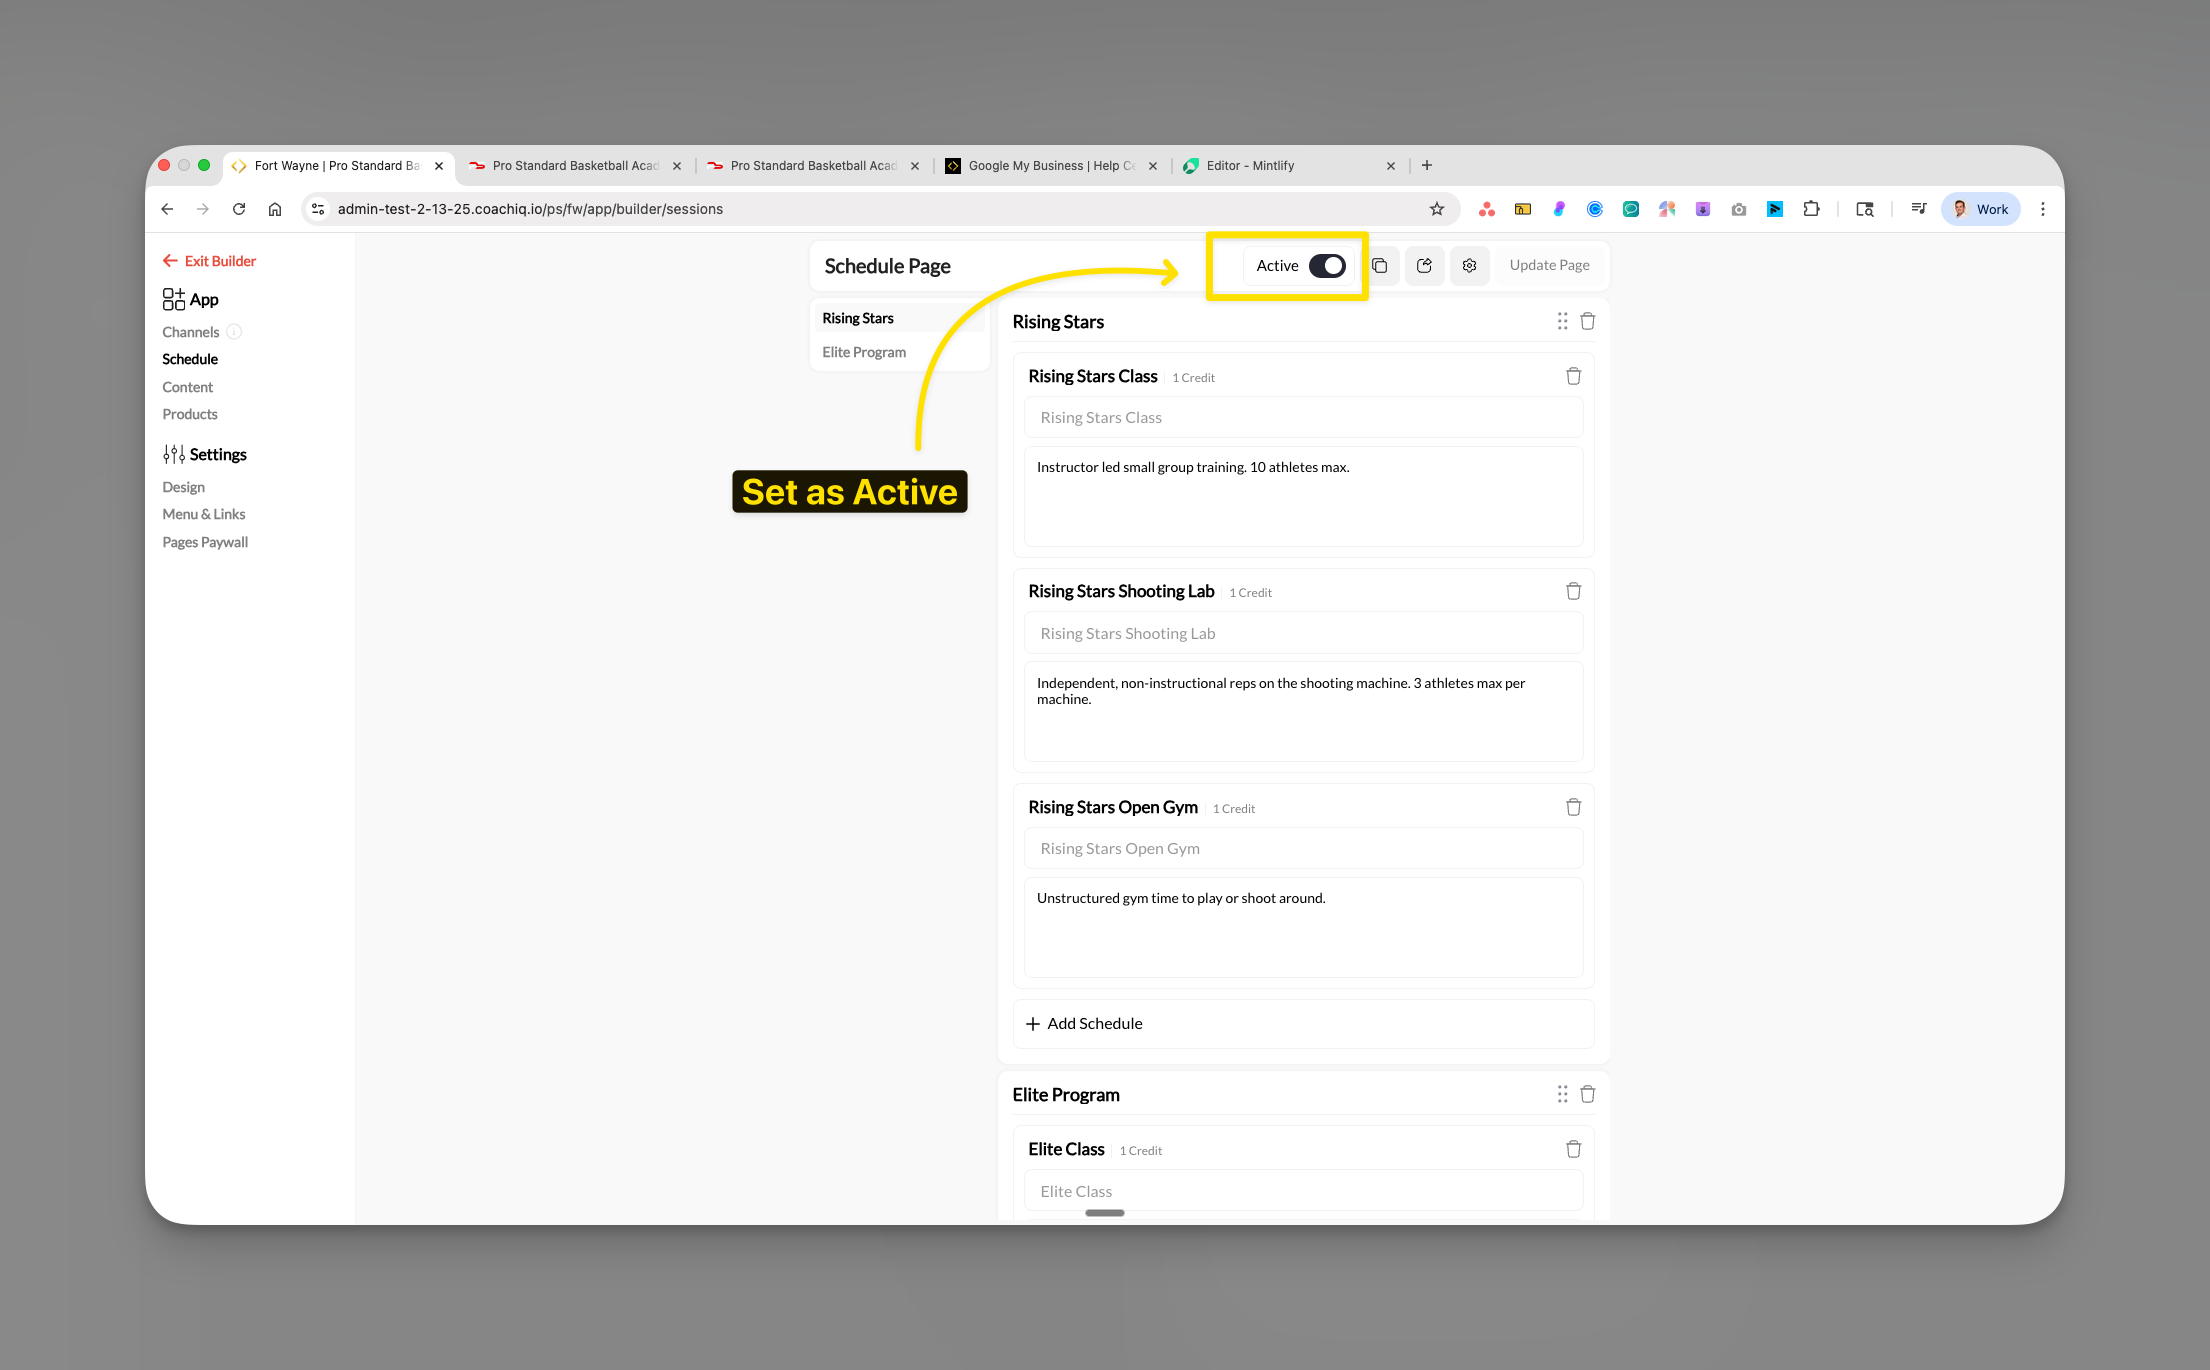 1. Click **+ Add Section** (create categories like "Private Training" or "Group Classes")
2. Click **+ Add Schedule** within a section
3. Select schedulers from the modal popup
4. Click **Add Selected**
1. Click **+ Add Section** (create categories like "Private Training" or "Group Classes")
2. Click **+ Add Schedule** within a section
3. Select schedulers from the modal popup
4. Click **Add Selected**
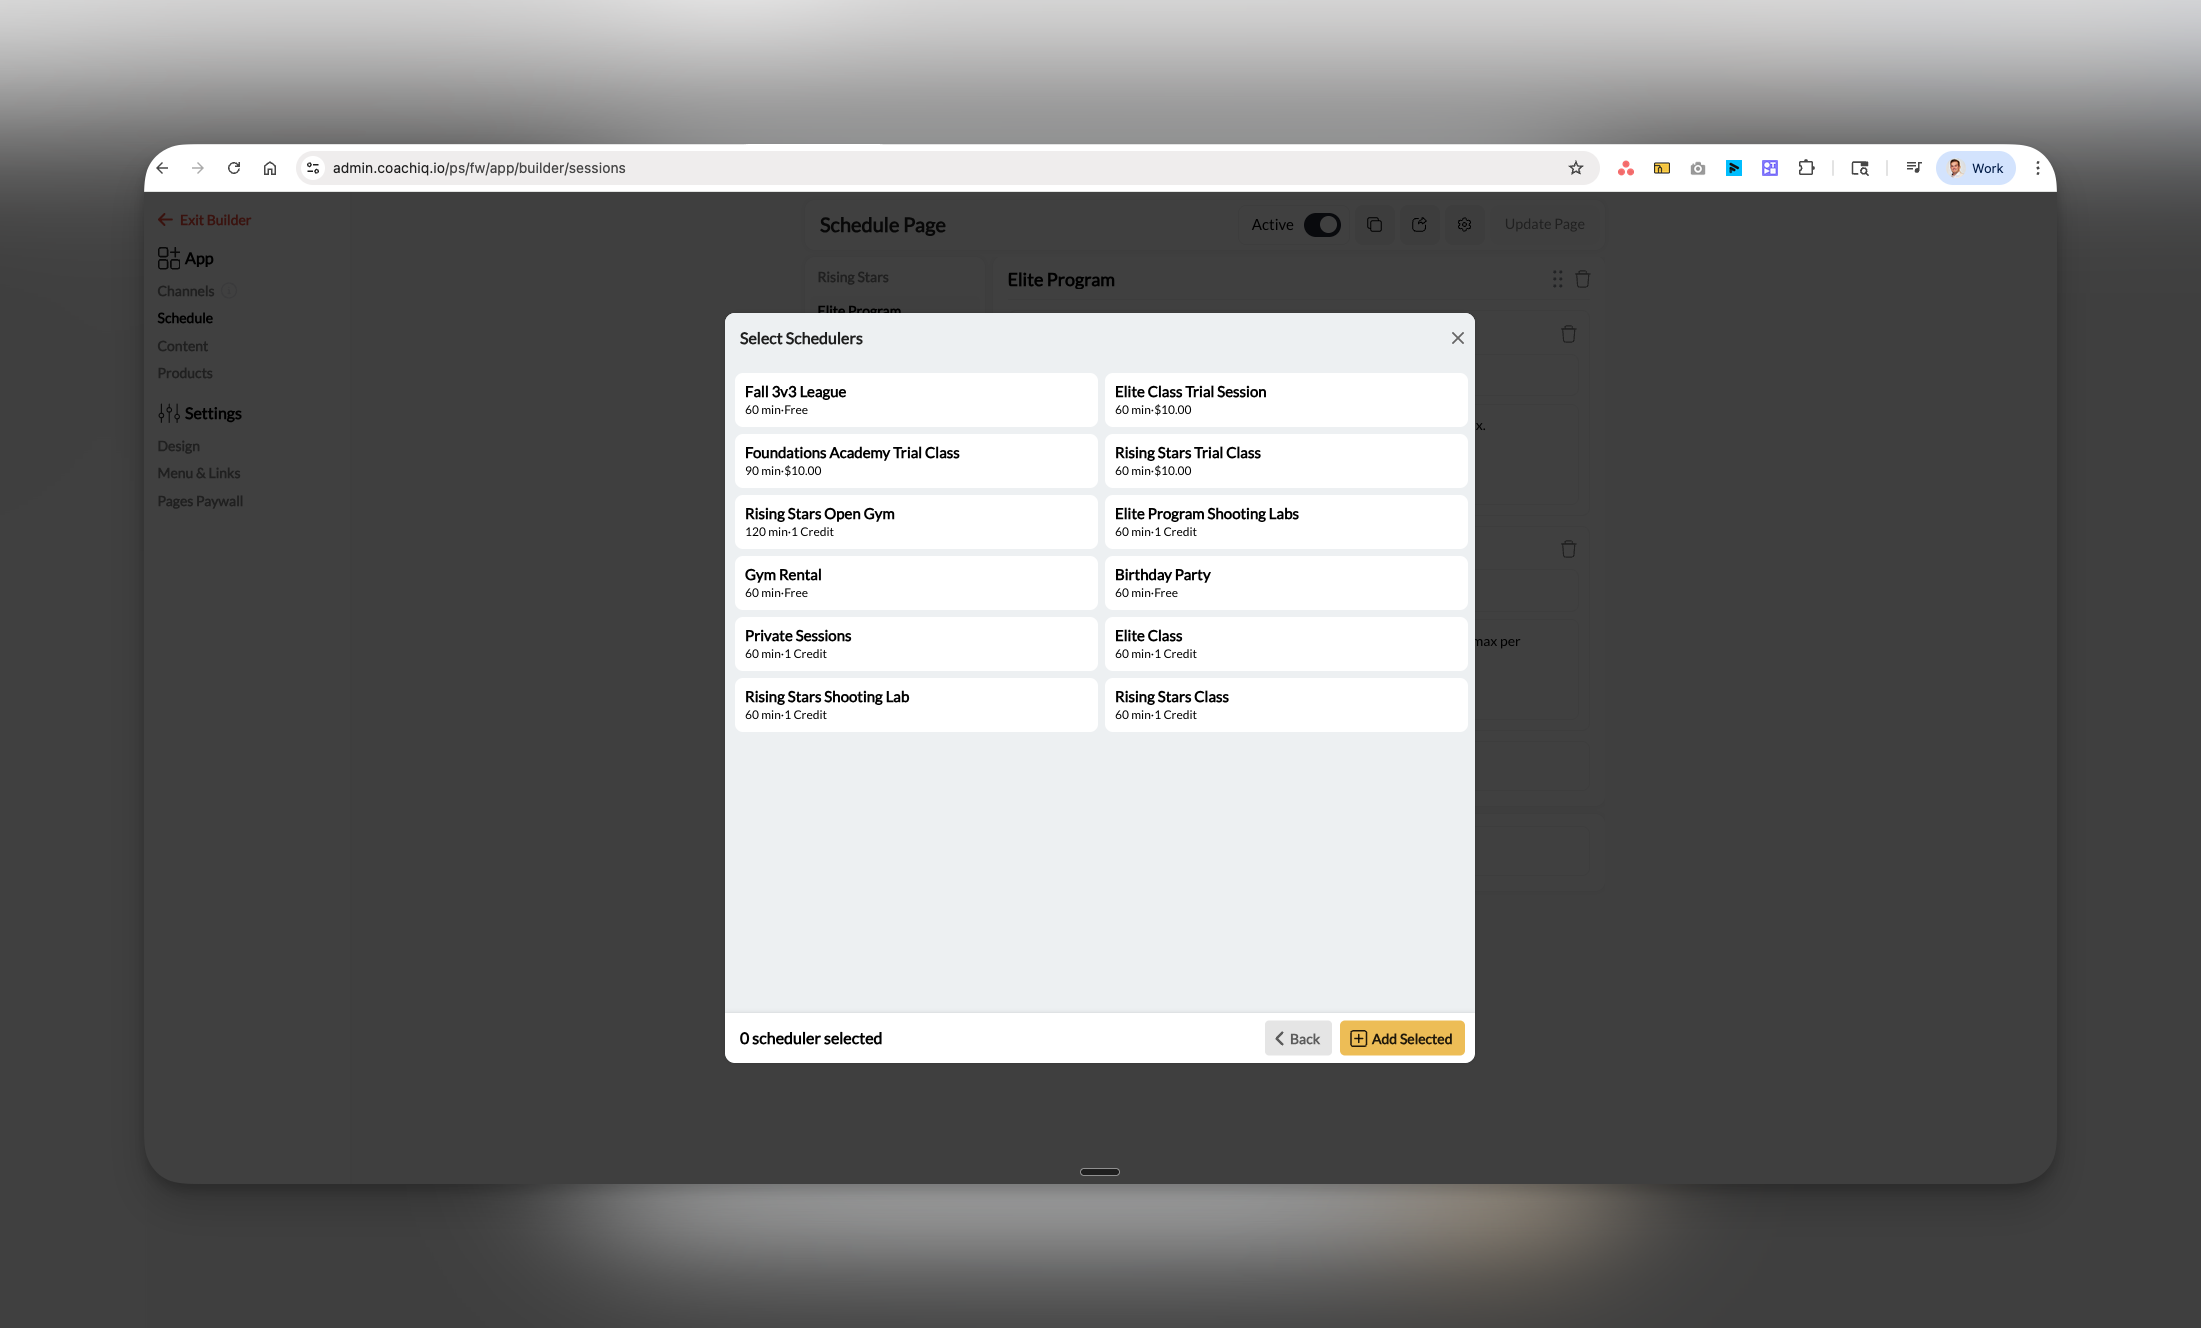 **Only see schedulers you've already created.** If a scheduler isn't in the list, create it first in Schedule → Schedulers.
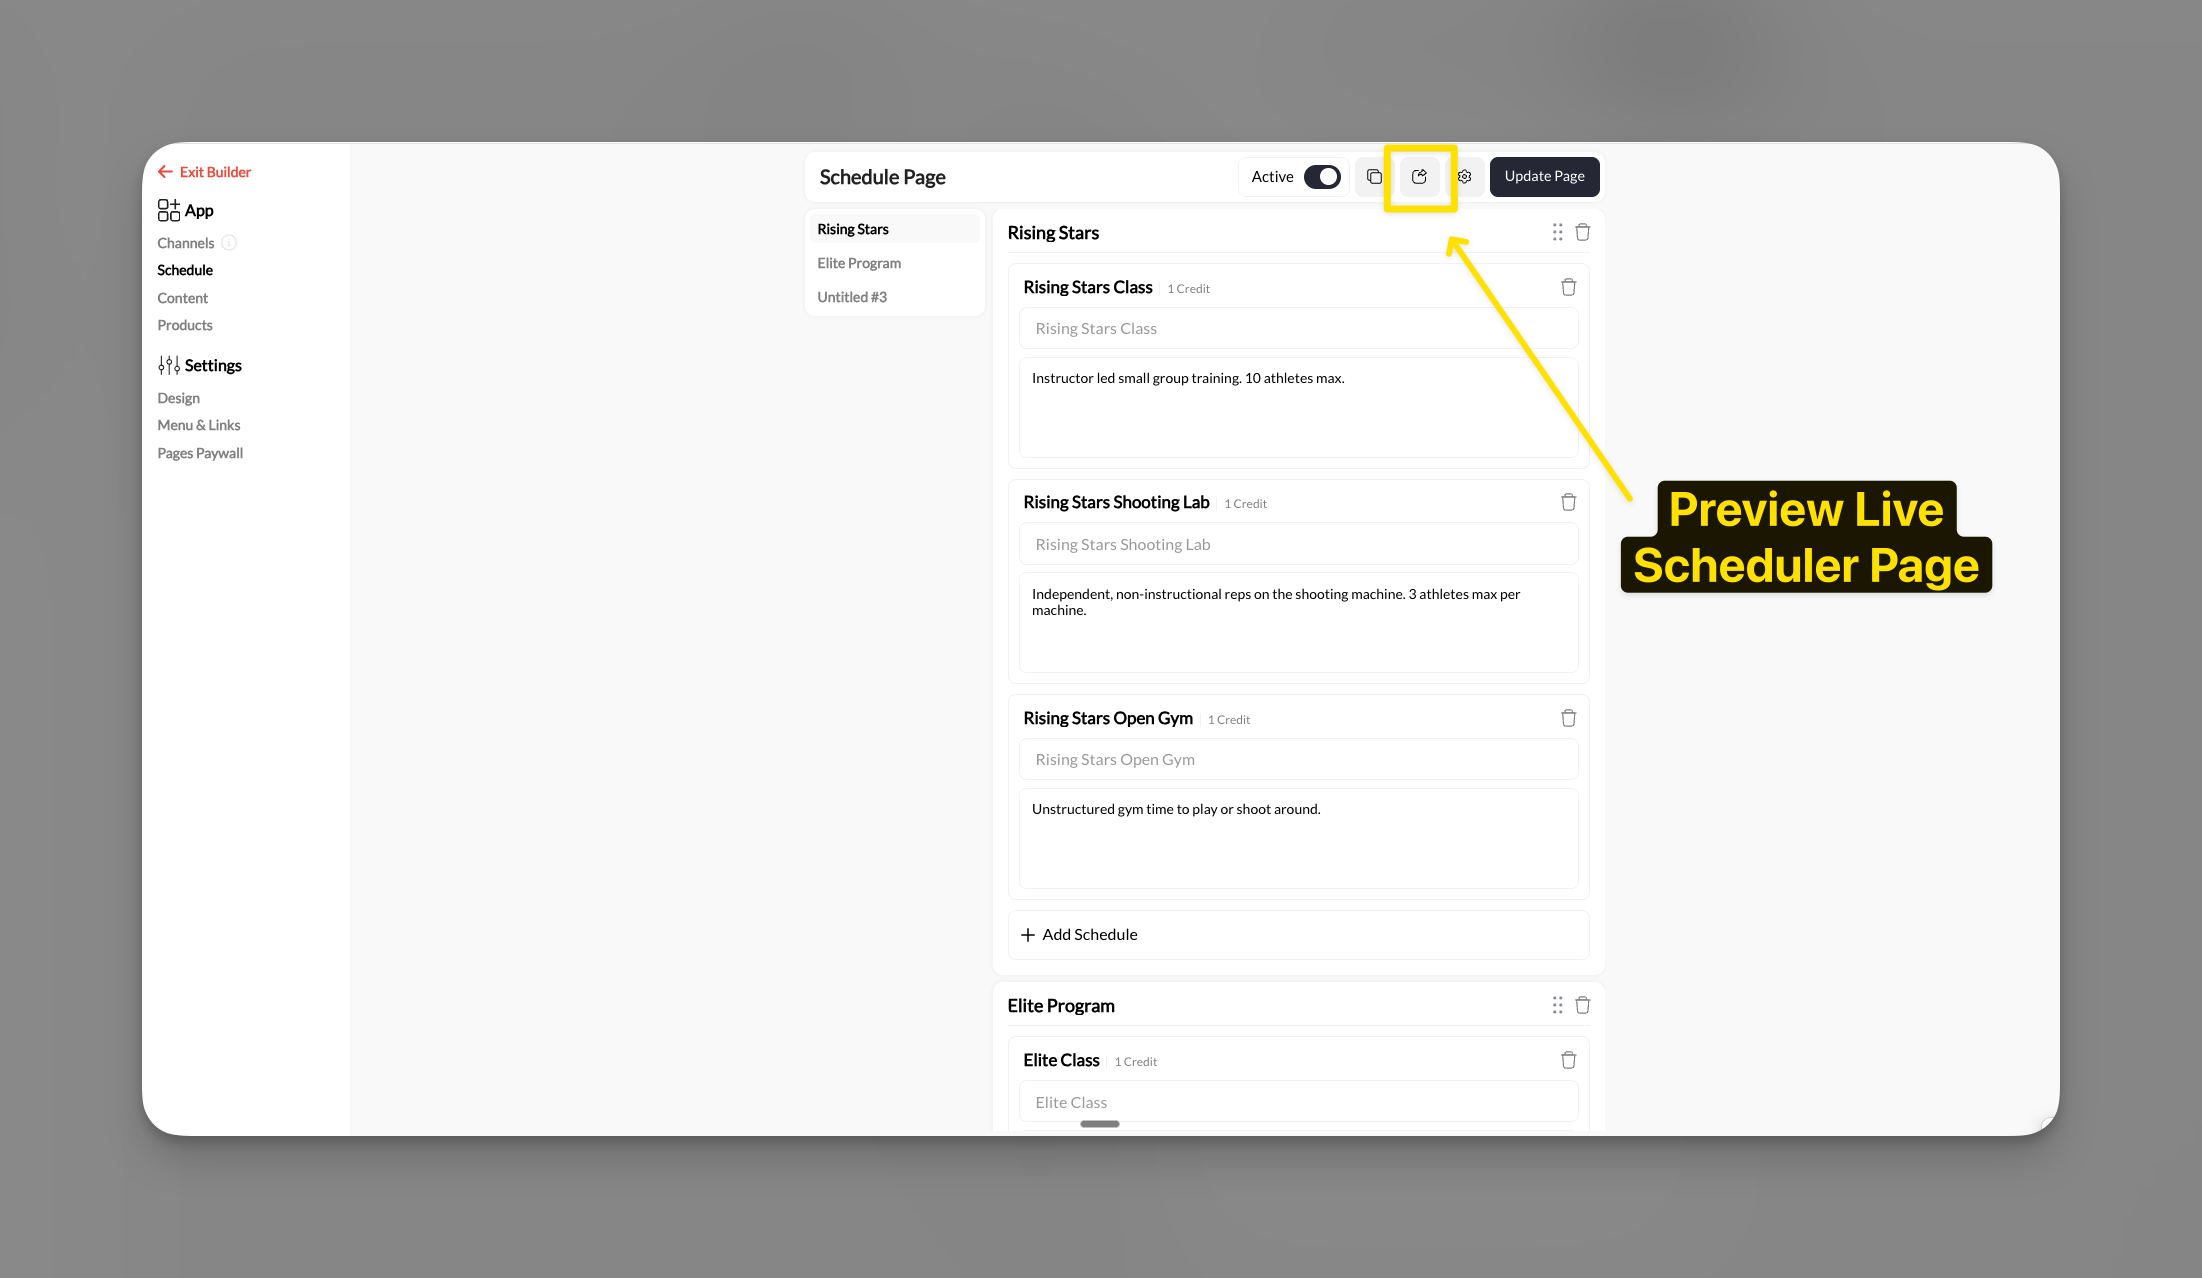
Click the **Preview** button to see the athlete view.
Verify:
* Sections appear in the right order
* Scheduler names are clear
* Credit costs display correctly
Once everything is set click **Update Page.**
Changes are live immediately.
**Only see schedulers you've already created.** If a scheduler isn't in the list, create it first in Schedule → Schedulers.
Click the **Preview** button to see the athlete view.
Verify:
* Sections appear in the right order
* Scheduler names are clear
* Credit costs display correctly
Once everything is set click **Update Page.**
Changes are live immediately.
 **Done!** Athletes can now see and book your schedulers.
## Organization best practices
**Create sections by:**
* **Service type**: "Private Training" | "Group Classes" | "Assessments"
* **Skill level**: "Beginner" | "Intermediate" | "Advanced"
* **Program**: "Rising Stars" | "Elite Training" | "Competition Prep"
* **Location**: "Main Gym" | "North Studio" | "Virtual Sessions"
**Order strategically:**
1. Most popular schedulers at the top
2. Free/trial sessions first (lower barrier to entry)
3. Premium services last (after athlete is engaged)
**Keep it simple:**
* 3-5 sections maximum (less overwhelming)
* 2-5 schedulers per section (easy scanning)
* Short section names (2-3 words)
**Pro tip**: Think like an athlete—organize by what they're looking for, not by your internal structure. Athletes search by "what I want to do," not "how you categorize it."
## Common questions
**Two-step requirement:**
1. Create scheduler (Schedule → Schedulers) ✅
2. Add to athlete portal (Athlete Portal → Schedule) ← Don't forget this step!
Creating a scheduler doesn't automatically make it visible to athletes.
Yes! Click on any scheduler in the app builder to edit:
* Display title (different from scheduler name)
* Description for athletes
* Order within section
Yes, currently all athletes see the same scheduler list. To restrict access:
* Use scheduler settings (capacity, prerequisites)
* Create member-tier-specific schedulers
* Use different booking links for different groups
Athlete Portal → Schedule → Click dots menu (⋮) on scheduler → Delete
**Note**: This only removes it from athlete view—the scheduler still exists in your system.
## Quick troubleshooting
**Athletes can't book even though scheduler is in app:**
* Check scheduler is **Active** (Schedule → Schedulers → Edit scheduler)
* Verify availability is configured
* Confirm athlete has required credits/payment method
* Check if capacity is full
**Changes not appearing:**
* Hard refresh browser (Ctrl+Shift+R or Cmd+Shift+R)
* Check in incognito mode
* Verify you clicked outside fields to save changes
**Credit amounts wrong:**
* Credits are set in scheduler settings, not app builder
* Go to Schedule → Schedulers → Edit scheduler → Payment section
***
## Related articles
Complete guide to customizing athlete app schedule display
Create schedulers before adding them to app
Configure capacity, limits, and permissions
***
**Need detailed customization help?** See the [complete Athlete Portal scheduling guide](/athlete-portal/schedule) for advanced organization strategies, troubleshooting, and best practices.
**Done!** Athletes can now see and book your schedulers.
## Organization best practices
**Create sections by:**
* **Service type**: "Private Training" | "Group Classes" | "Assessments"
* **Skill level**: "Beginner" | "Intermediate" | "Advanced"
* **Program**: "Rising Stars" | "Elite Training" | "Competition Prep"
* **Location**: "Main Gym" | "North Studio" | "Virtual Sessions"
**Order strategically:**
1. Most popular schedulers at the top
2. Free/trial sessions first (lower barrier to entry)
3. Premium services last (after athlete is engaged)
**Keep it simple:**
* 3-5 sections maximum (less overwhelming)
* 2-5 schedulers per section (easy scanning)
* Short section names (2-3 words)
**Pro tip**: Think like an athlete—organize by what they're looking for, not by your internal structure. Athletes search by "what I want to do," not "how you categorize it."
## Common questions
**Two-step requirement:**
1. Create scheduler (Schedule → Schedulers) ✅
2. Add to athlete portal (Athlete Portal → Schedule) ← Don't forget this step!
Creating a scheduler doesn't automatically make it visible to athletes.
Yes! Click on any scheduler in the app builder to edit:
* Display title (different from scheduler name)
* Description for athletes
* Order within section
Yes, currently all athletes see the same scheduler list. To restrict access:
* Use scheduler settings (capacity, prerequisites)
* Create member-tier-specific schedulers
* Use different booking links for different groups
Athlete Portal → Schedule → Click dots menu (⋮) on scheduler → Delete
**Note**: This only removes it from athlete view—the scheduler still exists in your system.
## Quick troubleshooting
**Athletes can't book even though scheduler is in app:**
* Check scheduler is **Active** (Schedule → Schedulers → Edit scheduler)
* Verify availability is configured
* Confirm athlete has required credits/payment method
* Check if capacity is full
**Changes not appearing:**
* Hard refresh browser (Ctrl+Shift+R or Cmd+Shift+R)
* Check in incognito mode
* Verify you clicked outside fields to save changes
**Credit amounts wrong:**
* Credits are set in scheduler settings, not app builder
* Go to Schedule → Schedulers → Edit scheduler → Payment section
***
## Related articles
Complete guide to customizing athlete app schedule display
Create schedulers before adding them to app
Configure capacity, limits, and permissions
***
**Need detailed customization help?** See the [complete Athlete Portal scheduling guide](/athlete-portal/schedule) for advanced organization strategies, troubleshooting, and best practices.