> ## Documentation Index
> Fetch the complete documentation index at: https://help.coachiq.io/llms.txt
> Use this file to discover all available pages before exploring further.
# Creating & Customizing Forms
> Build professional intake forms, registrations, and waivers using templates or from scratch — complete field type reference included.
This guide covers everything you need to build forms in CoachIQ — from quick template setups to fully custom builds.
**Where to find Forms**: Tools → Forms → **+ Create Form**
## Start with a template or blank form
When you create a new form, you choose your starting point:
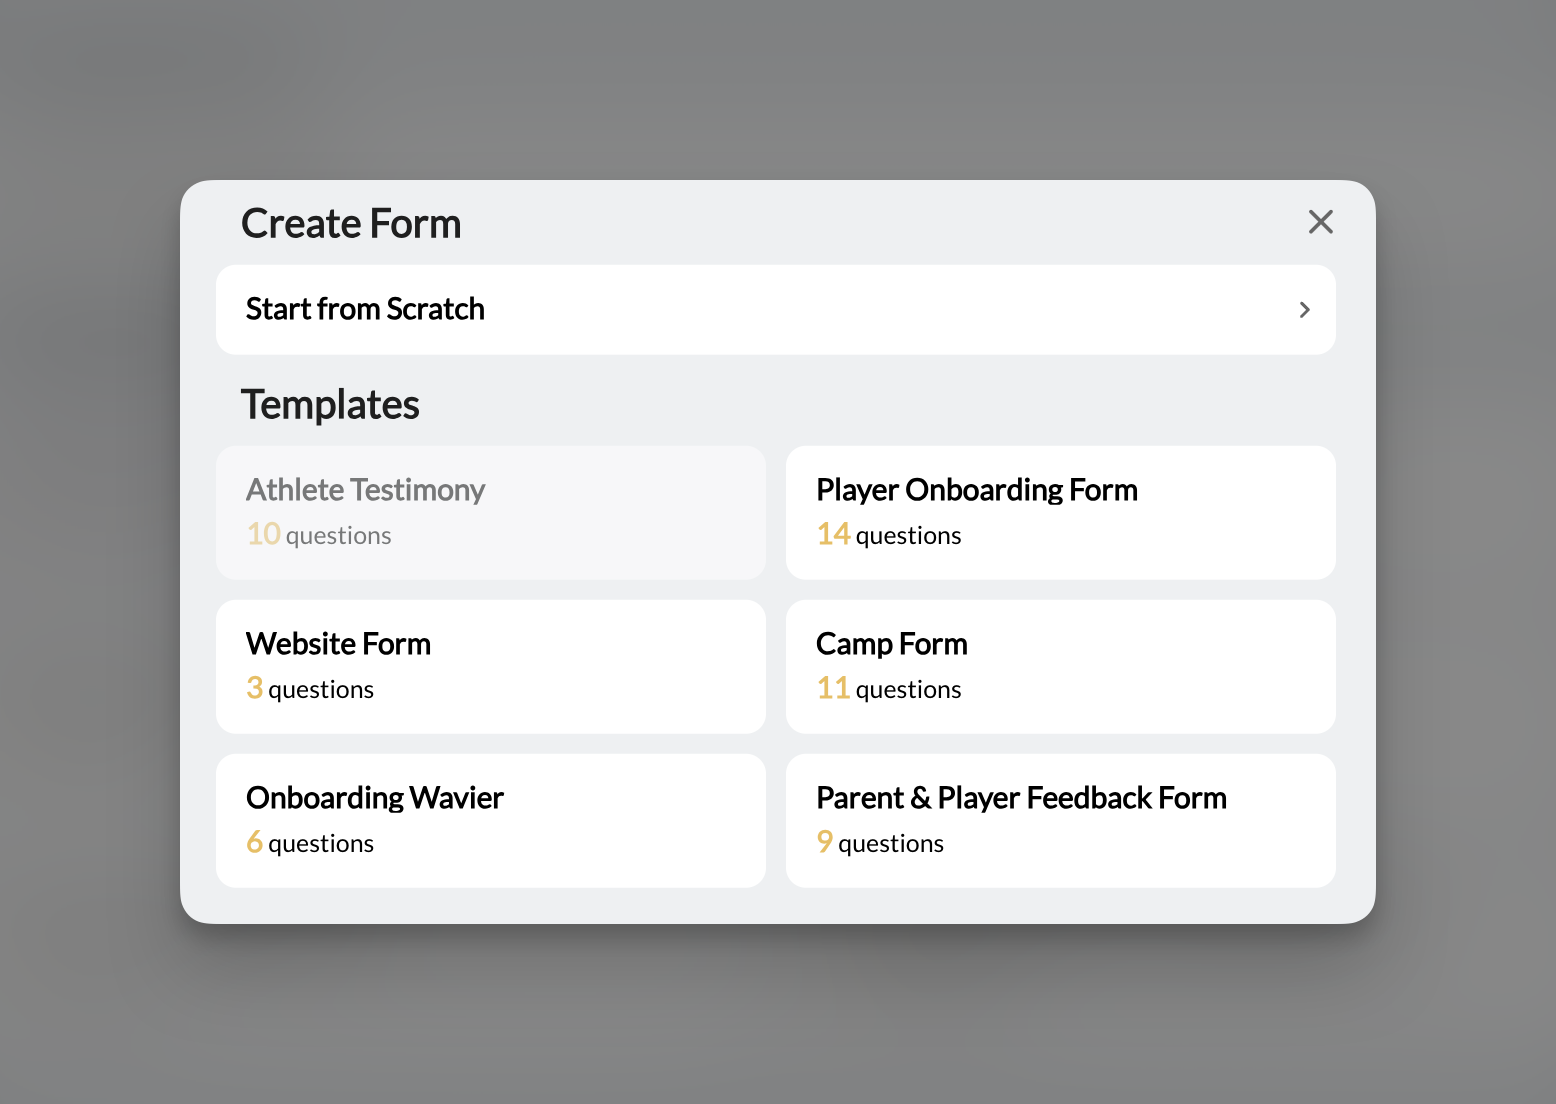 | Option | Best for |
| -------------------------- | ----------------------------------------------------------------------------- |
| **Website Form** | Lead capture on your site — simple contact info + "how did you hear about us" |
| **Player Onboarding Form** | New athlete intake — contact info, goals, experience, parent details |
| **Camp Form** | Event registration — attendee info, emergency contacts, t-shirt sizes |
| **Onboarding Waiver** | Liability agreements — terms display + agreement checkbox |
| **Athlete Testimony** | Collecting reviews — feedback questions + permission to share |
| **Blank Form** | Custom builds — start with nothing and add exactly what you need |
**Start with a template, then customize.** It's faster than building from scratch, and you can add, remove, or edit any field.
## The form builder interface
Once inside the builder, you'll see three areas:
| Area | Purpose |
| ---------------- | -------------------------------------------- |
| **Left sidebar** | Your added fields in order — drag to reorder |
| **Center panel** | Field picker with 5 categories |
| **Right panel** | Live preview of your form |
| Option | Best for |
| -------------------------- | ----------------------------------------------------------------------------- |
| **Website Form** | Lead capture on your site — simple contact info + "how did you hear about us" |
| **Player Onboarding Form** | New athlete intake — contact info, goals, experience, parent details |
| **Camp Form** | Event registration — attendee info, emergency contacts, t-shirt sizes |
| **Onboarding Waiver** | Liability agreements — terms display + agreement checkbox |
| **Athlete Testimony** | Collecting reviews — feedback questions + permission to share |
| **Blank Form** | Custom builds — start with nothing and add exactly what you need |
**Start with a template, then customize.** It's faster than building from scratch, and you can add, remove, or edit any field.
## The form builder interface
Once inside the builder, you'll see three areas:
| Area | Purpose |
| ---------------- | -------------------------------------------- |
| **Left sidebar** | Your added fields in order — drag to reorder |
| **Center panel** | Field picker with 5 categories |
| **Right panel** | Live preview of your form |
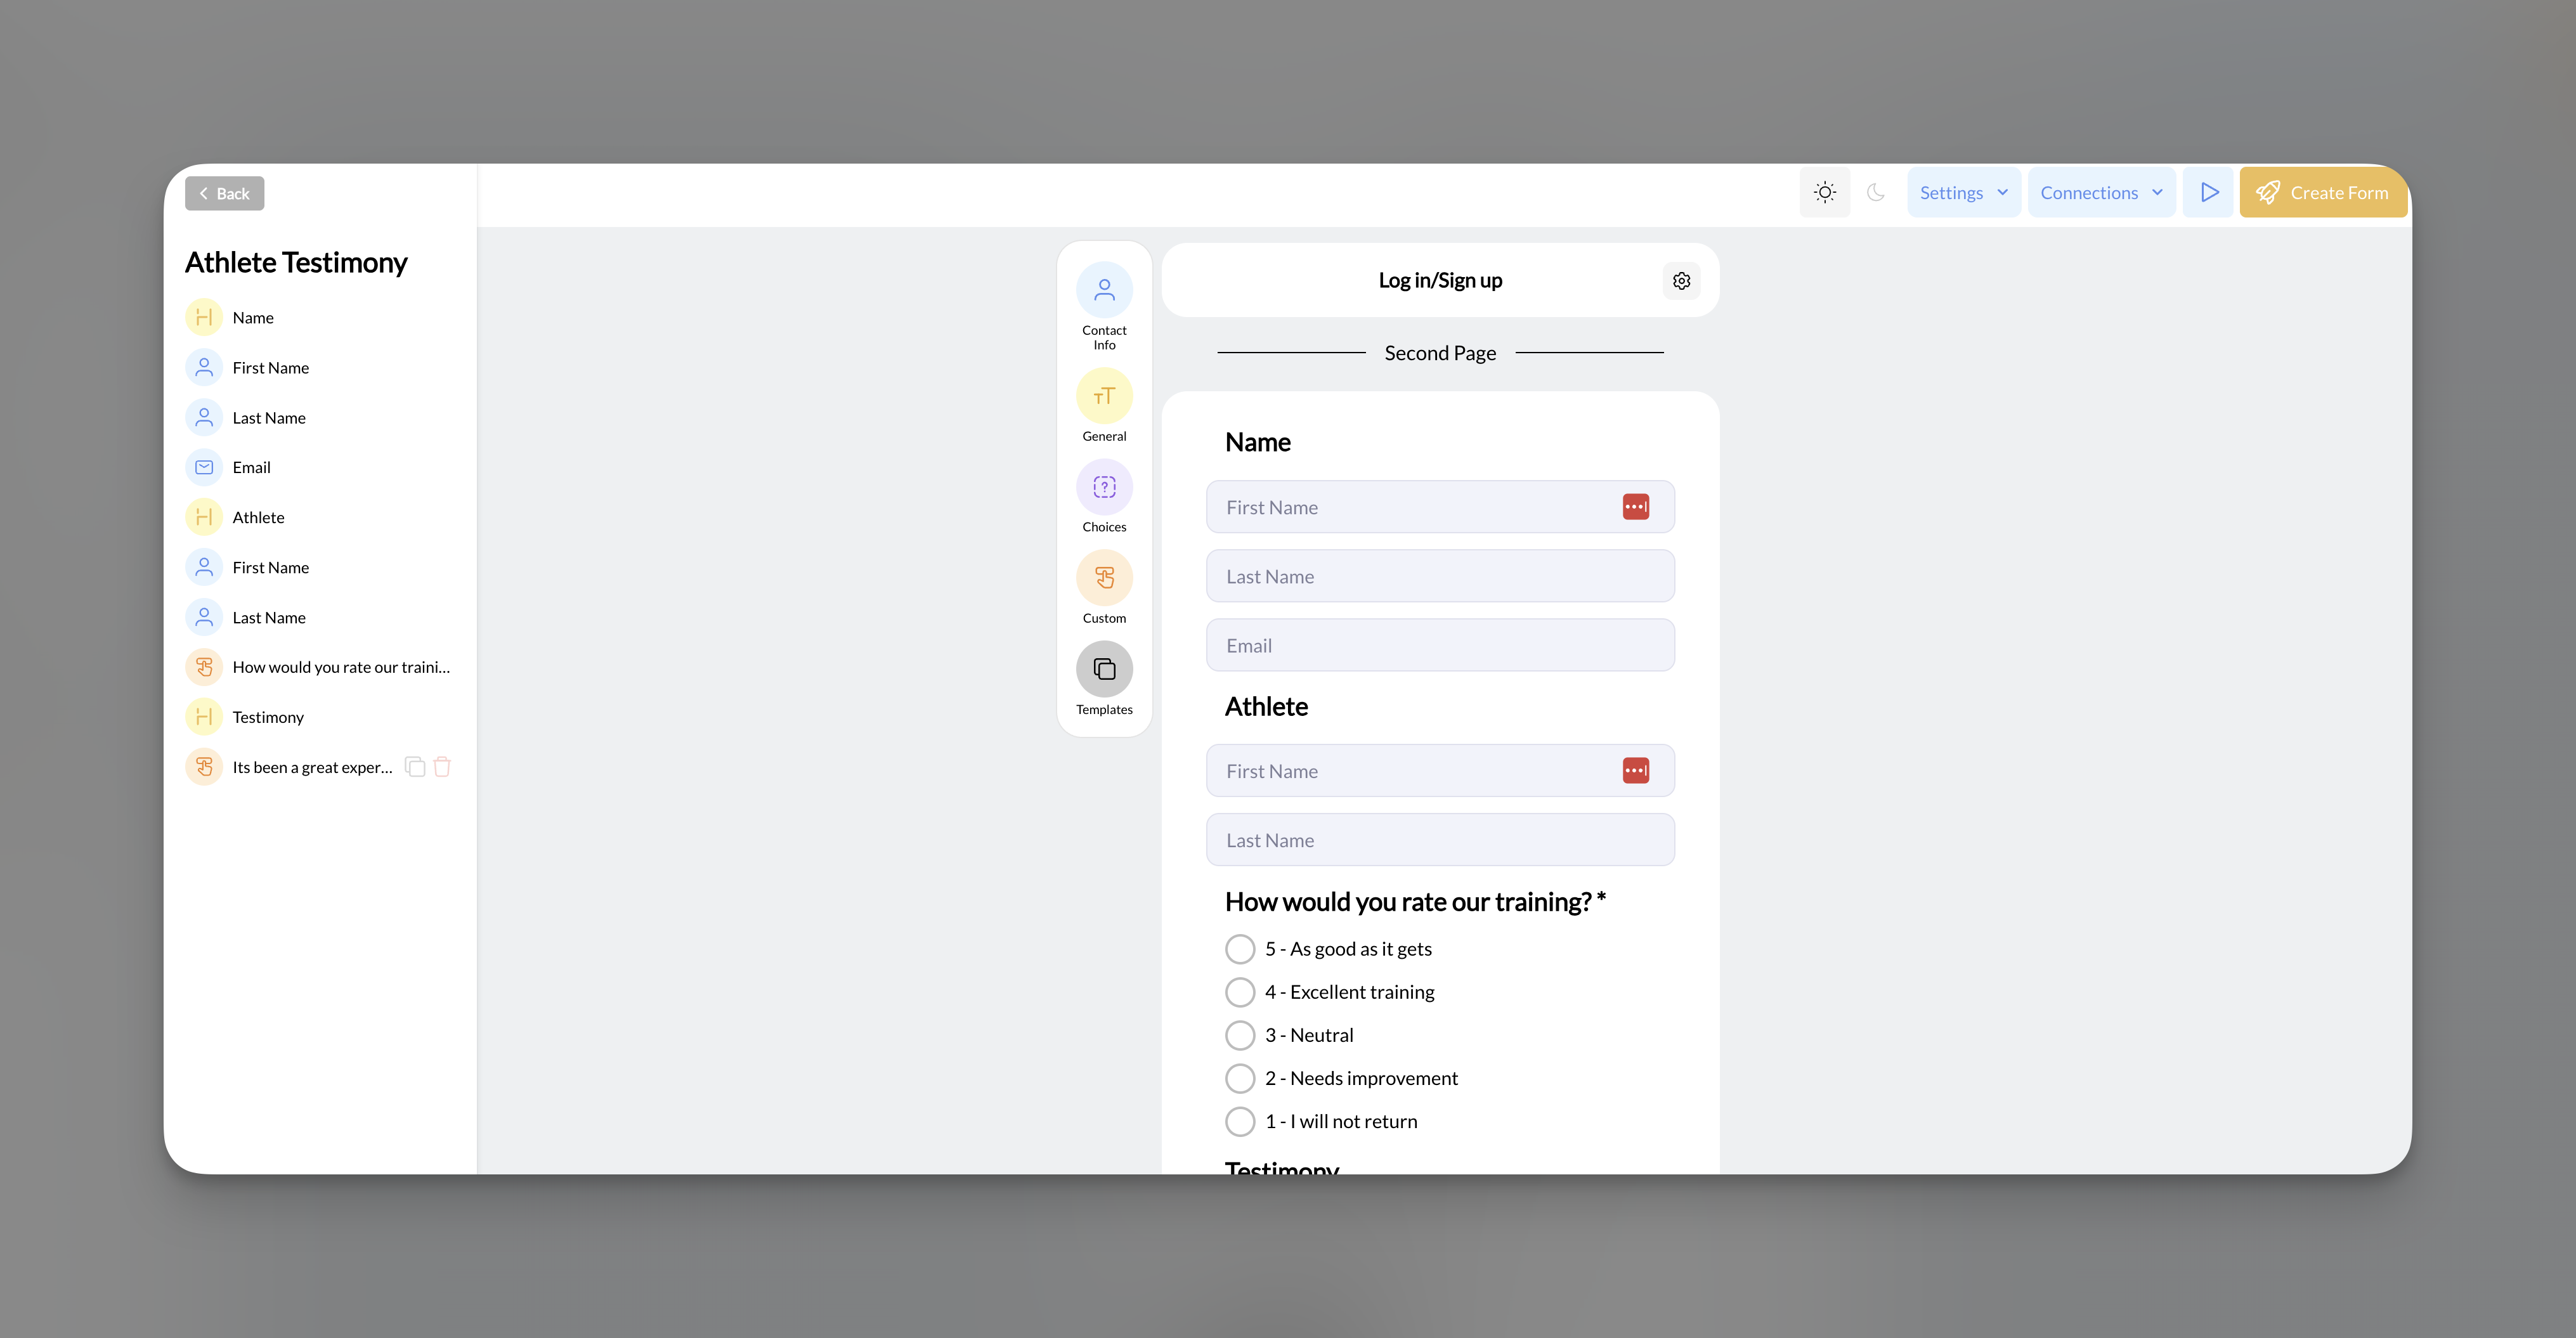 **Top bar options:**
* **Settings** — Button colors, multiple response toggle
* **Connections** — Add products, schedulers, or require login
* **Responses** — View submissions (after publishing)
* **Share** — Get your form link
* **Update Form** — Save and publish changes
## Field types reference
Fields are organized into 5 categories. Click a category icon in the center panel to see available fields.
### Contact Info fields
Pre-built fields designed for athlete and parent data. When you require login/signup (in Connections), these fields sync to the athlete's profile in [People](/people/overview).
| Field | What it captures |
| ------------------ | --------------------------------------------------------------- |
| Athlete First Name | Athlete's first name |
| Athlete Last Name | Athlete's last name |
| Athlete Email | Athlete's email address |
| Athlete Phone | Athlete's phone number |
| Athlete Age | Athlete's age |
| Parent First Name | Parent/guardian first name |
| Parent Last Name | Parent/guardian last name |
| Custom Field | Maps to one of your org's People custom fields (you pick which) |
**Profile sync only works when Login/Signup is required.** Without it, Contact Info fields capture data but don't automatically connect to People profiles.
#### Custom Field — map to your People custom fields
The **Custom Field** option (at the bottom of the **Contact Info** category) lets a form write to your organization's **People custom fields** — the same custom fields on an athlete's profile in [People](/people/overview), like "Started Training" or "Child Name".
1. In the form builder, open the **Contact Info** category and select **Custom Field**.
2. In the **Custom Field** dropdown, choose which custom field to map to (e.g., "Child Name").
3. Toggle **Required?** if the answer is mandatory.
With **Login/Signup required**, the athlete's answer writes straight to that custom field on their People profile — so an onboarding form can fully populate a new athlete's custom fields, the same way the waiver field connects to the Waivers tab.
### General fields
Content elements that add structure and context to your form — not questions.
| Field | What it does |
| -------------------- | ------------------------------------------------- |
| Media | Embed an image or video |
| Heading | Add a section title |
| Plain Text | Add instructions or descriptions |
| Upload File | Let respondents attach files (PDFs, images, etc.) |
| Description of Terms | Display legal text (for waivers) |
### Choices fields
Pre-built selection questions.
| Field | What it does |
| -------- | --------------------------------- |
| Checkbox | Multiple selections allowed |
| Yes / No | Binary choice (two radio buttons) |
### Custom fields
Build your own questions with these input types:
| Field | Best for | Example |
| ------------- | ------------------------------ | ----------------------------------------------------- |
| Text | Short answers | "What position do you play?" |
| Phone | Phone number input | Secondary contact number |
| Text Area | Long answers | "What are your training goals?" |
| Checkbox | Multiple selections | "Which days work for you?" (Mon, Tue, Wed...) |
| Select Box | Single selection (dropdown) | "Experience level" (Beginner, Intermediate, Advanced) |
| Radio Buttons | Single selection (all visible) | "I am the..." (Parent, Athlete) |
| Country | Country selection | Pre-populated country dropdown |
### Templates category
This shows the same template options from form creation — useful if you started blank and want to reference a template's structure.
***
## Build a form step-by-step
Go to **Tools → Forms** and click **+ Create Form**. Choose a template or start blank. Give your form a name.
Click a category in the center panel, then click a field to add it. The field appears in your left sidebar and right preview.
For custom fields, you'll see a modal to configure:
* Field type (Text, Select Box, etc.)
* Label (the question text)
* Default value (optional)
Drag fields in the left sidebar to change their order. The preview updates automatically.
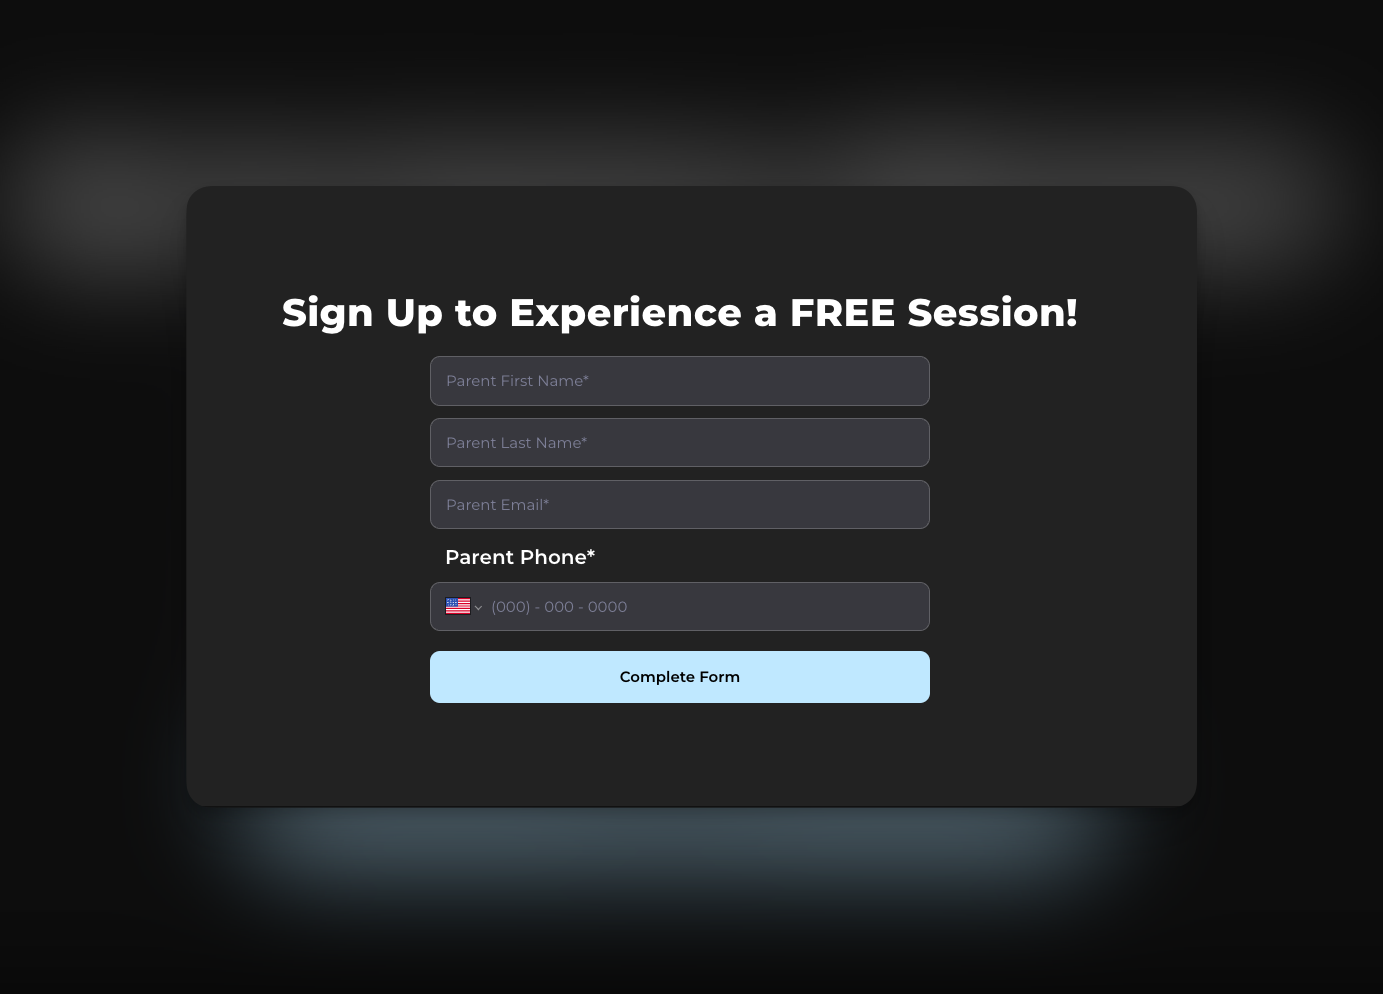
Click a field to select it, then mark it as required. Required fields show an asterisk (\*) and must be completed to submit.
Use **Heading** fields to create sections (e.g., "Athlete Information", "Parent/Guardian Details"). Use **Plain Text** to add instructions or context.
Click the preview button to see exactly what respondents will see. Test the flow before publishing.
Click **Update Form** to save. Your form is now live and ready to share.
## Customize form design
Match your form to your brand using the **Settings** menu:
| Setting | What it controls |
| ----------------- | ------------------------------------- |
| Button Color | Background color of the submit button |
| Button Text Color | Text color on the submit button |
**Use your brand colors.** If your CoachIQ website uses a specific color scheme, match your form buttons for a consistent experience.
**Top bar options:**
* **Settings** — Button colors, multiple response toggle
* **Connections** — Add products, schedulers, or require login
* **Responses** — View submissions (after publishing)
* **Share** — Get your form link
* **Update Form** — Save and publish changes
## Field types reference
Fields are organized into 5 categories. Click a category icon in the center panel to see available fields.
### Contact Info fields
Pre-built fields designed for athlete and parent data. When you require login/signup (in Connections), these fields sync to the athlete's profile in [People](/people/overview).
| Field | What it captures |
| ------------------ | --------------------------------------------------------------- |
| Athlete First Name | Athlete's first name |
| Athlete Last Name | Athlete's last name |
| Athlete Email | Athlete's email address |
| Athlete Phone | Athlete's phone number |
| Athlete Age | Athlete's age |
| Parent First Name | Parent/guardian first name |
| Parent Last Name | Parent/guardian last name |
| Custom Field | Maps to one of your org's People custom fields (you pick which) |
**Profile sync only works when Login/Signup is required.** Without it, Contact Info fields capture data but don't automatically connect to People profiles.
#### Custom Field — map to your People custom fields
The **Custom Field** option (at the bottom of the **Contact Info** category) lets a form write to your organization's **People custom fields** — the same custom fields on an athlete's profile in [People](/people/overview), like "Started Training" or "Child Name".
1. In the form builder, open the **Contact Info** category and select **Custom Field**.
2. In the **Custom Field** dropdown, choose which custom field to map to (e.g., "Child Name").
3. Toggle **Required?** if the answer is mandatory.
With **Login/Signup required**, the athlete's answer writes straight to that custom field on their People profile — so an onboarding form can fully populate a new athlete's custom fields, the same way the waiver field connects to the Waivers tab.
### General fields
Content elements that add structure and context to your form — not questions.
| Field | What it does |
| -------------------- | ------------------------------------------------- |
| Media | Embed an image or video |
| Heading | Add a section title |
| Plain Text | Add instructions or descriptions |
| Upload File | Let respondents attach files (PDFs, images, etc.) |
| Description of Terms | Display legal text (for waivers) |
### Choices fields
Pre-built selection questions.
| Field | What it does |
| -------- | --------------------------------- |
| Checkbox | Multiple selections allowed |
| Yes / No | Binary choice (two radio buttons) |
### Custom fields
Build your own questions with these input types:
| Field | Best for | Example |
| ------------- | ------------------------------ | ----------------------------------------------------- |
| Text | Short answers | "What position do you play?" |
| Phone | Phone number input | Secondary contact number |
| Text Area | Long answers | "What are your training goals?" |
| Checkbox | Multiple selections | "Which days work for you?" (Mon, Tue, Wed...) |
| Select Box | Single selection (dropdown) | "Experience level" (Beginner, Intermediate, Advanced) |
| Radio Buttons | Single selection (all visible) | "I am the..." (Parent, Athlete) |
| Country | Country selection | Pre-populated country dropdown |
### Templates category
This shows the same template options from form creation — useful if you started blank and want to reference a template's structure.
***
## Build a form step-by-step
Go to **Tools → Forms** and click **+ Create Form**. Choose a template or start blank. Give your form a name.
Click a category in the center panel, then click a field to add it. The field appears in your left sidebar and right preview.
For custom fields, you'll see a modal to configure:
* Field type (Text, Select Box, etc.)
* Label (the question text)
* Default value (optional)
Drag fields in the left sidebar to change their order. The preview updates automatically.
Click a field to select it, then mark it as required. Required fields show an asterisk (\*) and must be completed to submit.
Use **Heading** fields to create sections (e.g., "Athlete Information", "Parent/Guardian Details"). Use **Plain Text** to add instructions or context.
Click the preview button to see exactly what respondents will see. Test the flow before publishing.
Click **Update Form** to save. Your form is now live and ready to share.
## Customize form design
Match your form to your brand using the **Settings** menu:
| Setting | What it controls |
| ----------------- | ------------------------------------- |
| Button Color | Background color of the submit button |
| Button Text Color | Text color on the submit button |
**Use your brand colors.** If your CoachIQ website uses a specific color scheme, match your form buttons for a consistent experience.
 ## Form settings
Access these in the **Settings** dropdown:
### Multiple responses
* **ON** — Same person can submit the form multiple times
* **OFF** — One submission per person (requires login)
Use cases:
* **ON**: Feedback forms, session check-ins
* **OFF**: Registration forms, waivers (one per athlete)
## How connections add pages
When you add Products, Schedulers, or Login/Signup via the **Connections** menu, each becomes a separate page in the form flow:
```
Page 1: Form fields (your questions)
↓
Page 2: Login/Signup (if enabled)
↓
Page 3: Product payment (if added)
↓
Page 4: Scheduler booking (if added)
↓
Complete
```
This is the only way to create multi-page forms. There's no manual page break option — the pages come from connections you add.
## Form building tips
Every additional field reduces completion rates. Ask only what you need. You can always collect more info later.
Start with simple fields (name, email) before asking longer questions (goals, experience). This builds momentum.
For longer forms, break content into clear sections: "Athlete Info", "Parent Info", "Training Preferences". Makes scanning easier.
Always preview your form. Check that required fields are marked, questions make sense, and the flow feels natural.
Consistent colors build trust. If athletes click a form link from your site, it should feel like the same experience.
## What you can't do (yet)
* **Duplicate forms** — Each form must be built individually
* **Conditional logic** — Can't show/hide fields based on answers
* **Manual page breaks** — Multi-page only comes from connections
* **Save partial responses** — Respondents must complete in one session
## Next steps
Add products and schedulers to your forms
Get your link, embed on your website, and configure completion actions
## Related articles
Understand the products you can connect to forms for payment collection
Build a scheduler to embed in your form flow for session bookings
Trigger automated actions when forms are submitted
See how form submissions connect to athlete profiles when login is required
## Form settings
Access these in the **Settings** dropdown:
### Multiple responses
* **ON** — Same person can submit the form multiple times
* **OFF** — One submission per person (requires login)
Use cases:
* **ON**: Feedback forms, session check-ins
* **OFF**: Registration forms, waivers (one per athlete)
## How connections add pages
When you add Products, Schedulers, or Login/Signup via the **Connections** menu, each becomes a separate page in the form flow:
```
Page 1: Form fields (your questions)
↓
Page 2: Login/Signup (if enabled)
↓
Page 3: Product payment (if added)
↓
Page 4: Scheduler booking (if added)
↓
Complete
```
This is the only way to create multi-page forms. There's no manual page break option — the pages come from connections you add.
## Form building tips
Every additional field reduces completion rates. Ask only what you need. You can always collect more info later.
Start with simple fields (name, email) before asking longer questions (goals, experience). This builds momentum.
For longer forms, break content into clear sections: "Athlete Info", "Parent Info", "Training Preferences". Makes scanning easier.
Always preview your form. Check that required fields are marked, questions make sense, and the flow feels natural.
Consistent colors build trust. If athletes click a form link from your site, it should feel like the same experience.
## What you can't do (yet)
* **Duplicate forms** — Each form must be built individually
* **Conditional logic** — Can't show/hide fields based on answers
* **Manual page breaks** — Multi-page only comes from connections
* **Save partial responses** — Respondents must complete in one session
## Next steps
Add products and schedulers to your forms
Get your link, embed on your website, and configure completion actions
## Related articles
Understand the products you can connect to forms for payment collection
Build a scheduler to embed in your form flow for session bookings
Trigger automated actions when forms are submitted
See how form submissions connect to athlete profiles when login is required