> ## Documentation Index
> Fetch the complete documentation index at: https://help.coachiq.io/llms.txt
> Use this file to discover all available pages before exploring further.
# Create Interactive Training Lessons for Athletes
> Learn how to build engaging, swipeable lessons in CoachIQ's Lesson Builder. Add videos, quizzes, text overlays, and let athletes upload their own content for review.
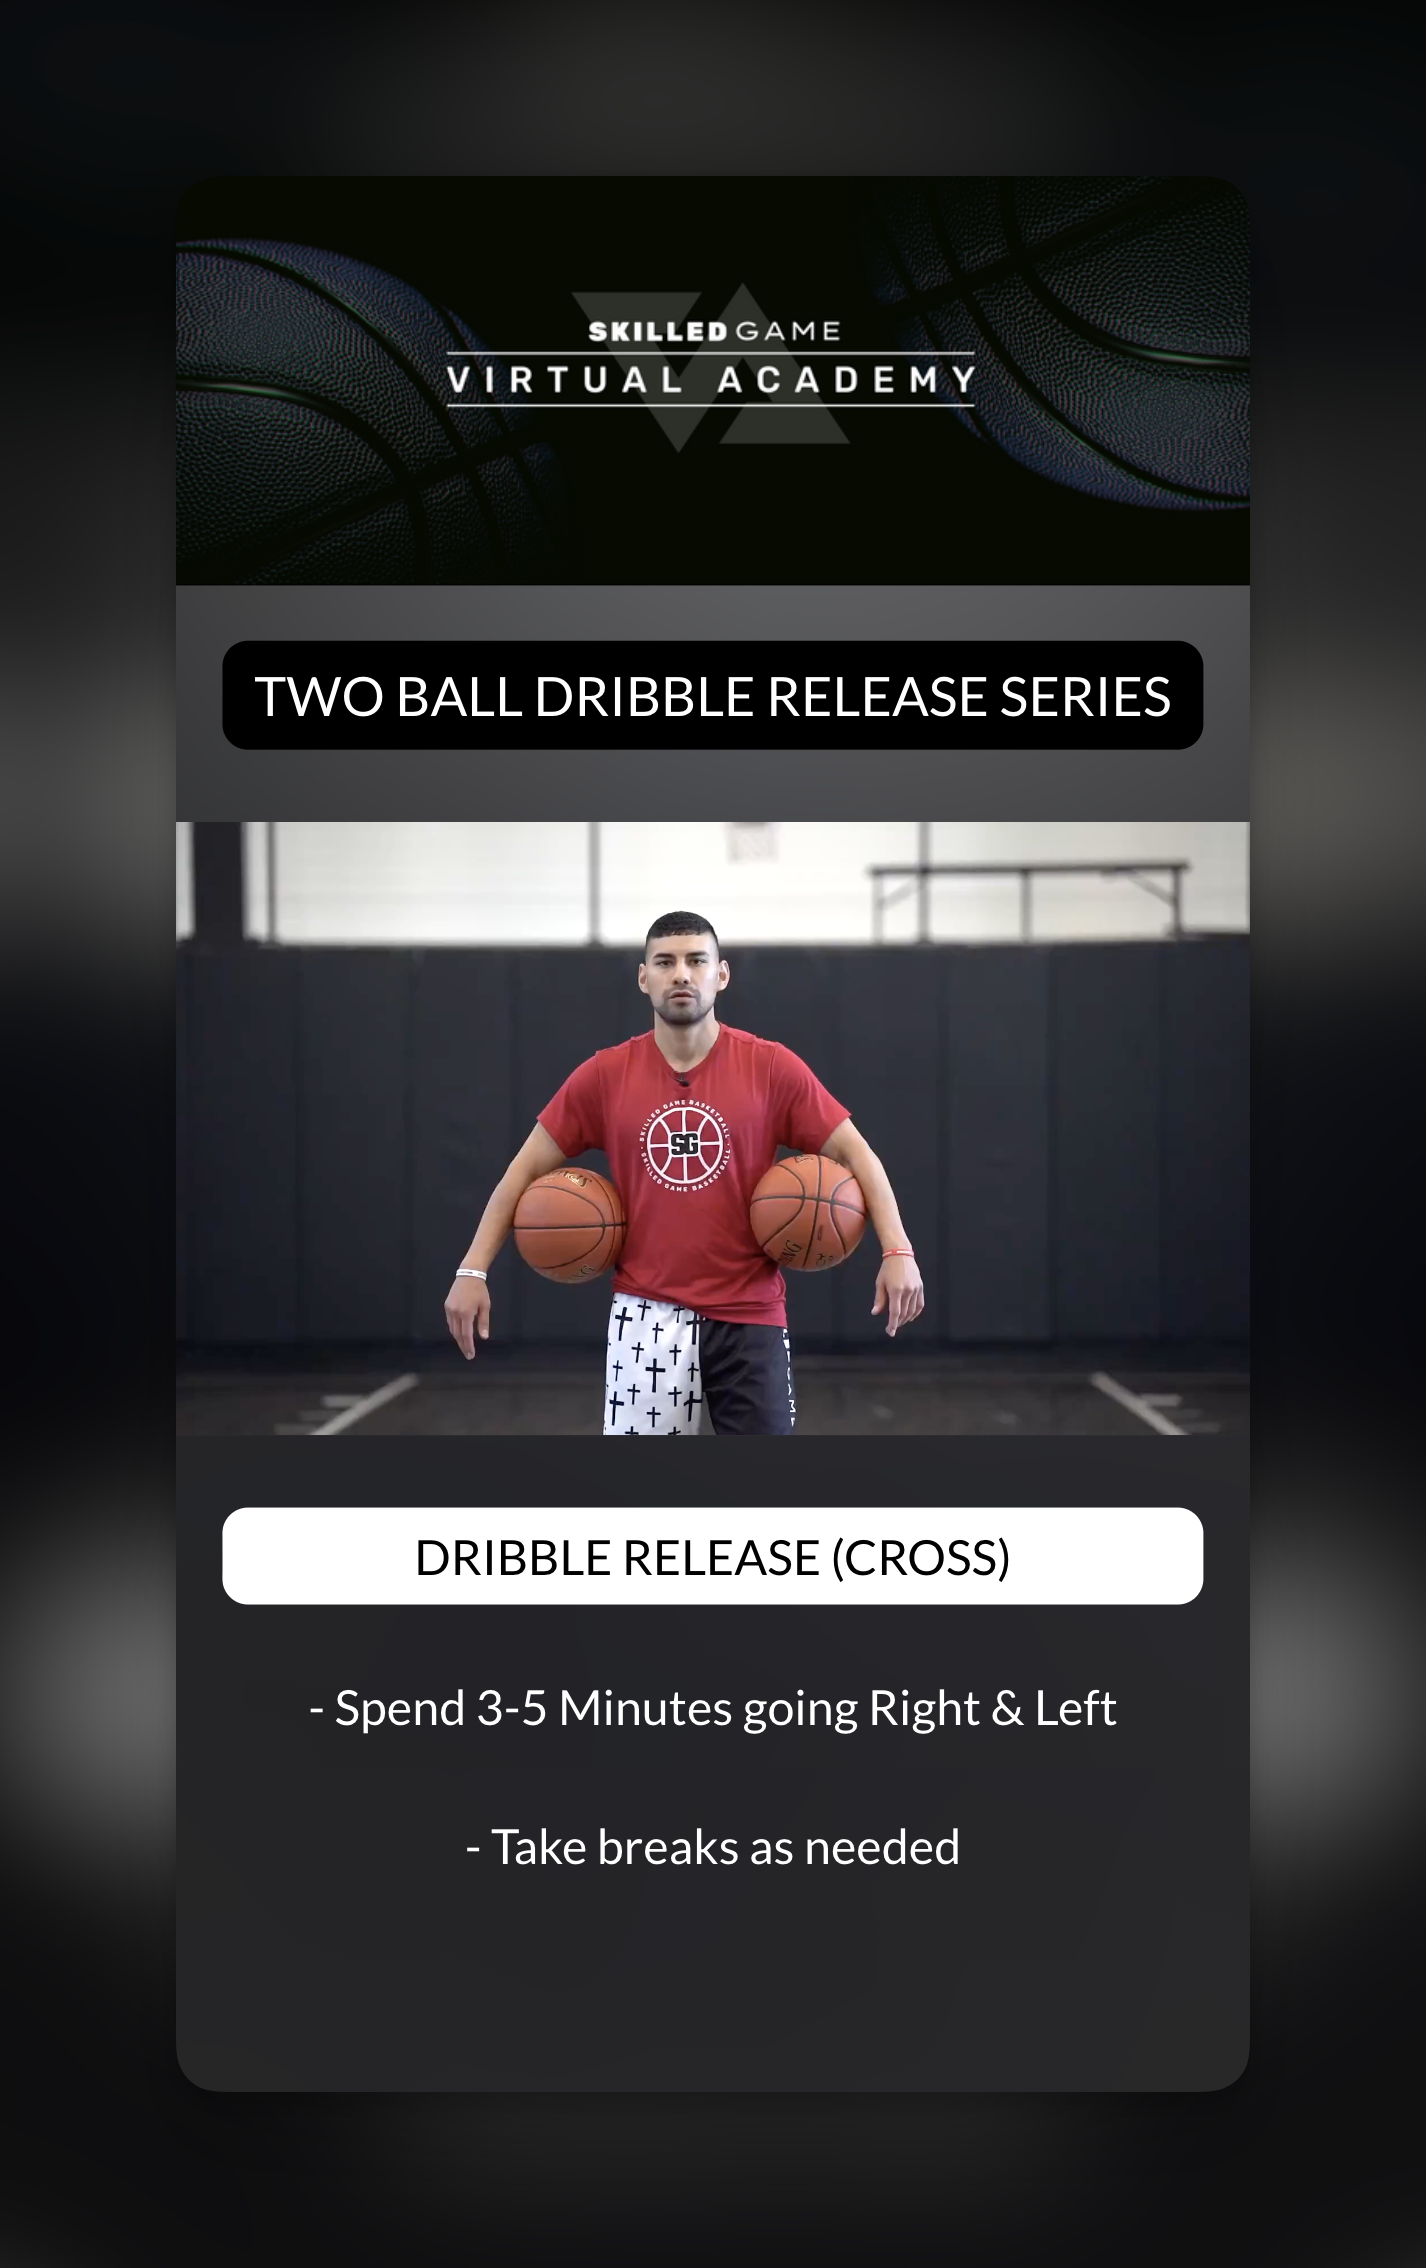
Lessons are interactive, slide-based content your athletes swipe through—like Instagram Stories, but for coaching. Each lesson can combine videos, images, text, quizzes, and more into an engaging experience that goes beyond just watching a video.
**Where to find Lessons**: Dashboard → Content → [Media Hub](/content/media-overview) → Create Lesson button
 ## What makes lessons powerful
Unlike standalone videos, lessons let you:
* **Layer text and instructions** over your media
* **Add quizzes** to check athlete understanding
* **Collect written feedback** with form fields
* **Let athletes upload** their own videos for you to review
* **Guide navigation** with buttons and links
* **Create a structured experience** athletes complete slide by slide
**Best for**: Skill breakdowns, drill explanations, educational content, form checks, and any training that benefits from interaction beyond just "watch this video."
## How to create your first lesson
Go to **Content → Media Hub** and click the **Create Lesson** button in the top right.
You can also click **Copy Existing** to duplicate an existing lesson as a starting point.
Click the **Settings** icon in the top bar to configure:
* **Lesson Name**: What athletes will see (e.g., "Shooting Form Basics")
* **Thumbnail**: The cover image shown in programs
* **Tags**: For organizing in Media Hub
Your lesson starts with one blank slide. Click on any element type in the toolbar to add content:
* **Media**: Add a video or image from your Media Hub
* **Text**: Add text overlays
* **Button**: Add navigation or links
* **Quiz**: Add multiple choice questions
* **Form**: Add free-text input fields
* **Upload**: Let athletes submit their own content
Click **Add Slide** at the bottom of the builder to create additional slides. Athletes will swipe left/right to navigate between them.
Click the **Preview** button (play icon) in the top bar to see exactly what athletes will experience. Swipe or click arrows to navigate through slides.
Click **Update Lesson** (yellow button, top right) to save your work.
**Critical**: The Lesson Builder does NOT auto-save. If you navigate away without clicking Update Lesson, you will lose all unsaved changes.
## Understanding the Lesson Builder interface
The builder is divided into four main areas:
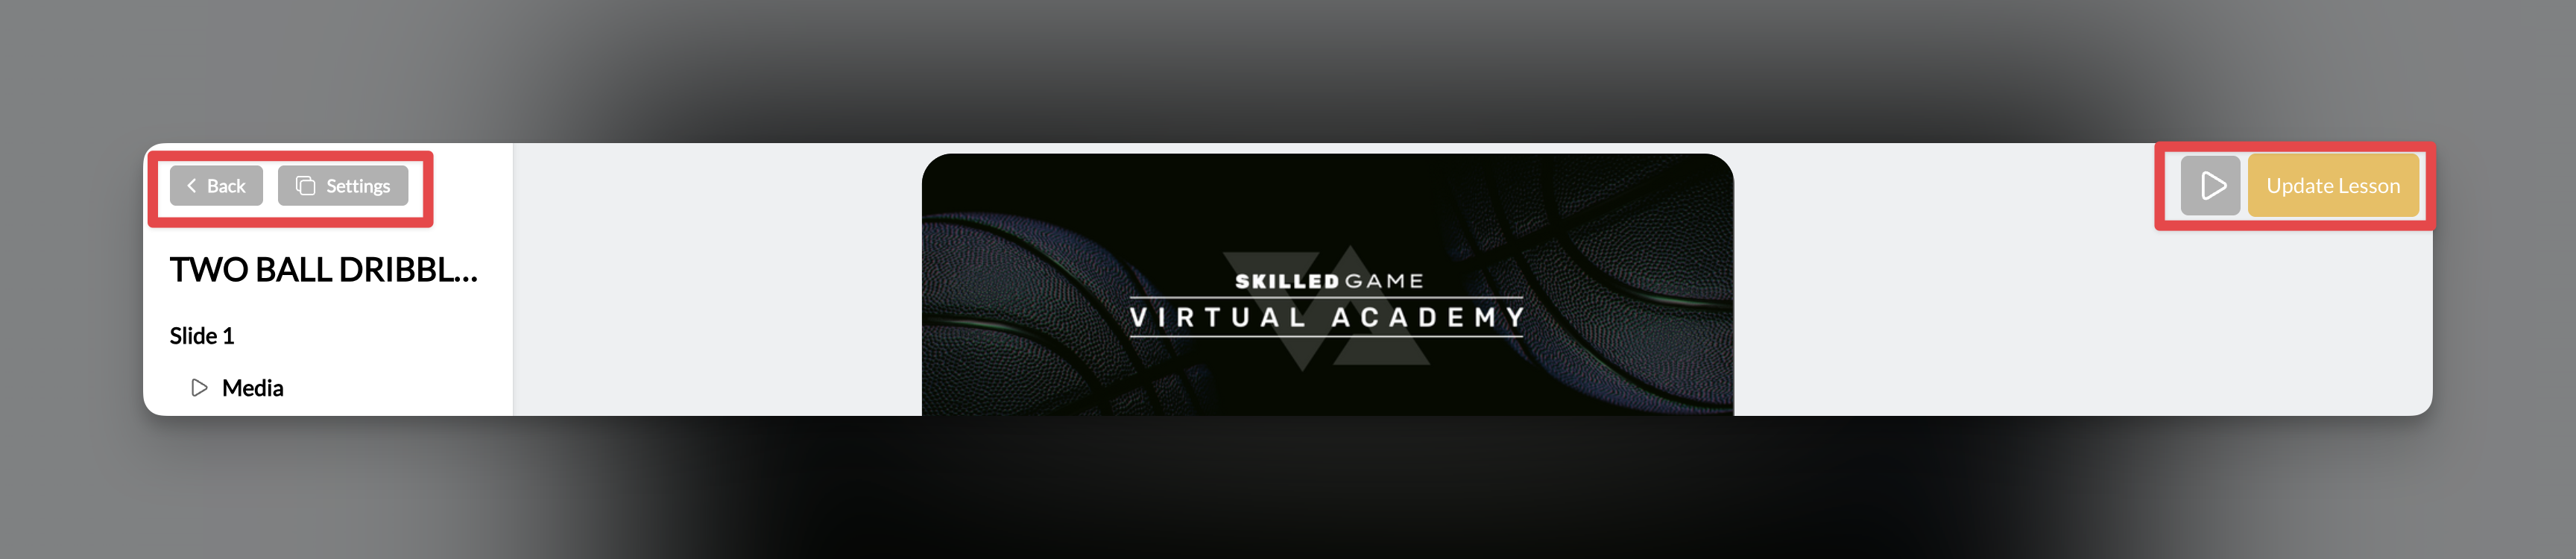
### Top bar
| Element | Function |
| ----------------------- | ----------------------------------------------- |
| **← Back** | Return to Media Hub (prompts to save if needed) |
| **Settings** | Lesson name, thumbnail, and tags |
| **Preview** (play icon) | See the lesson as athletes will experience it |
| **Update Lesson** | Save all changes (yellow button) |
## What makes lessons powerful
Unlike standalone videos, lessons let you:
* **Layer text and instructions** over your media
* **Add quizzes** to check athlete understanding
* **Collect written feedback** with form fields
* **Let athletes upload** their own videos for you to review
* **Guide navigation** with buttons and links
* **Create a structured experience** athletes complete slide by slide
**Best for**: Skill breakdowns, drill explanations, educational content, form checks, and any training that benefits from interaction beyond just "watch this video."
## How to create your first lesson
Go to **Content → Media Hub** and click the **Create Lesson** button in the top right.
You can also click **Copy Existing** to duplicate an existing lesson as a starting point.
Click the **Settings** icon in the top bar to configure:
* **Lesson Name**: What athletes will see (e.g., "Shooting Form Basics")
* **Thumbnail**: The cover image shown in programs
* **Tags**: For organizing in Media Hub
Your lesson starts with one blank slide. Click on any element type in the toolbar to add content:
* **Media**: Add a video or image from your Media Hub
* **Text**: Add text overlays
* **Button**: Add navigation or links
* **Quiz**: Add multiple choice questions
* **Form**: Add free-text input fields
* **Upload**: Let athletes submit their own content
Click **Add Slide** at the bottom of the builder to create additional slides. Athletes will swipe left/right to navigate between them.
Click the **Preview** button (play icon) in the top bar to see exactly what athletes will experience. Swipe or click arrows to navigate through slides.
Click **Update Lesson** (yellow button, top right) to save your work.
**Critical**: The Lesson Builder does NOT auto-save. If you navigate away without clicking Update Lesson, you will lose all unsaved changes.
## Understanding the Lesson Builder interface
The builder is divided into four main areas:
### Top bar
| Element | Function |
| ----------------------- | ----------------------------------------------- |
| **← Back** | Return to Media Hub (prompts to save if needed) |
| **Settings** | Lesson name, thumbnail, and tags |
| **Preview** (play icon) | See the lesson as athletes will experience it |
| **Update Lesson** | Save all changes (yellow button) |
 ### Left sidebar
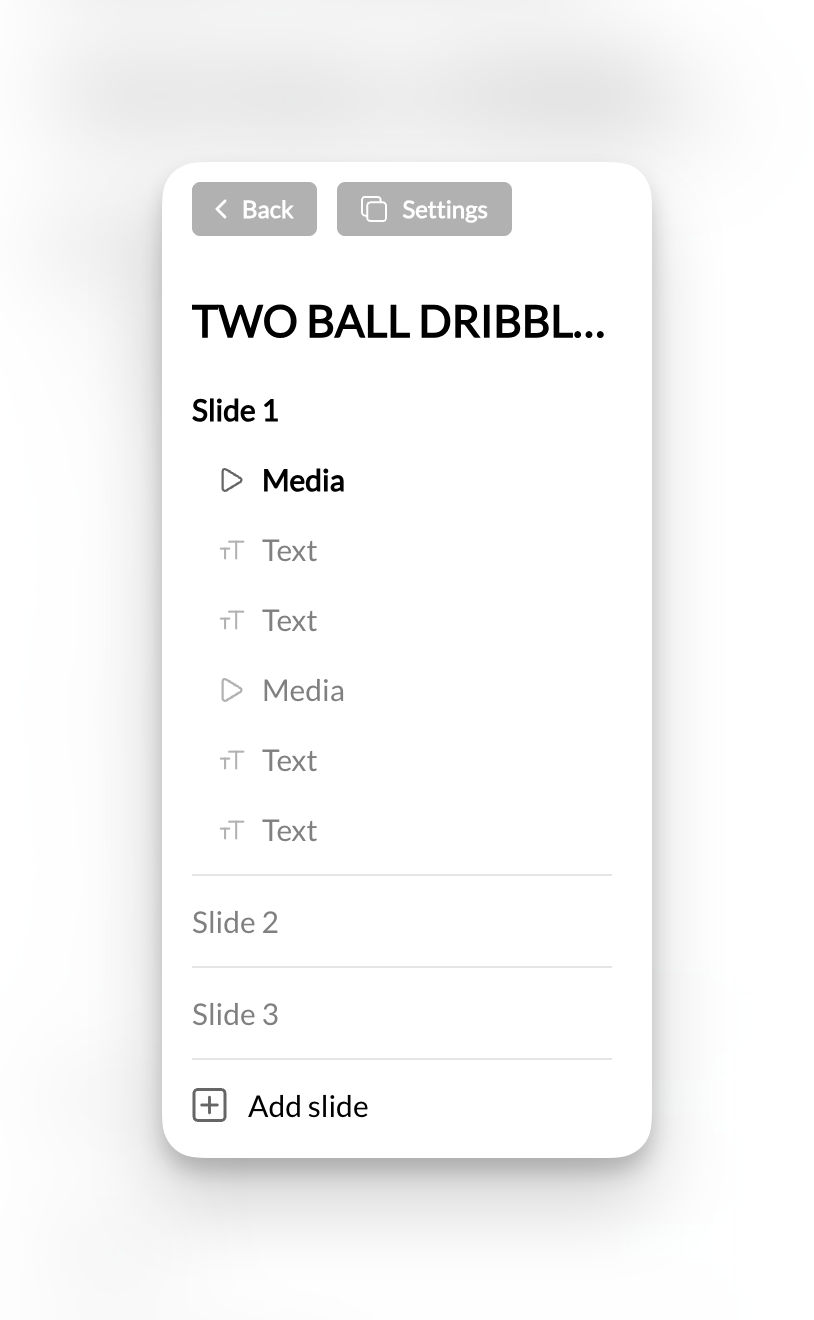
Shows your lesson structure:
* **Lesson title** at the top
* **Slide list** showing each slide and its elements
* Expandable view to see what's on each slide
* Click any slide to select it for editing
### Left sidebar
Shows your lesson structure:
* **Lesson title** at the top
* **Slide list** showing each slide and its elements
* Expandable view to see what's on each slide
* Click any slide to select it for editing
 ### Center canvas
A mobile phone preview showing exactly how your current slide will appear to athletes. This is your main editing area—what you see is what athletes get.
### Center canvas
A mobile phone preview showing exactly how your current slide will appear to athletes. This is your main editing area—what you see is what athletes get.
 ### Right panel
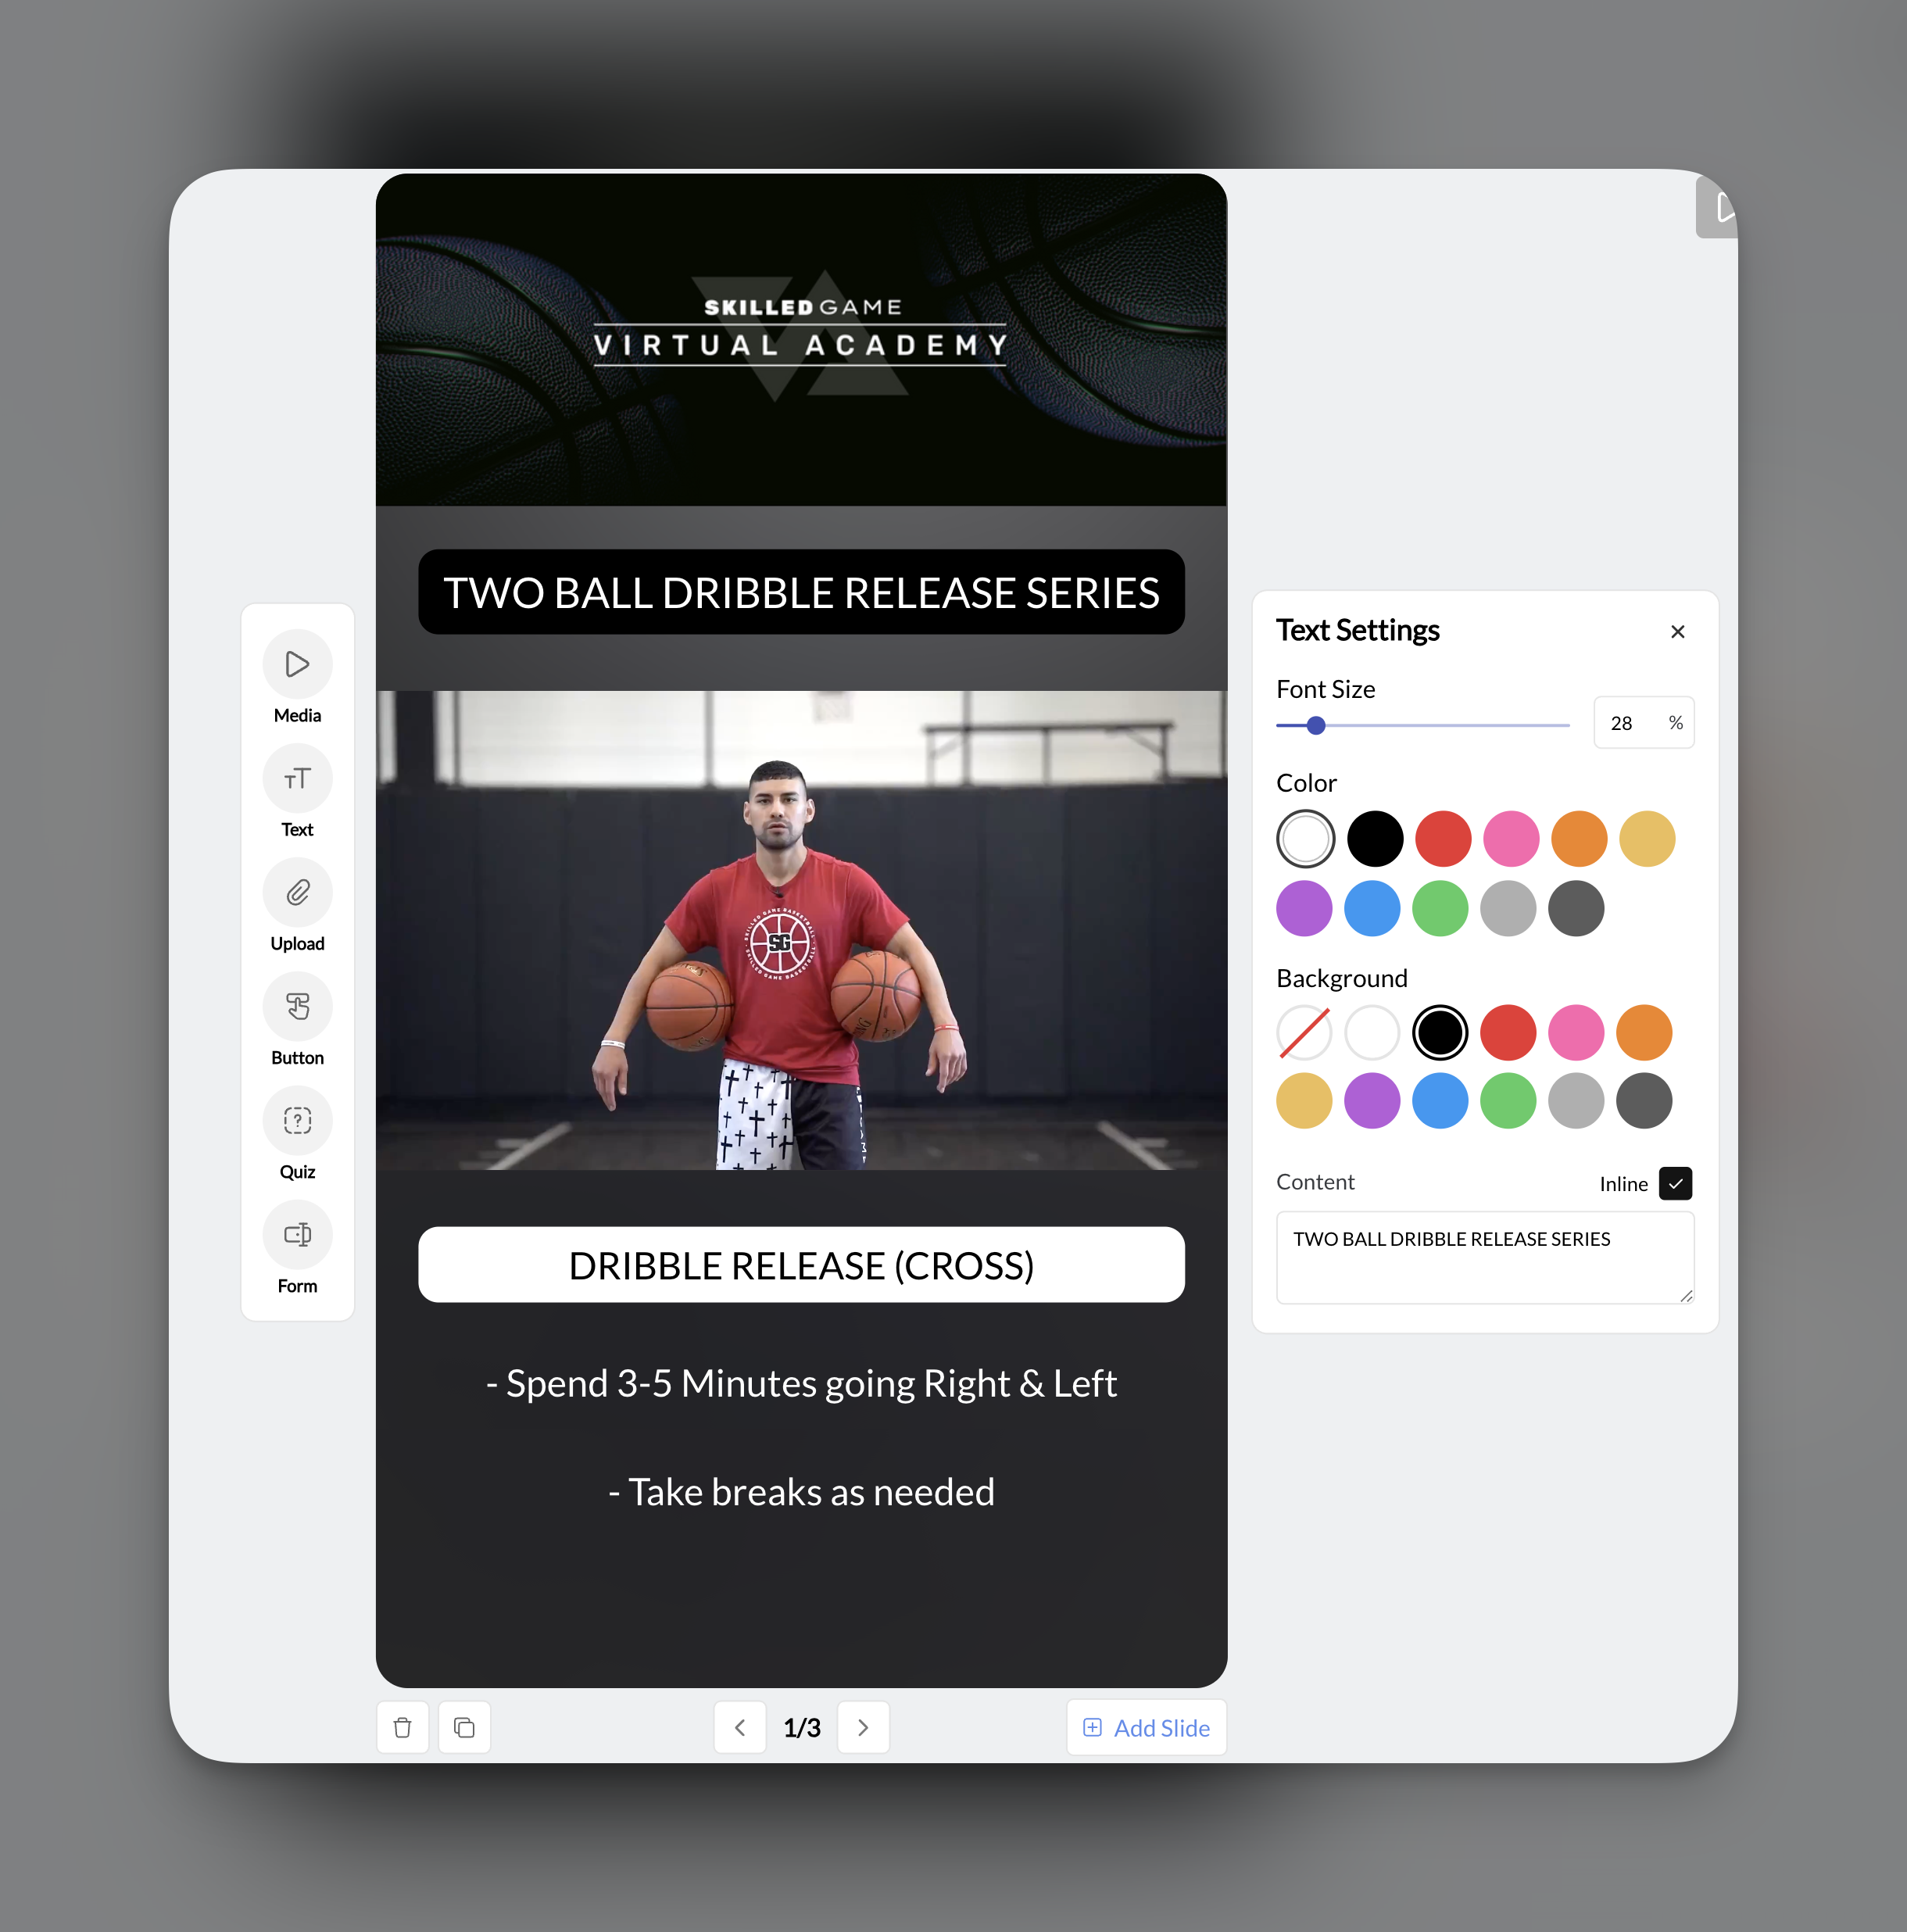
Contextual settings for whatever element you have selected. Options change based on the element type (text color, button actions, quiz options, etc.).
## Working with slides
### Adding slides
Click **Add Slide** at the bottom of the builder. New slides appear at the end of your lesson.
### Reordering slides
Drag slides up or down in the left sidebar to change their order.
### Duplicating slides
Click the **duplicate icon** at the bottom of the canvas to copy the current slide. Useful when creating similar slides with minor variations.
### Deleting slides
Select a slide and click delete. Be careful—this cannot be undone without re-creating the slide.
**No limit**: You can add unlimited slides to a single lesson. However, shorter, focused lessons (5-15 slides) typically perform better than very long ones.
## The six lesson elements
Each slide can contain multiple elements layered on top of each other. Here's a quick overview:
| Element | Icon | Purpose |
| ---------- | ---- | -------------------------------------------- |
| **Media** | ▶ | Add videos or images from your Media Hub |
| **Text** | TT | Add customizable text overlays |
| **Button** | 👆 | Navigation buttons, links, or file downloads |
| **Quiz** | ❓ | Multiple choice questions |
| **Form** | 📋 | Free-text input fields |
| **Upload** | 📎 | Let athletes upload their own content |
For detailed instructions on configuring each element, see the [Lesson Components Guide](/content/lesson-components).
## How athletes experience lessons
When athletes open a lesson within a [program](/content/programs-overview), they see:
1. **A full-screen, mobile-optimized view** of your first slide
2. **Progress dots at the top** showing how many slides remain (like Instagram Stories)
3. **Swipe left/right** (or tap arrows) to navigate between slides
4. **Interactive elements** they can engage with—answer quizzes, fill forms, upload videos
5. **Completion tracking** so they know when they've finished
The experience feels native and modern—athletes are already familiar with this format from social media.
## Where lesson responses go
When athletes interact with your lesson elements:
| Element | Where responses go |
| ---------- | --------------------------------------- |
| **Quiz** | Collected in the parent Program's Stats |
| **Form** | Collected in the parent Program's Stats |
| **Upload** | Collected in the parent Program's Stats |
Responses are tied to the Program, not the individual lesson. This means you access all athlete submissions from the Program Builder's Stats view.
## Tips for creating effective lessons
Begin each slide with a video or image, then layer text and other elements on top. This creates visual interest and context.
One concept per slide. If you're explaining multiple things, split them across slides rather than cramming everything onto one.
Add a "Next" button instead of relying on swipe navigation. This ensures athletes acknowledge each slide before moving on.
Click Update Lesson often while building. There's no auto-save, and losing 30 minutes of work is frustrating.
## Common lesson patterns
**Slide 1**: Full video demonstration
**Slide 2**: Key point #1 with text overlay on still image
**Slide 3**: Key point #2 with text overlay
**Slide 4**: Quiz checking understanding
**Slide 5**: Upload element for athlete to submit their attempt
**Slide 1**: Introduction video from you
**Slides 2-5**: Key concepts with images and text
**Slide 6**: Quiz on the material
**Slide 7**: Form asking athletes to reflect on what they learned
**Slide 1**: Example of correct form (video)
**Slide 2**: Common mistakes to avoid (text + images)
**Slide 3**: Upload element for athlete to submit their form video
**Slide 4**: Thank you message with next steps
## Frequently asked questions about lessons
Yes! Once created, lessons appear in your Media Hub and can be added to any program. This is great for reusing foundational content across different courses.
In Media Hub, click on any lesson to open it. You can also access lessons from within a Program by clicking on the lesson node and selecting "Edit Lesson."
Yes. Each slide can have unlimited elements layered on top of each other. For example, a video with a text overlay and a button at the bottom.
**Quiz** provides multiple choice options—athletes tap to select their answer. **Form** provides a free-text field—athletes type their own response. Use Quiz for quick checks, Form for reflection and open-ended questions.
No. Quizzes in CoachIQ are for engagement and feedback collection, not formal assessment. There's no pass/fail or scoring—you simply see what athletes selected.
The Upload element lets athletes submit their own videos, images, or files. It's designed for them to upload content (like a video of themselves doing a drill), NOT for coaches to add content. Use the Media element to add your own videos and images.
The Lesson Builder does not auto-save. If you navigated away or closed the browser without clicking "Update Lesson," your changes were not saved. Always save frequently while building.
## Next steps
Deep dive into configuring each of the six element types—Media, Text, Button, Quiz, Form, and Upload.
Package your lessons into structured programs athletes can access.
## Related articles
Get your videos and images into Media Hub before building lessons.
Configure pricing and access for the programs that contain your lessons.
Control which programs and lessons athletes see in the app.
Pair your training content with scheduling so athletes can book sessions.
### Right panel
Contextual settings for whatever element you have selected. Options change based on the element type (text color, button actions, quiz options, etc.).
## Working with slides
### Adding slides
Click **Add Slide** at the bottom of the builder. New slides appear at the end of your lesson.
### Reordering slides
Drag slides up or down in the left sidebar to change their order.
### Duplicating slides
Click the **duplicate icon** at the bottom of the canvas to copy the current slide. Useful when creating similar slides with minor variations.
### Deleting slides
Select a slide and click delete. Be careful—this cannot be undone without re-creating the slide.
**No limit**: You can add unlimited slides to a single lesson. However, shorter, focused lessons (5-15 slides) typically perform better than very long ones.
## The six lesson elements
Each slide can contain multiple elements layered on top of each other. Here's a quick overview:
| Element | Icon | Purpose |
| ---------- | ---- | -------------------------------------------- |
| **Media** | ▶ | Add videos or images from your Media Hub |
| **Text** | TT | Add customizable text overlays |
| **Button** | 👆 | Navigation buttons, links, or file downloads |
| **Quiz** | ❓ | Multiple choice questions |
| **Form** | 📋 | Free-text input fields |
| **Upload** | 📎 | Let athletes upload their own content |
For detailed instructions on configuring each element, see the [Lesson Components Guide](/content/lesson-components).
## How athletes experience lessons
When athletes open a lesson within a [program](/content/programs-overview), they see:
1. **A full-screen, mobile-optimized view** of your first slide
2. **Progress dots at the top** showing how many slides remain (like Instagram Stories)
3. **Swipe left/right** (or tap arrows) to navigate between slides
4. **Interactive elements** they can engage with—answer quizzes, fill forms, upload videos
5. **Completion tracking** so they know when they've finished
The experience feels native and modern—athletes are already familiar with this format from social media.
## Where lesson responses go
When athletes interact with your lesson elements:
| Element | Where responses go |
| ---------- | --------------------------------------- |
| **Quiz** | Collected in the parent Program's Stats |
| **Form** | Collected in the parent Program's Stats |
| **Upload** | Collected in the parent Program's Stats |
Responses are tied to the Program, not the individual lesson. This means you access all athlete submissions from the Program Builder's Stats view.
## Tips for creating effective lessons
Begin each slide with a video or image, then layer text and other elements on top. This creates visual interest and context.
One concept per slide. If you're explaining multiple things, split them across slides rather than cramming everything onto one.
Add a "Next" button instead of relying on swipe navigation. This ensures athletes acknowledge each slide before moving on.
Click Update Lesson often while building. There's no auto-save, and losing 30 minutes of work is frustrating.
## Common lesson patterns
**Slide 1**: Full video demonstration
**Slide 2**: Key point #1 with text overlay on still image
**Slide 3**: Key point #2 with text overlay
**Slide 4**: Quiz checking understanding
**Slide 5**: Upload element for athlete to submit their attempt
**Slide 1**: Introduction video from you
**Slides 2-5**: Key concepts with images and text
**Slide 6**: Quiz on the material
**Slide 7**: Form asking athletes to reflect on what they learned
**Slide 1**: Example of correct form (video)
**Slide 2**: Common mistakes to avoid (text + images)
**Slide 3**: Upload element for athlete to submit their form video
**Slide 4**: Thank you message with next steps
## Frequently asked questions about lessons
Yes! Once created, lessons appear in your Media Hub and can be added to any program. This is great for reusing foundational content across different courses.
In Media Hub, click on any lesson to open it. You can also access lessons from within a Program by clicking on the lesson node and selecting "Edit Lesson."
Yes. Each slide can have unlimited elements layered on top of each other. For example, a video with a text overlay and a button at the bottom.
**Quiz** provides multiple choice options—athletes tap to select their answer. **Form** provides a free-text field—athletes type their own response. Use Quiz for quick checks, Form for reflection and open-ended questions.
No. Quizzes in CoachIQ are for engagement and feedback collection, not formal assessment. There's no pass/fail or scoring—you simply see what athletes selected.
The Upload element lets athletes submit their own videos, images, or files. It's designed for them to upload content (like a video of themselves doing a drill), NOT for coaches to add content. Use the Media element to add your own videos and images.
The Lesson Builder does not auto-save. If you navigated away or closed the browser without clicking "Update Lesson," your changes were not saved. Always save frequently while building.
## Next steps
Deep dive into configuring each of the six element types—Media, Text, Button, Quiz, Form, and Upload.
Package your lessons into structured programs athletes can access.
## Related articles
Get your videos and images into Media Hub before building lessons.
Configure pricing and access for the programs that contain your lessons.
Control which programs and lessons athletes see in the app.
Pair your training content with scheduling so athletes can book sessions.